Free Amigurumi Octopus Pattern
A round teal head that becomes eight naturally curling tentacles — no separate legs to sew on, just one continuous piece from start to finish.
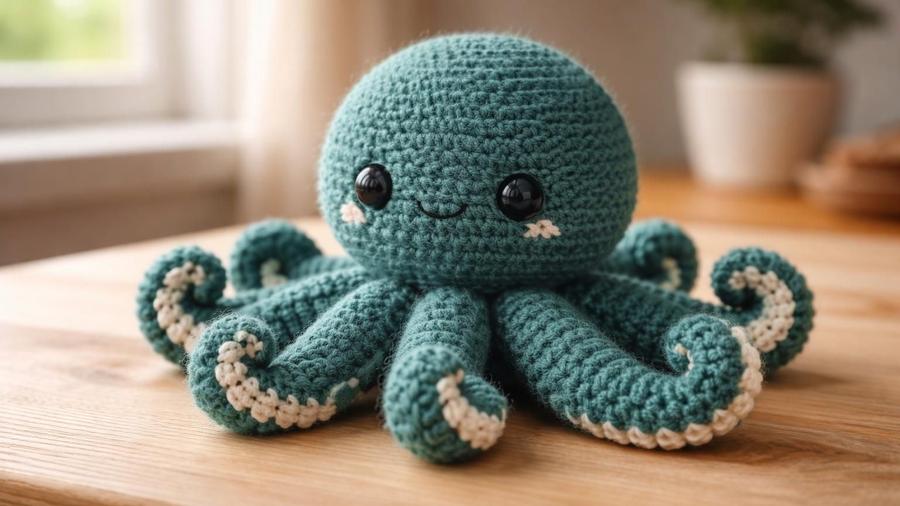
Most amigurumi animals are an exercise in assembly: you make a pile of separate pieces and spend as much time sewing as you did crocheting. The octopus is the happy exception, and the first time I made one I remember feeling almost suspicious that it could really work — that you could just keep going straight from the body into eight individual legs without ever picking up a needle and thread until the very end.
The trick is dividing the last round of the mantle into eight equal groups of stitches and working each group as its own little tube, one after another, right off the same piece. Add a color change and a few rounds of slip stitch at the tip of each leg, and the tentacles curl into that classic wavy, tapering shape entirely on their own, with no extra shaping or wire needed.
Below is the full pattern in US terms, along with notes on dividing the tentacles evenly, getting them to curl properly, and the mistakes that trip people up the first time they try this technique. It's a small step up from a simple sew-together animal, so if this is your first amigurumi project, our amigurumi for beginners guide or our simpler mini amigurumi ball pattern are gentler places to start.
Materials
- 1–2 skeins worsted-weight yarn in teal
- Small amount of white or cream yarn for the tentacle tips
- 3.5mm hook (smaller than standard, for tight amigurumi stitches)
- Polyester fiberfill stuffing
- Safety eyes, or embroidery thread for a child-safe embroidered face
- Stitch marker, to track the start of each round and each tentacle
- Scissors and a yarn needle
Abbreviations (US terms)
| Abbr. | Means |
|---|---|
| sc | Single crochet |
| sl st | Slip stitch |
| st(s) | Stitch(es) |
| inc | 2 sc in same stitch (increase) |
| dec | Sc 2 sts together (decrease) |
| rnd(s) | Round(s) |
See our abbreviations glossary for the full list including UK terms.
Gauge
Gauge isn't critical here — the goal is tight, even stitches that keep the stuffing from showing through. If you can see stuffing between your stitches, size down your hook.
Notes
- Written in US terms, worked in a continuous spiral without joining, the same basic technique as our mini amigurumi ball pattern, but with the tentacles worked directly from the mantle instead of as separate pieces.
- This pattern is a small step up in difficulty from a typical amigurumi animal, since all eight tentacles are worked continuously without a break.
- The mantle's final round has exactly 24 stitches, which divides evenly into 8 groups of 3 for the tentacles.
Pattern
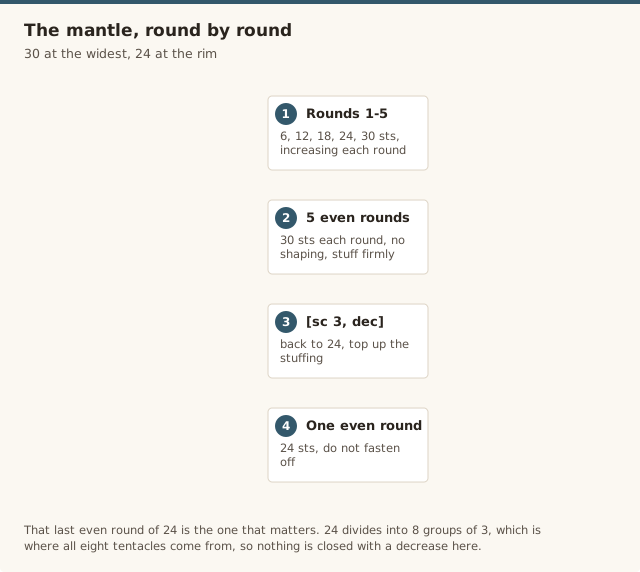
Magic ring, 6 sc. (6) → Inc around. (12) → [sc 1, inc] around. (18) → [sc 2, inc] around. (24) → [sc 3, inc] around. (30)
Sc every st around for 5 rounds, no shaping. (30 sts each round) Stuff firmly as you approach the last of these rounds.
[sc 3, dec] around. (24) Add any remaining stuffing needed so the mantle is completely firm before continuing.
Sc every st around once more. (24) Do not fasten off. This final round of 24 stitches is what you'll divide into 8 groups of 3 for the tentacles.
Working on the first 3 stitches of the round only, sc even for 10 rounds, no shaping, stuffing lightly as you go. Switch to white or cream and sc even for 2 more rounds.
Work 2 final rounds in slip stitch only (rather than single crochet); the shorter, denser slip stitches pull the tip into a natural curl. Fasten off and weave in the end.
Rejoin the working yarn to the next unworked stitch on the mantle and repeat for the remaining 7 tentacles, moving around the mantle in order until all 8 are complete.
Attach safety eyes to the front of the mantle, spaced evenly above the tentacles, before the mantle is fully closed and stuffed, or embroider the eyes with yarn once the piece is complete for a child-safe alternative. Embroider a small smile below the eyes and, if you like, two small blush marks with pink yarn.
Dividing and curling the tentacles
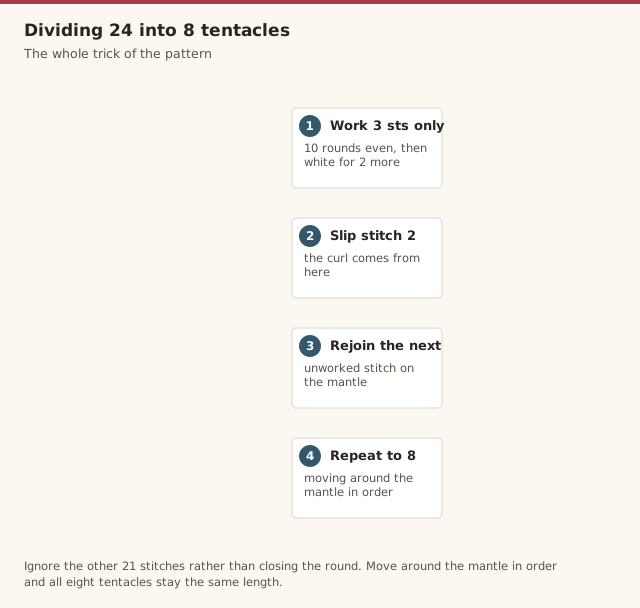
The mantle's last round has exactly 24 stitches, and 24 divides neatly into 8 groups of 3, which is the whole trick behind this technique. Rather than closing the round with a decrease as you would for a typical amigurumi piece, you simply stop after the last plain round and start working on just 3 of those 24 stitches, ignoring the rest for now. Once you've worked all the rounds for that first tentacle and fastened it off, you rejoin your yarn to the very next unworked stitch and start the second tentacle, continuing all the way around the mantle until all 8 groups have become their own tentacle.
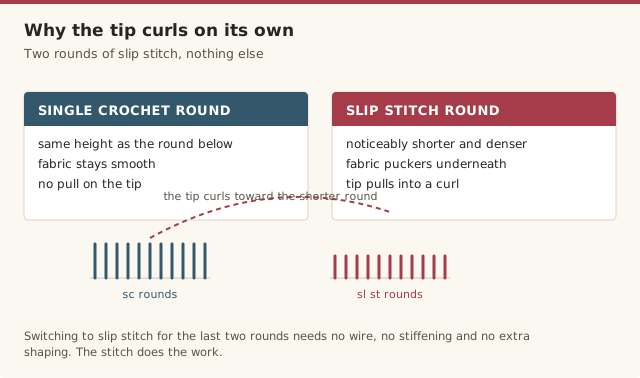
The curl itself comes from switching to slip stitch for the final two rounds of each tentacle. A slip stitch round is much shorter and denser than a single crochet round worked over the same number of stitches, so when you work slip stitch rounds directly on top of single crochet rounds, the fabric puckers and pulls the tip into a tight, natural curl without any wire, stiffening, or extra shaping needed. It's a genuinely satisfying moment the first time you see it happen.
Color variations
Teal is a classic octopus color, but this pattern works just as well in coral pink, deep purple, or a soft lavender, and the white or cream tentacle tips read as a natural highlight in almost any main color. If you'd like each tentacle to curl in a slightly different direction for a more playful, less symmetrical look, you can vary how tightly you work the slip stitch tension on a few of them; a looser slip stitch curls less tightly than a firm one, so mixing tensions across the eight tentacles gives each one a slightly different personality.
Sizing up or down
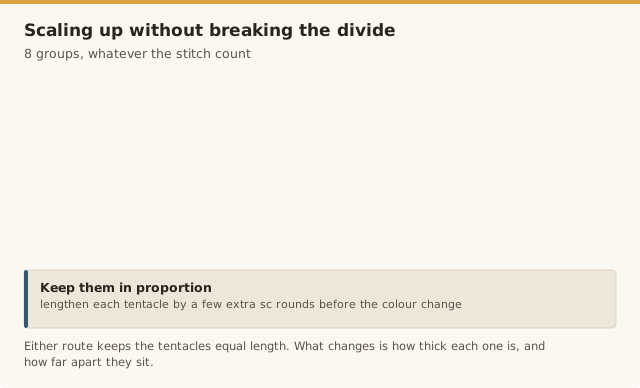
To make a larger octopus, add one more increase round to the mantle before the straight rounds; this will also add 8 extra stitches to the final dividing round, giving you 8 groups of 4 instead of 3 for slightly thicker tentacles, or you can keep the groups at 3 stitches and simply have wider gaps between tentacles. Lengthen each tentacle by a few extra single crochet rounds before the color change to keep everything in proportion. For a smaller octopus, do the reverse throughout.
Common mistakes & fixes
Fix: use a stitch marker or a small paper tally to track exactly how many rounds you've worked on each tentacle before starting the next one; it's easy to lose count when working eight nearly identical pieces in a row.
Fix: make sure you're switching to true slip stitch, not single crochet, for the final rounds, and work those slip stitches with your normal tension rather than loosely; a loose slip stitch produces a much weaker curl.
Fix: switch colors at the exact same round number on every tentacle, and count your single crochet rounds before changing color rather than eyeballing the length.
Fix: make sure the mantle is fully and evenly stuffed before you start the tentacles, since it's much harder to adjust the stuffing once eight legs are already worked directly into the fabric.
Fix: place a stitch marker in the very first stitch of the dividing round before you begin, so you always have a fixed reference point to count around from as you work each new tentacle.
Our pick
Fairfield Poly-Fil Premium Fiber Fill, 32oz
Enough for this octopus and future amigurumi projects, staying fluffy without clumping over time.
View on Amazon →Frequently asked questions
Is this amigurumi octopus pattern safe for young children?
For children under 3, or any child who still mouths toys, embroider the eyes with yarn instead of using plastic safety eyes, and check that each tentacle's fastened-off end is securely woven in and reinforced, since the tentacle tips are small parts on a toy that gets a lot of handling. Adult supervision is recommended for young children with any small-parts toy. See our guide to attaching safety eyes for more detail.
Is the octopus pattern harder than a typical amigurumi animal?
A little, yes. Working the eight tentacles directly from the body without a break is a step up from a pattern where every piece is worked separately and sewn on, so it's a good project for someone who has finished at least one simpler amigurumi animal first.
How do the tentacles curl without any extra shaping?
After each tentacle's single crochet rounds are finished, the last two rounds are worked in slip stitch instead of single crochet. Slip stitch rounds naturally pull the tube into a tight curl because they're shorter and denser than single crochet, which is exactly the technique used here to create the curled tips without any special shaping.
How long does this amigurumi octopus take to make?
Because all eight tentacles are worked in one continuous piece after the head and body, most confident intermediate crocheters finish this octopus in one longer session or two shorter ones, roughly 3 to 5 hours of crochet time including the tentacles.
What's the best stuffing for an amigurumi octopus?
Polyester fiberfill is the standard choice for amigurumi because it stays soft, keeps its shape, and is washable and hypoallergenic, unlike natural fiber stuffing that can clump or felt with handling over time.
Can I make the octopus bigger or smaller?
Yes. To scale it up, add one more increase round to the mantle before dividing off for the tentacles, which will also add 8 extra stitches to divide evenly across the eight legs; work a few extra rounds on each tentacle before the color change to lengthen them to match. For a smaller octopus, do the reverse.
Why are my octopus's tentacles different lengths?
This usually happens from losing count of rounds partway through working eight tentacles in a row. Use a stitch marker or a small paper tally to track exactly how many rounds you've completed on each tentacle before moving to the next one.
CrochetGuides is a participant in the Amazon Services LLC Associates Program. As an Amazon Associate we earn from qualifying purchases, at no extra cost to you.