Crochet Christmas Gnome Pattern
A no-face amigurumi gnome with a tall pointed hat and a soft yarn beard — a fast holiday shelf-sitter.

In my classes, a crochet Christmas gnome is the project I reach for when a beginner wants to try amigurumi without committing to a full doll. I'll never forget a student who stitched her gnome's body beautifully, then stuffed it so timidly it flopped over like a tired scarecrow. The fix wasn't more skill — it was more stuffing, packed firmly down into the base before she closed it up. Once she'd tied on the yarn beard and set the pointed hat at a jaunty angle, that little gnome stood upright on the shelf as if it had always lived there. No face to embroider, no fiddly limbs: just satisfying shaping and a project you can finish in a single evening.
The gnome also hides a beginner's secret: there are no arms, legs, or face to get wrong, so every stitch goes into the two parts that matter — the body and the hat. I've taught this to people who'd never touched a magic ring, and by the end of the evening they had a little red-capped figure grinning up from the table. It's the amigurumi project I recommend when the idea of a full bear still feels like too much, but you're ready to watch a shape grow in your hands.
What you need
- Worsted weight (#4) yarn: red or another festive color (body/hat) and cream (beard)
- 4.0mm (US G/6) hook
- Polyester fiberfill stuffing
- Yarn needle
- Optional: small wooden bead or pom-pom for the nose
Body
Steps
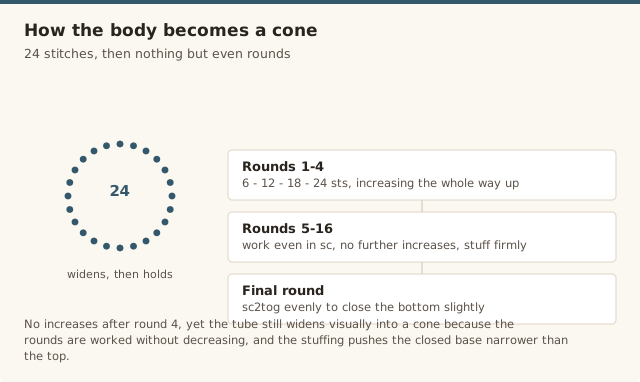
- Magic ring, 6 sc into the ring. (6 sts)
- Round 2: 2 sc in each st around. (12 sts)
- Round 3: *sc, 2 sc in next st* around. (18 sts)
- Round 4: *2 sc, 2 sc in next st* around. (24 sts)
- Rounds 5–16 (approx.): work even in sc without further increasing, so the tube widens visually into a cone as it's stuffed — stuff firmly as you go.
- Final round: sc2tog evenly around to close the bottom slightly, then fasten off and weave the tail through the remaining stitches to close.
Hat
Steps
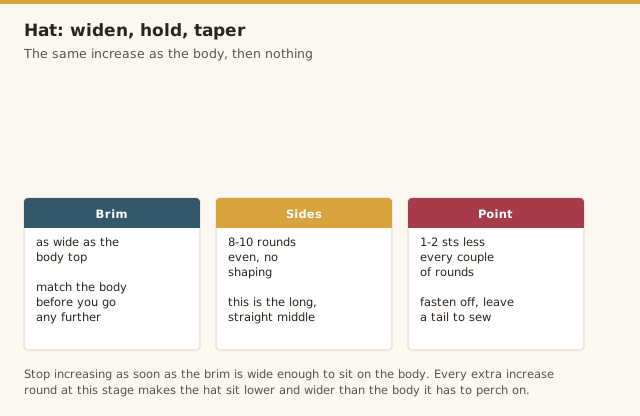
- Magic ring, 6 sc into the ring. (6 sts)
- Increase the same way as the body for 3–4 rounds until the hat brim is wide enough to sit on top of the body.
- Work even, without further increasing, for 8–10 rounds so the hat narrows into a point relative to the body width, decreasing by 1–2 sts every couple of rounds near the very top to close it off neatly.
- Fasten off, leaving a tail for attaching.
Assembly
Steps
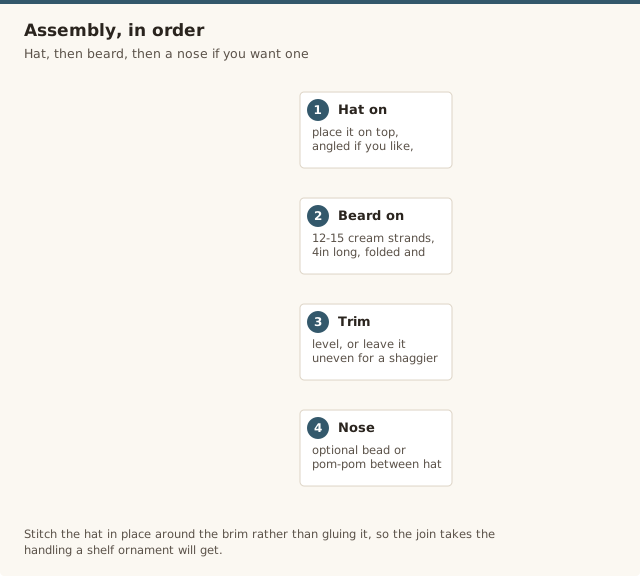
- Place the hat on top of the body, angled slightly if you like, and stitch it in place around the brim.
- Cut 12–15 strands of cream yarn, each about 4 inches long. Fold them in half and attach them in a row just under the hat brim using a lark's head knot or by stitching through, to form the beard.
- Trim the beard ends level, or leave them slightly uneven for a shaggier look.
- Optional: glue or stitch a small bead or pom-pom nose between the hat and beard.
A step-by-step gnome walkthrough, useful for seeing how the hat, beard, and body are shaped and assembled.
Yarn and stuffing
A smooth worsted-weight yarn gives the cleanest gnome, because the simple cone shape shows every stitch — a fuzzy or novelty yarn hides the shaping that makes it read as a gnome. Acrylic or a cotton-acrylic blend is my default for both the body and the hat, and a cream of the same weight for the beard keeps the strands consistent. Stuffing matters as much as yarn: use polyester fiberfill and pack it firmly, adding small pinches as you go rather than one big wad at the end, so the body stands straight instead of slouching. For a weighted, stable base, a few tablespoons of poly pellets or dried rice sealed in a small cloth bag sit in the bottom before the fiberfill. Our best yarn for amigurumi and starter kit guides cover the full setup.
The beard: attaching and shaping
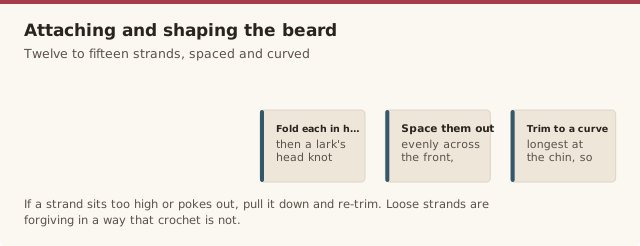
The beard is what makes the gnome, and it's all in how you attach it. Cut twelve to fifteen strands of cream yarn, each about four inches long, fold each in half, and attach the loop under the hat brim with a lark's head knot so the two loose ends hang down as the beard. Space the strands evenly across the front rather than bunching them at the centre, and trim them in a gentle curve — slightly shorter at the sides, longer at the chin — so the beard frames the nose instead of swallowing it. If a strand sits too high or pokes out, pull it down and re-trim; the loose ends are forgiving, so you can adjust until it looks right. It's the one step where a few extra minutes make all the difference.
Making it stand and gifting
A gnome that stands on its own is a gnome that feels finished, and the secret is in the base. Pack the bottom firmly and flatten it against the table before closing the final round, and add a weighted pouch if you want it to stay put on a shelf. For a gift, these little figures are wonderfully low-stakes — no sizing, no washing instructions beyond a gentle hand-wash, and a whole family of them can be made from a few balls of scrap yarn. If you're making one for a young child, skip the bead or pom-pom nose and embroider a small triangle instead, so there's nothing that could come loose. Tuck in a card saying it's handmade and washable, and you've given something with real shelf presence.
Common mistakes & fixes
Fix: it was under-stuffed. Pack fiberfill firmly into the base, adding small pinches as you close the final round, or add a weighted pouch to the bottom so the body sits steady.
Fix: the brim was made too wide or too narrow for the body. Increase until the hat brim matches the body's top edge, then stitch it on all the way around rather than at a few points.
Fix: too few strands, or they were bunched in one spot. Use twelve to fifteen strands, space them evenly under the brim, and trim a gentle curve so the beard looks full and balanced.
Fix: it was glued rather than stitched. Sew a bead or pom-pom nose on securely with a few passes of thread, or embroider a small nose instead so there's nothing to detach.
Fix: the stuffing went in as a few large clumps. Add it in small pieces, smoothing with your fingers as you go, and check the shape between additions so it fills evenly.
Fix: the hat wasn't given any shape before attaching. Lightly stuff the tip or leave it empty, but secure the brim firmly to the body so the point stands rather than collapsing to one side.
Frequently asked questions
Do gnomes need a face?
No — the classic Scandinavian-style gnome has no visible face, just a hat and a beard, which is part of what makes this pattern quick to finish.
What can I use to weigh the base so it stands up?
A few tablespoons of poly pellets or dried rice sealed in a small bag, added to the bottom of the body before stuffing the rest with fiberfill.
Can I make a whole family of gnomes?
Yes — this pattern scales easily with a smaller hook and thinner yarn for mini versions, or a chunkier yarn for an oversized doorstop gnome.
How much yarn do I need for one gnome?
One gnome uses well under one ball of each colour — roughly 50 yards of the body colour and 20 yards of cream for the beard, so it's a great scrap-yarn project.
Can I use different colours for a non-Christmas gnome?
Yes — swap the red for any colour you like; pastel yarns make sweet spring gnomes, and neutral tones work as year-round shelf decor.
Is it safe to give to a small child?
If it's for a baby or toddler, skip the optional bead or pom-pom nose and embroider a small nose instead, so there's nothing a little one could pull loose. The rest of the gnome is soft and has no small parts, making it a safe shelf-sitter with that one adjustment.
CrochetGuides is a participant in the Amazon Services LLC Associates Program. As an Amazon Associate we earn from qualifying purchases, at no extra cost to you.