Easy Crochet Phone Case Pattern (Custom Fit, Any Phone)
A snug, ribbed sleeve sized to your exact phone — no chart needed, just your tape measure.
In my classes, the crochet phone case is the project people most often start after a dishcloth — and the mistake I see most often is skipping the measuring step because it feels obvious. A student once spent an evening working a lovely ribbed sleeve, only to slide her phone in and find it stuck halfway. The problem wasn't her stitching; she'd measured the phone without its case on. That single afternoon taught me to insist on a quick swatch and one honest measurement before the hook touches yarn. This case is built to your own numbers rather than a fixed chart, so it fits the phone you own now — and still works when you upgrade next year. If you need a refresher on the half double crochet stitch it uses, our basic crochet stitches guide has you covered.
What sold me on this project is that it has no fixed size to get wrong. Because you build it from your own phone's numbers, the same page works for a slim phone today and a bigger one next year. I've watched students make a case, then a week later make a second one for a friend's phone without once opening a size chart. If you can measure and count, you can make this — everything else is just the same half double crochet, row after row.
What you need
- A small amount of worsted weight yarn
- 3.5–4.0mm hook (a size smaller than the yarn label, for a snug, dense fabric)
- Yarn needle
- Optional: 1 button, for a flap closure
Step 1: measure and swatch
Steps
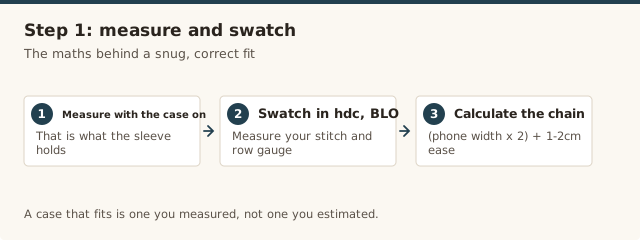
- Measure your phone's width and height (with its case on, if you use one).
- Work a small swatch in hdc, working every row through the back loop only, and measure your stitch and row gauge.
- Calculate your starting chain: (phone width × 2) + 1–2cm ease, converted to stitches using your gauge.
Step 2: work the body
Steps
- Chain the number calculated above, plus 2 turning chains.
- Row 1: hdc in the 3rd chain from the hook and each chain across, through both loops.
- Row 2 onward: chain 2, turn, hdc in the back loop only of each stitch across.
- Repeat until the piece measures (phone height × 2) + 2–3cm, then fasten off.
Step 3: fold and seam
Steps
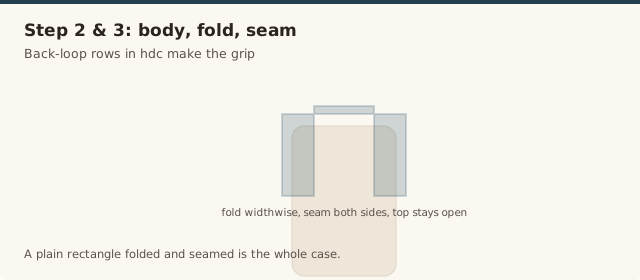
- Fold the rectangle in half widthwise, right sides together.
- Seam up both sides, leaving the top open for the phone to slide in.
- Turn right side out.
Optional: flap and button closure
For a top flap, leave one side unclosed at the top instead — continue a few extra rows on the back panel only, shape a point or rounded flap, add a buttonhole (a small chain space in the last row) or a button loop, and stitch a matching button to the front panel.
A compact project walkthrough, useful for seeing how a snug-fitting case is shaped and finished.
Yarn choice and stretch
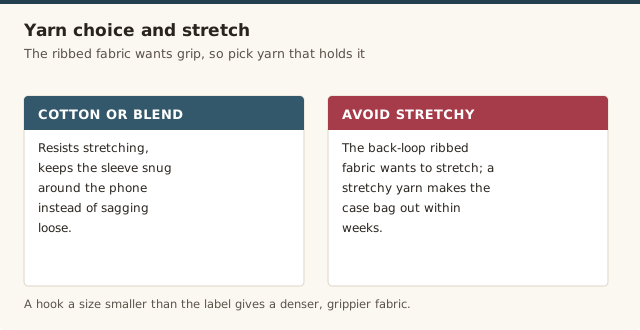
The ribbed back-loop fabric gives this case its grip, but it also wants to stretch, so the yarn you choose decides how well it holds up. A worsted-weight cotton or a cotton-acrylic blend is the safest, because cotton resists stretching and keeps the sleeve snug around your phone rather than sagging loose after a few weeks of pocket wear. Pure acrylic is springier and will ease off the sides over time, so if that's all you have, work one hook size smaller than the label suggests to tighten the fabric. Avoid fluffy or slippery yarns entirely — they hide the rib texture and slide against the phone instead of gripping it. For more on how fibre changes the drape, see yarn weight explained.
Sizing for a snug fit
A case that fits is a case you measured, not one you estimated. Measure the phone with its case on, because that's what the sleeve has to hold — a student once skipped this and made a lovely case for a phone she'd never actually put back in its bumper. Add about a centimetre of ease to the width for comfort, and work the body to twice the height plus two or three centimetres so the fold has room to turn without straining the seams. The ribbing is forgiving, but it only works in your favour if you start from honest numbers; a swatch of ten stitches and ten rows gives you the gauge to convert those measurements into a chain count. If your first attempt comes out off, our fixing project size guide shows how to recover it.
Lining and structure
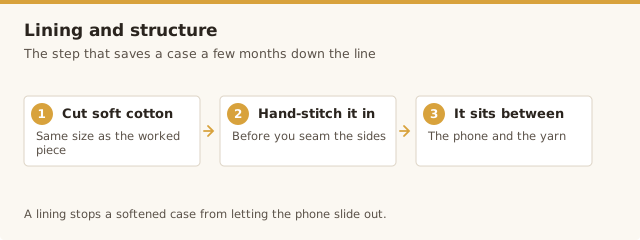
After a few months of daily use, even a firm cotton case can soften, and that's when a simple lining earns its keep. Cut a rectangle of soft cotton fabric the same size as your worked piece and hand-stitch it to the inside before you seam the sides, so the lining sits between the phone and the yarn. It stops the case stretching, protects the screen edge from snagging on stitches, and hides the seamed ends so the inside looks finished. If you'd rather not line it, at least weave every end through the ribbing and press the seamed sides flat with a warm iron over a cloth — the flatter the seams, the less they catch on pockets and bags.
Common mistakes & fixes
Fix: it was measured without its case on, or with too little ease. Re-measure with the case fitted, add about a centimetre of ease to the width, and adjust your chain count before you rework it.
Fix: a stretchy acrylic on too large a hook relaxed with wear. Switch to cotton or a cotton-blend, or drop a hook size, so the ribbing keeps its grip instead of easing off the sides.
Fix: the turning chains are being pulled too tight. Keep them loose and even, and work the first row into both loops as written before switching to back-loop-only, so the foundation edge stays straight.
Fix: a heavy seam was used. Seam from the inside with a neat whip stitch through the back loops only, and press the finished seams flat so they sit slim against the phone.
Fix: the end was left on the inside face. Weave all tails through the ribbing and trim them flush, or add a fabric lining so no yarn end ever touches the phone's surface.
Fix: the buttonhole and button are misaligned. Mark the button's position against the flap before you sew it on, and make the buttonhole slightly smaller than the button so it catches and holds.
Frequently asked questions
Why work through the back loop only?
It creates a stretchy, ribbed texture, similar to a knit rib, that hugs the phone's shape and adds grip, instead of a flat, loose fabric.
Will this fit any size phone?
Yes, since it's built from your own measurements rather than a fixed size — just recalculate the chain and row count for a different phone.
Can I felt this for extra padding?
Yes, if using 100% non-superwash wool, a gentle hot-wash felting process will shrink and thicken the fabric for a padded case.
What yarn should I use for a crochet phone case?
A durable worsted weight cotton or a cotton-acrylic blend is best, because it holds its shape and doesn't stretch as much as pure acrylic. Avoid fluffy or slippery yarns, which make the ribbed fabric harder to control and quicker to sag.
Can I add a wrist strap to my phone case?
Yes. Before seaming the sides, stitch a short chain loop into one corner of the fold, or attach a crocheted strap to the top edge afterward. A loop tucked just inside the seam is the tidiest option.
How do I wash a crochet phone case?
Spot-clean it with a damp cloth for everyday marks, or hand-wash in cool water with a little gentle detergent and lay it flat to dry. Skip the machine and the dryer, which can stretch the ribbing out of its snug fit.
CrochetGuides is a participant in the Amazon Services LLC Associates Program. As an Amazon Associate we earn from qualifying purchases, at no extra cost to you.