Shell Stitch: A Complete Tutorial
How to work the shell stitch for a scalloped, wave-like texture, as an all-over fabric pattern or a decorative border.
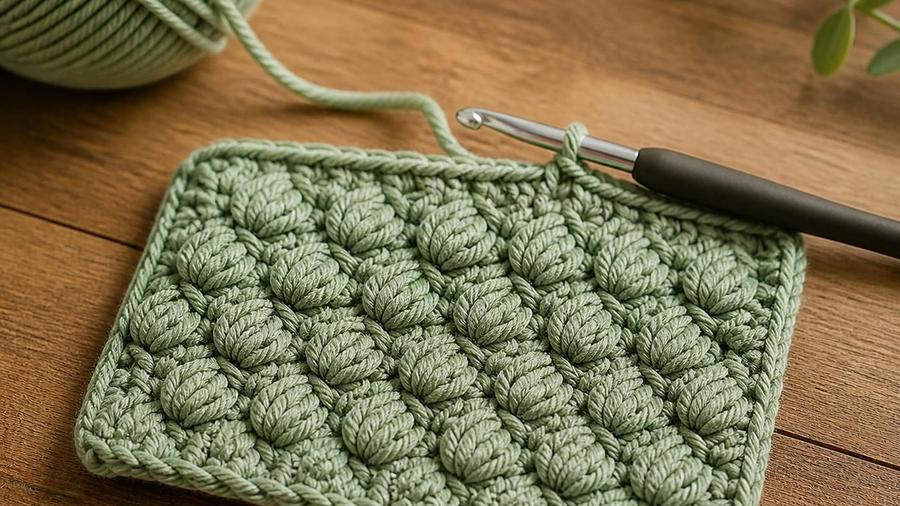
The first blanket I tried in shell stitch rippled so badly it looked almost pleated rather than flat, waves rising and falling across the whole surface in a way no amount of blocking fully corrected. I'd been eyeballing the skip count between shells instead of counting it out precisely, sometimes skipping one stitch, sometimes three, without noticing the inconsistency as I worked. Shell stitch turns out to be genuinely sensitive to that skip count in a way plain single or double crochet just isn't, since the whole scalloped effect depends on a very specific balance between how many stitches gather into each shell and how many get skipped in between.
This tutorial covers that balance directly: the basic shell repeat, how skip-count and shell width interact to control whether the fabric lies flat or ripples, and the difference between using shell stitch as a full all-over fabric versus reserving it for a single decorative border round.
Shell stitch is one of the more immediately recognizable crochet textures, the fan-shaped clusters and their resulting wave pattern show up everywhere from vintage afghans to modern scalloped edgings, and it's a genuinely useful stitch to have confidently in your toolkit since it appears across such a wide range of project styles.
Materials for practicing
- A worsted or DK-weight yarn in a smooth, solid color
- A hook sized to the yarn's standard recommendation
- Stitch marker, scissors
Abbreviations (US terms)
| Abbr. | Means |
|---|---|
| ch | Chain |
| dc | Double crochet |
| sc | Single crochet |
| sk | Skip |
See our abbreviations glossary and basic stitches guide.
Working the basic shell
The classic basic shell is worked as: 5 dc into a single stitch, skip 2 stitches, repeat. Those 5 double crochets, all sharing the same base stitch, naturally fan outward as they're worked, since each one needs a little extra room at the top compared to the single point they all share at the base, and it's that fanning that creates the shell's characteristic wedge shape.
Foundation chain planning matters more for shell stitch than for a lot of other patterns, since the repeat needs to divide evenly into your total stitch count for the shells to land consistently across the full width. A common approach is starting with a chain in multiples of 6 (accounting for the shell-plus-skip repeat) plus a few extra stitches for the pattern's edges, adjusting the exact math based on the specific shell variant and border treatment you're using.
Practice the basic 5-dc shell in isolation on a swatch before combining it with anything else, working several full rows, before moving to a project. This helps you feel by hand what "5 sts sharing one base" is supposed to look and feel like on the hook, which makes it much easier to catch a miscounted shell later by feel alone.
Keeping the fabric flat, not rippled
Shell stitch's flatness depends on the shell width and the skip count balancing each other out across the row. Each 5-dc shell takes up noticeably more finished width than the single base stitch it's worked into, while each 2-stitch skip removes width relative to a row of plain stitches. When these two effects are properly matched to the stitch pattern's design, the fabric comes out flat; when they're mismatched, even slightly, the fabric visibly ripples, either bunching (too few stitches skipped relative to shell width) or gapping and stretching (too many skipped).
This is exactly why consistency matters more here than in most other stitch patterns: a single shell worked with only 1 stitch skipped instead of 2 will crowd its neighbors and pull the fabric out of flat at exactly that point, and that small localized ripple often doesn't smooth out even with aggressive blocking, since the underlying stitch structure, not just surface tension, is what's actually uneven.
If a finished piece ripples despite careful counting, check whether every shell in the piece uses the same dc count. It's an easy slip to work 4 or 6 double crochets into a shell instead of 5 partway through a long project, especially if you're working from memory rather than checking the written pattern periodically, and even one stitch difference per shell adds up to a visible ripple across a full row.
Shell stitch as a border versus all-over fabric
Using shell stitch as a dedicated border round, worked once around a finished piece's edge, is a different design decision than using it as the fabric for an entire project, and the two call for slightly different approaches even though the underlying stitch is identical. A border round can use a taller or more pronounced shell (say, 7 dc instead of 5) since it only needs to look good as a single accent line rather than integrate into rows above and below it.
For an all-over fabric, plan how each row's shells relate to the row below. The most common and visually pleasing approach offsets each row's shells to center over the skipped stitches of the row beneath, rather than stacking new shells directly on top of the previous row's shells. This offset is what produces the interlocking, woven-looking scallop pattern that's typical of most published shell-stitch blanket designs, rather than a series of disconnected vertical columns.
If you're adapting a shell pattern specifically to use as a border on a piece that wasn't originally designed with shell stitch, work a swatch of just the border round on scrap fabric first to confirm the stitch count divides evenly into your actual piece's finished edge, since retrofitting a border stitch count onto an existing project is one of the more common places a shell border comes out uneven.
Color and variation ideas
A single solid color lets the shell's fan shape and the resulting scallop pattern read as clearly as possible, which is worth trying first if you haven't worked shell stitch before, since a busy variegated yarn can visually compete with the texture rather than complement it. Once you're comfortable with the basic construction, changing color at the start of each shell row, rather than mid-row, produces clean horizontal stripes that follow the natural row structure without any awkward color-change points inside a shell cluster.
A more advanced variation changes color mid-shell, working the first 2-3 double crochets of each shell in one color and the remaining stitches in a second color, which creates a subtle two-tone fan effect within each individual shell. This is fiddlier to manage cleanly, since it means more ends to weave in overall, but it's a genuinely distinctive look that a plain row-based color change can't replicate.
The lacet stitch, alternating chain spaces with shells rather than plain skipped stitches, is a related variation worth knowing about once basic shell stitch feels comfortable. It produces a more open, lighter fabric than the solid version, useful for a lighter-weight shawl or a summer garment where the denser standard shell stitch would feel too warm or heavy.
Common shell stitch slip-ups
Fix: keep the exact stitch count specified inside each shell (commonly 5 dc) rather than adding or dropping a stitch by eye, since even one extra double crochet noticeably widens that shell compared to its neighbors.
Fix: match the skip-count between shells to the pattern exactly, skipping too few stitches crowds the shells and causes rippling, skipping too many leaves gaps that pull the fabric out of shape.
Fix: work the shell stitch as a dedicated final border round rather than trying to let the last row of an all-over shell pattern double as the edge, since a dedicated border round can use a slightly different, more pronounced shell.
Fix: work a small test swatch first and note that shell stitch is more visibly sensitive to tension inconsistency than plain single or double crochet, since any tension drift shows up as an obviously different-sized fan shape.
Fix: work one row of a plain, calmer stitch (like single crochet) directly before and after a shell section as a visual "buffer" row, which is standard practice in many published shell-stitch patterns.
Blocking a finished shell stitch piece is worth doing even when the tension and skip count were both careful throughout, since a light steam block or a damp-and-pin block helps the individual double crochets within each shell settle into a more even, symmetrical fan shape than they naturally hold straight off the hook. This final step is optional but noticeably improves how crisp the scalloped effect looks in the finished piece.
Shell stitch FAQ
What's the basic shell stitch repeat and how do I count it?
The classic basic shell is 5 double crochets worked into a single stitch, followed by skipping 2 stitches before the next shell. Count each shell as one repeat unit and check the skip count between shells rather than counting individual stitches by eye, which is easy to miscount in a dense cluster.
How does shell stitch differ from a plain scallop edging?
A plain scallop edging is usually a single row of shells worked directly onto a finished edge purely for decoration, while shell stitch used as an all-over pattern repeats across every row to form the entire fabric. The same basic shell motif underlies both, the difference is whether it's the whole fabric or just a finishing detail.
What yarn weight and hook size show off the shell shape best?
A worsted or DK weight yarn with a hook sized to the yarn's standard recommendation gives clearly defined individual double crochets within each shell, which is what makes the fan shape read clearly. A much smaller hook than recommended tightens the shells into a denser, less distinctly fan-shaped texture.
Can shell stitch be used as an all-over blanket pattern rather than just a border?
Yes, shell stitch is a common and popular all-over blanket pattern in its own right, repeated across every row rather than reserved for a single edging round. The main planning consideration is working out your row transitions so the shells stack in a consistent, pleasing offset from row to row.
Is shell stitch beginner-friendly?
It's a reasonable next stitch to learn once basic single and double crochet feel comfortable, since the shell itself is just a cluster of double crochets worked into one stitch, no new individual stitch type is required, just a new arrangement of stitches you likely already know.
What other stitches pair well with shell stitch in the same project?
A plain row of single or double crochet worked between shell rows is a common pairing, giving the eye a calmer resting point between busier shell rows. Puff stitch also pairs well as an alternating accent within a shell-based design, since both are raised, rounded textures that read well together.
CrochetGuides is a participant in the Amazon Services LLC Associates Program. As an Amazon Associate we earn from qualifying purchases, at no extra cost to you.