Slip Stitch Crochet: Joining, Edging & Surface Technique
The stitch you already learned as "just for closing rounds" turns out to be one of the most versatile tools in crochet, once you look past that one job.
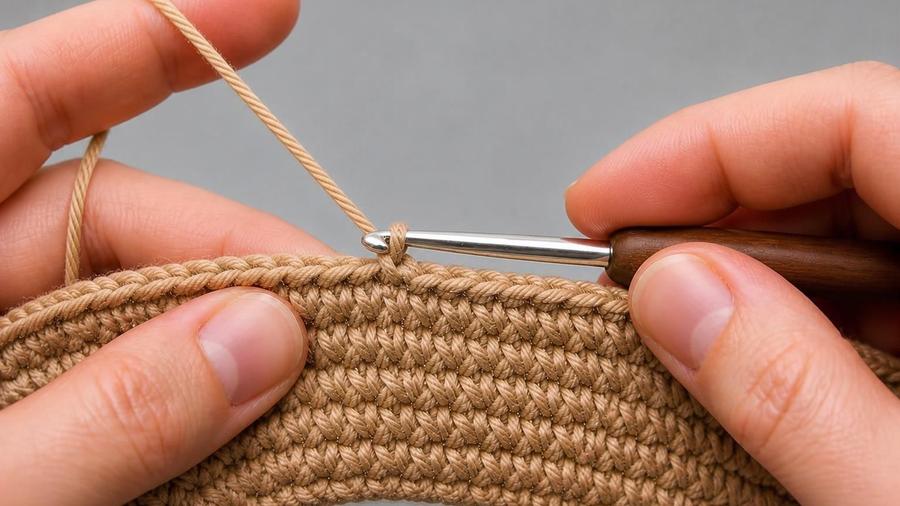
For at least a year after I learned to crochet, I thought slip stitch had exactly one job: joining the end of a round back to its beginning. That's how I'd been taught it, that's the only context I'd ever seen it used in, and I genuinely didn't question it. Then a pattern for a cardigan I was making called for a slip stitch edging around the entire front opening, and I remember being confused, wasn't slip stitch just the little closing move? Why would you build a whole border out of it?
It turns out slip stitch is one of the most quietly versatile techniques in the whole craft, precisely because it's so short and simple. That same small, flat, low-profile stitch that closes a round also makes a clean, unobtrusive edging finish, joins two pieces together, and, worked deliberately on the surface of already-finished fabric, creates a decorative raised line that looks nothing like its humble reputation would suggest. The same basic motion, insert, yarn over, pull through everything at once, does all four jobs. What changes is where and why you're doing it.
This guide moves past the "closing a round" use you likely already know and focuses on the other three: edging, seaming, and decorative surface slip stitch, along with the tension habits that make all of them look clean rather than sloppy.
Part of what makes slip stitch worth a closer look is how differently it behaves from the taller stitches most crocheters spend the bulk of their time on. Single and double crochet build height and bulk deliberately, since that's usually what a project needs. Slip stitch does the opposite: it adds almost none, which is exactly the property that makes it useful whenever a project calls for a flat, unobtrusive finish rather than more fabric.
The basic slip stitch motion
A slip stitch is the shortest, simplest stitch in crochet: insert your hook into the next stitch, yarn over, and pull that new loop through both the stitch and the loop already sitting on your hook, all in one motion. There's no separate "pull through two loops" step the way single crochet has; everything happens at once. That single-motion simplicity is exactly why slip stitch produces such a flat, low-profile result compared to taller stitches, and it's the foundation for every use covered in this guide.
Slip stitch as an edging
Steps
- With your working yarn already attached at one end of the edge you want to finish, insert your hook into the next stitch along that edge.
- Yarn over and pull through both the stitch and the loop on your hook in one motion, completing one slip stitch.
- Move to the next stitch along the edge and repeat.
- Continue around the entire edge, working evenly, until you reach your starting point, then join with a slip stitch to the very first stitch if working in the round, or fasten off if working a flat edge.
A slip stitch edging sits much closer to the fabric than a single or double crochet border would, since the stitch itself has almost no height. That makes it the right choice whenever you want a clean, defined edge without visibly building up the fabric there, like finishing a garment opening, a blanket edge that already has the size you want, or a granny square that just needs its raw edge tidied rather than expanded.
Slip stitch for seaming
Steps
- Hold the two pieces you want to join with the edges lined up, right sides together or facing however your project needs.
- Insert your hook through corresponding stitches on both pieces at once.
- Yarn over and pull through both pieces' stitches and the loop on your hook in one motion.
- Move to the next matching pair of stitches and repeat along the whole seam.
Slip stitch seaming produces a firmer, less flexible join than mattress stitch, and a slightly more visible ridge than a hand-sewn whip stitch seam, since it's worked with a hook rather than a needle and creates a small chain-like ridge along the join. It earns its place specifically when you want speed and real structural strength over a flat, invisible finish, like a sturdy seam on a bag or a join that needs to hold up to a lot of handling. For seams where invisibility matters more, our guide to seaming crochet pieces covers whip stitch and mattress stitch in detail.
Decorative surface slip stitch
Steps
- Hold your working yarn behind the already-finished fabric, with a slip knot on the hook.
- Insert your hook from front to back into a stitch on the line you want to decorate.
- Yarn over on the back and pull a loop through to the front, and through the loop already on your hook, in one motion, the same as a basic slip stitch.
- Move along your chosen path, whether that's following an existing row of stitches or a freehand curved line, and repeat.
Surface slip stitch is applied on top of fabric that's already finished, rather than being part of the fabric's construction the way an edging or a regular round is. Because it doesn't add height or bulk, it's popular for outlining a shape, adding a contrasting colour accent line, or creating subtle texture on an otherwise plain surface, all without changing the piece's overall size or structure.
Getting the tension right
Slip stitch's biggest practical challenge across all of these uses is tension, specifically the tendency to pull it too tight without realizing. Because the stitch is so small and simple, it's easy to cinch it down snugly out of habit, and a too-tight slip stitch edging will pucker and pull the fabric it's attached to, while too-tight surface slip stitch will distort the fabric underneath it. The fix in every case is the same: consciously keep your tension looser than feels natural, checking periodically that the edge or line you're working lies flat rather than curling or bunching.
When to choose slip stitch over another option
Reach for slip stitch when you want minimal added height or bulk, when speed matters more than an invisible finish, or when you're adding a decorative detail that shouldn't change the underlying fabric's shape or size. Reach for a taller stitch, single crochet edging, or a needle-and-yarn seaming method like mattress stitch instead when you want more visible texture, more structural give, or a completely flat, invisible join. Slip stitch isn't a universal best option, it's a specific tool for jobs where its particular flatness and simplicity are exactly what's needed.
Common mistakes & fixes
Fix: this is almost always tension pulled too tight. Consciously loosen your grip and check the edge lies flat every few stitches rather than only at the end.
Fix: the same tension issue applies here, work looser than feels natural, and consider going up a hook size specifically for surface work if tightness keeps recurring.
Fix: this is a natural property of slip stitch seaming, not a mistake, since it creates a firmer join than needle-based methods. If flexibility matters more than speed and strength for this particular seam, switch to mattress stitch or whip stitch instead.
Fix: lightly mark your intended path with a removable fabric marker or a contrasting scrap of yarn woven loosely through the stitches beforehand, then remove it once the surface slip stitch line is complete.
Fix: remember slip stitch (sl st) has no separate yarn-over-and-pull-through-two step the way single crochet does; it's a single, one-motion action. If a pattern's instructions describe two separate pull-throughs, it's asking for single crochet, not slip stitch.
Frequently asked questions
Isn't slip stitch just for closing rounds?
Closing a round is its most common beginner use, but slip stitch also works as a flat edging finish, a joining method for seams, and a decorative surface technique worked directly on top of finished fabric. Each use relies on the exact same basic stitch, just applied in a different context.
What's the difference between slip stitch edging and a regular border?
A slip stitch edging is flatter, denser, and doesn't add height to the piece the way a border worked in single or double crochet would, since a slip stitch is much shorter than those stitches. It's chosen specifically when you want a clean, low-profile finish rather than a more textured or built-up border.
Can I use slip stitch to seam two crochet pieces together?
Yes, working a row of slip stitches through corresponding stitches on two pieces is a valid, fast seaming method, though it produces a firmer, less flexible seam than mattress stitch and a slightly more visible ridge than whip stitch. It's most often used when a very sturdy join matters more than an invisible one.
What is surface slip stitch used for?
Surface slip stitch adds a decorative line of texture or contrasting colour directly on top of already-finished crochet fabric, without adding bulk or height. It's popular for outlining shapes, adding a contrast-colour detail line, or creating a subtle raised design on an otherwise plain piece.
Does slip stitch use more or less yarn than single crochet?
Less, generally, since a slip stitch is a much shorter, flatter stitch than a single crochet. This is part of why slip stitch edging sits so close to the fabric rather than adding visible height.
My slip stitches look too tight and are hard to work into. What's wrong?
This is extremely common, since slip stitch's small size makes it easy to pull too snugly without realizing. Deliberately keep your tension looser than feels natural, especially for edging or surface work, and consider going up a hook size if tightness is a recurring problem.
Can slip stitch be used to make an entire fabric, not just a joining or edging technique?
Yes, this is called slip stitch crochet or sometimes shallow crochet, a full technique used to make entire garments with a dense, knit-like fabric. It's a slower, more specialized style than using slip stitch for joins or edging, and it isn't the focus of this particular guide.
CrochetGuides is a participant in the Amazon Services LLC Associates Program. As an Amazon Associate we earn from qualifying purchases, at no extra cost to you.