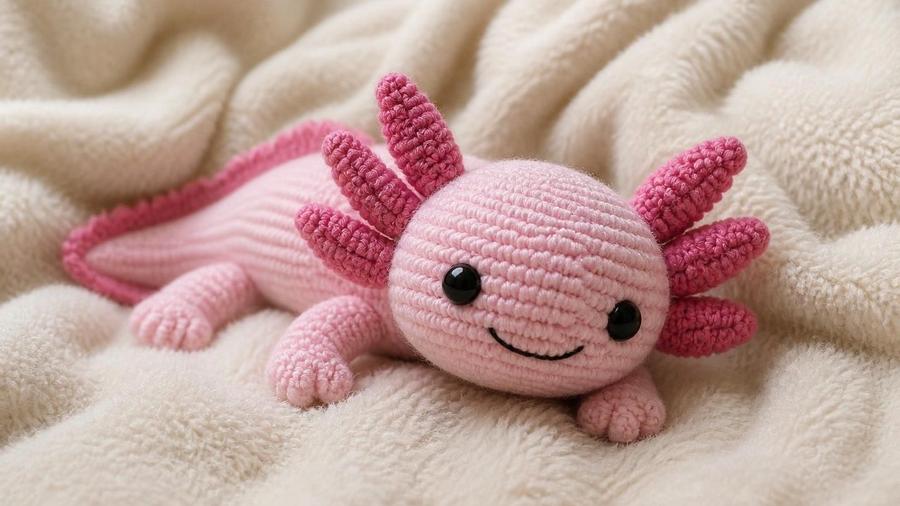
A trendy axolotl worked as one continuous piece from head to tail, with fluffy wire-supported external gills and a wide smiling face.
Updated 2026 · US terms · About 6-7in nose to tail-tip
The gills are what everyone notices first on a finished axolotl, and they're also the one detail that's easy to get completely wrong without realizing it until the piece is done. My first version had gills that looked more like small flat leaves stuck to the sides of the head than the feathery, three-dimensional fronds an actual axolotl has. A crocheted piece of yarn, on its own, simply lies flat, no matter how you shape the stitches, which means something has to give it structure from the inside if you want it standing away from the head the way the real thing does.
This pattern works the head, body, and tail as one continuous tapering piece rather than separate seamed sections, which is closer to an axolotl's actual proportions than a typical segmented amigurumi build, plus the specific wire-supported gill construction that's the real difference-maker for this design.
Part of why this design has become such a popular amigurumi subject in recent years is that it sits at a sweet spot of difficulty: the continuous head-to-tail shaping is a genuinely useful skill to practice beyond just this one project, but the gill and leg pieces are small and forgiving enough that a mistake on any one of them is quick to redo without unraveling the whole body. It's a good next project once you're comfortable with basic increase and decrease rounds and want to try a slightly more involved silhouette than a simple sphere-based animal.
Head, body, and tail are worked as one continuous piece with a gradual taper, no seam between sections.
Legs are worked separately and sewn on; gills are worked as small fringed pieces with wire inserted.
Worked in continuous rounds throughout; place a marker at the start of each round.
Pattern
Head, rounds 1-6
Magic ring, 6 sc into ring (6). Rnd 2: inc in every st (12). Rnd 3: *sc, inc* around (18). Rnd 4: *sc 2, inc* around (24). Rnd 5: *sc 3, inc* around (30, this flatter, wider increase builds the characteristic wide axolotl face rather than a tall rounded head). Work 2 rounds even at 30.
Body, rounds 8-16
Work even at 30 sts for 5-6 rounds. Attach safety eyes on round 8 or 9, spaced wide apart to suit the flat-topped head. Stuff the head firmly as you continue.
Tail taper
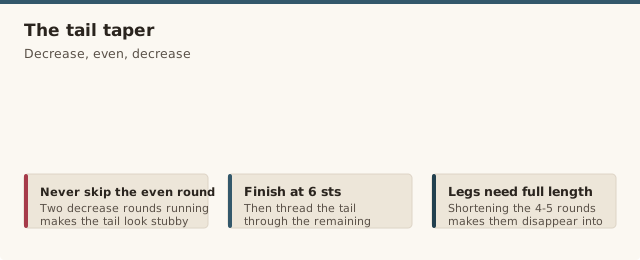
Begin gradual decreases: *sc 4, dec* around, work 1 round even, *sc 3, dec* around, work 1 round even, continuing this gradual pattern (never skipping the even round between decrease rounds) until 6 sts remain. Fasten off, thread tail through remaining sts, cinch closed.
Legs (make 4)
Magic ring, 5 sc into ring (5). Work even for 4-5 rounds (the full length given here, not shortened). Stuff lightly, flatten the opening, and sc across to close. Sew all 4 legs to the underside of the body, evenly spaced front and back, checking that all four sit level before securing the final stitches.
Gills (make 6, 3 per side)
With contrast color, chain 8. Fasten off, leaving long tails on both ends. Fold a 2in pipe cleaner segment in half and insert it inside the chain, or lay it alongside and whip-stitch the chain around it to encase it. Trim and fringe the yarn ends slightly for texture if desired. Attach 3 gill branches per side near the head/body join, bending each into a slight outward curve.
Building the fluffy gills
The wire is what separates a gill branch that stands away from the head from one that just lies flat against it. Insert it the full length of each gill piece, not just partway, since an unsupported tip will droop even if the base is held stiff. Bend each gill into a gentle outward-and-upward curve before attaching it, matching the natural fan shape real axolotl gills have, rather than leaving them straight.
For a fluffier finished look, work the chain base slightly longer than the finished gill needs to be and trim the excess yarn at the tip into a light fringe once attached, rather than working a precisely-sized chain from the start. This gives a softer, more feathery silhouette than a single clean strand, and it's much easier to trim a bit more off than to add length back once a piece is already attached.
Spacing the three gill branches per side evenly, rather than bunching them close together, also makes a noticeable difference to how full the finished set looks. A gap of roughly 2-3 stitches between each gill's attachment point, fanning slightly outward from front to back, mimics the natural arrangement better than three branches all emerging from nearly the same spot. Pin all three on one side in place before sewing any of them down, so you can adjust the spacing and angle as a set rather than fixing one at a time, and compare the finished side against its mirror before starting the second set.
Color options
Pale pink with slightly darker pink or coral gills is the color most people picture when they think "axolotl," matching the common leucistic coloring seen in most pet and plush versions. A dark speckled brown, grey, or black-and-gold combination represents the "wild type" coloring real axolotls also come in, and works just as well with this same construction if you'd rather avoid pink or want a moodier finished look. Whichever base color you choose, keep the gills in a visibly different shade so they read as a separate feature rather than blending into the head.
A speckled or self-striping yarn for the body adds a mottled, slightly translucent-looking texture that mimics real axolotl skin more closely than a flat solid color, particularly in pale pink or pale grey colorways where the speckling reads like natural variation rather than an obvious print. Keep the gills in a plain, solid contrast color even when the body is speckled, since two textured yarns side by side tend to blur together and lose the visual separation between body and gills that makes the design read clearly.
A small pastel-blue or lavender colorway, while not a color real axolotls come in, has become a popular novelty choice for this pattern and works just as well with the same construction, since nothing about the shaping depends on any particular color being used.
Getting the smile right
An axolotl's flat-topped, wide head is only half of what gives it that recognizable expression, the other half is entirely in how the mouth is embroidered. A straight horizontal line reads as neutral or even slightly grumpy, while a gentle upward curve at both corners, kept subtle rather than a full cartoon grin, is what produces the calm, faintly amused look real axolotls are known for online. Work the mouth after the eyes are already placed and the piece is fully stuffed, using the eye positions as a guide for how wide to make the curve, rather than embroidering it first and hoping the eyes land in the right relationship to it afterward.
A single strand of black or dark grey embroidery floss, split down from the standard six-strand skein, gives a finer line than working with the full thickness, which matters at this small scale where a thick line can end up looking more like a frown than a smile regardless of the curve's shape.
Where axolotl patterns go wrong
Mistake: the gills flop down against the head instead of framing the face outward.
Fix: cut six short pipe-cleaner segments and thread one inside each gill branch before attaching, bending them into a slight outward curve.
Mistake: the signature axolotl "smile" ends up looking flat or expressionless.
Fix: embroider the mouth with a gentle upward curve at both corners, placed just below the eye line, rather than a straight horizontal line.
Mistake: the legs are worked but end up too short to actually read as legs once stuffed.
Fix: don't shorten the specified round count on the legs, they need the full length given or they disappear into the body.
Mistake: the tail tapers too abruptly and looks stubby rather than sleek.
Fix: follow the gradual decrease schedule spread over several rounds rather than doing one big decrease round to save time.
Mistake: the finished color looks too saturated or artificial.
Fix: choose a genuinely pale pink or pink-and-white speckled yarn rather than a hot/bright pink for a more realistic look, or go with a dark speckled "wild type" colorway as an alternative.
Our pick for the gills
Notions
Thin Chenille Stems, 6mm
A thinner chenille stem than standard craft pipe cleaners holds a gentle curve without overwhelming the small scale of a gill branch, giving a lighter, more natural fanned-out look.
How do I get the gills to stand out and look fluffy rather than flat?
Thread a short piece of pipe cleaner inside each gill branch before attaching it, then bend them into a slight outward curve. Working the gill fringe a bit longer than you think you need and trimming it to shape afterward also helps them read as full and fluffy rather than sparse.
What yarn color is most true-to-life for an axolotl?
A pale pink or pink-and-white speckled yarn matches the common "leucistic" axolotl coloring most people picture. A dark speckled brown or black-and-gold "wild type" colorway is an equally realistic alternative if you'd rather avoid pink.
Can the legs be made poseable?
Not easily with the standard construction here, since the legs are stuffed and sewn on fixed rather than jointed. A thin pipe cleaner inserted the same way as the gills can add limited bend to the legs if a poseable version is wanted, though it isn't part of the base pattern.
What hook size keeps the stitches tight enough for the small gill pieces?
A 3.5mm hook, the same size used for the rest of the body, keeps the small gill pieces tight enough to hold their shape once the wire is inserted. Going up a size for just the gills makes them noticeably floppier.
How much yarn does the whole project take?
About 80-100 yards of worsted-weight yarn for the main body and legs combined, plus a small amount of contrast for the gills, since the head-to-tail piece is worked continuously without separate seamed sections.
Can this pattern be scaled down into a keychain-size version?
Yes, reduce the number of even rounds through the body and shorten the tail taper proportionally, and use a smaller hook (3.0mm) with the same yarn for a denser, smaller-scale finish. The gill branches can stay roughly the same length relative to a smaller head for the detail to still read clearly.
Nora has been teaching crochet for 12 years, from absolute beginners to people coming back to the craft after decades away. She started CrochetGuides to write the clear, honest instructions she wishes she'd had when she was learning — the ones that actually work the first time.
CrochetGuides is a participant in the Amazon Services LLC Associates Program. As an Amazon Associate we earn from qualifying purchases, at no extra cost to you.