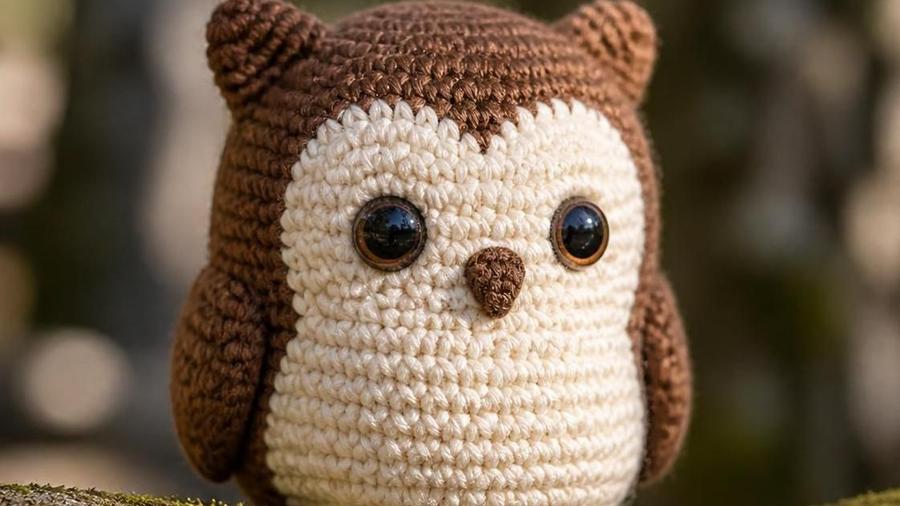
An evergreen sitting owl with a contrast belly patch and small pointed ear tufts, worked bottom-up in continuous rounds.
Updated 2026 · US terms · About 5-6in tall finished
The belly patch is what makes or breaks an amigurumi owl, and my first one had a visible step where the color changed, a small jog running right up the front like a seam that wasn't supposed to be there. It's a tiny detail, but it's exactly the kind of thing that separates a pattern that looks intentional from one that looks like a mid-project color mistake. The fix wasn't a different color-change technique overall, just switching from a plain yarn-over swap to a standing, jogless join that shifts where each round starts.
This pattern isn't tied to any single season, which makes it a genuinely useful one to have finished and ready on a shelf year-round. It covers the color-change belly patch, the pointed ear tufts that are the other detail most likely to flop rather than stand up, and eye placement that keeps the whole thing reading as an owl rather than a generic round animal.
Owls also make an unusually good gift or nursery decor piece precisely because they're not tied to a holiday or a specific age group the way many amigurumi subjects are. A well-made owl sits comfortably on a bookshelf, a baby's dresser, or a desk without looking out of place in any of those settings, which is part of why this one is worth keeping in a pattern library even outside of any particular season.
Worked bottom-up in continuous rounds; place a marker at the start of each round.
The belly patch is worked as a color-change section directly in the round, not sewn on separately, though a separate sewn-on oval also works if preferred.
Magic ring, 6 sc into ring (6). Rnd 2: inc in every st (12). Rnd 3: *sc, inc* around (18). Rnd 4: *sc 2, inc* around (24). Rnd 5: *sc 3, inc* around (30). Rnd 6: *sc 4, inc* around (36).
Body with belly patch, rounds 7-14
Work even at 36 sts. Beginning round 7, switch to contrast color using a standing jogless join for the center-front 12 sts of each round (the belly patch), continuing in main color for the remaining 24 sts. Repeat this two-color round through round 14, keeping the patch centered on the marked front stitch each round.
Ear tufts
Switch back to solid main color. On the next round, work 2 short pointed tufts directly into the head: sc 2, inc, sc 2, sc2tog into a small 4-5 stitch section, spaced apart at the top of the head, leaving the rest of the round in plain sc. Weave in the contrast-color tail from the belly patch once it's no longer needed.
Head taper and close
Stuff firmly, checking that the fill reaches evenly into the base so the finished owl can sit upright on its own. Work several decrease rounds (*sc 4, dec* around, then *sc 3, dec*, tightening the decrease ratio each round) until 6 sts remain. Fasten off, thread tail through remaining sts, cinch closed.
Wings (make 2, worked flat)
Chain 6. Row 1: sc in 2nd ch from hook and each ch across (5 sts), turn. Rows 2-4: sc across, turn. Row 5: sc2tog, sc 1, sc2tog (3), turn. Row 6: sc2tog, sc 1 (2). Fasten off leaving a tail for sewing. Sew both wings to the sides, level with the belly-patch color-change round.
The jogless color change
A standard color change, simply finishing the last stitch of one color and starting the next with a new yarn, leaves a visible diagonal step where the colors meet, since each round of continuous crochet spirals slightly rather than joining in a perfect circle. A standing or jogless join fixes this by working the last stitch of the round before the change through its final yarn-over in the new color, effectively shifting the visual transition line so it reads as a clean edge rather than a step.
Practicing this join on a small scrap swatch before starting the belly patch is worth the five minutes it takes, since the technique feels different from a normal color change the first time and is much easier to get comfortable with on scrap yarn than in the middle of the one belly patch that has to look right on the finished piece.
Carrying the unused color up the inside of the work between rounds, rather than cutting and rejoining it every time, saves a considerable number of ends to weave in later and keeps the color changes looking crisper. Twist the two strands around each other once at the start of each round before picking up the working color, which keeps the carried yarn from pulling loose or showing through gaps in the stitches on the inside of the piece.
Eye and wing placement
Use the belly-patch color-change round as a horizontal reference line for placing both the eyes and the wings, rather than counting rows from the very bottom or guessing by eye once the piece is stuffed. Eyes generally sit 1-2 rounds above where the belly patch begins; wings sit level with the patch itself, roughly where a real owl's folded wings would rest against its sides. Using one consistent reference line for both keeps the whole face-and-wing arrangement visually balanced rather than each element being placed independently and potentially clashing.
Eye spacing on an owl can afford to be wider than on most amigurumi animals, since a real owl's eyes sit quite far apart and close to the sides of its face rather than clustered near the center. A gap of about 6-7 stitches between the two eye posts, measured on the round you've chosen for placement, gives that characteristic wide-eyed owl look. Push both posts in and view the piece from a small distance before locking the backing washers on, since this is a permanent step once done.
Choosing a color scheme
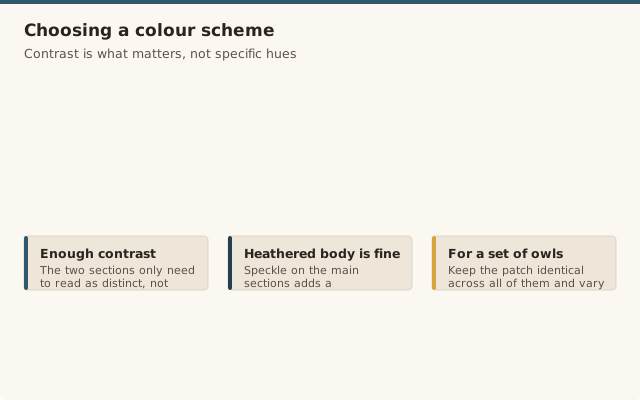
The belly patch and main body only need to contrast enough to read clearly as two distinct sections; they don't need to be dramatically different in tone. A warm brown body with a cream or oatmeal belly patch is the most realistic combination and works well as a year-round neutral decor piece. For a brighter, more playful version, a muted teal, mustard, or dusty rose body still reads clearly as an owl as long as the belly patch stays a lighter, contrasting shade, since it's the contrast itself, not the specific colors chosen, that makes the two-tone pattern legible from across a room.
If you're making several owls as a themed set, consider keeping the belly-patch color consistent across all of them while varying the main body color from owl to owl. This gives a visually cohesive group without every piece being identical, and it's a good way to use up several different partial skeins of the same weight yarn that might not otherwise be enough for a full project on their own.
A speckled or heathered yarn for the main body, rather than a solid color, adds a subtle textured look that reads a bit like real feathers without any extra stitching or embroidery work. This only works well for the main body sections, though, keep the belly patch in a solid, plain color, since two speckled or textured yarns next to each other tend to blur the contrast that makes the patch visible in the first place.
Common owl-shaping issues
Mistake: the color-change round shows a visible jog or step where the new color starts.
Fix: use a standing/jogless color-change join rather than just switching yarn mid-round, so the color line looks continuous.
Mistake: the ear tufts flop over instead of standing up.
Fix: work them with fewer stitches over fewer rounds than the main body so they're naturally stiffer, and consider a small piece of pipe cleaner inside each one.
Mistake: eyes end up placed too high or too low and the piece stops reading as an owl.
Fix: count rows up from the belly-patch color-change round as a placement guide rather than eyeballing it after the fact.
Mistake: the sewn-on belly patch doesn't match the curve of the body and puckers.
Fix: crochet the patch with its own gradual increases to match the body's curve, and block it flat before sewing, if using the sewn-on version rather than the in-round color-change version.
Mistake: the wings end up positioned too far forward or too far back.
Fix: use the belly-patch color-change round as a horizontal reference line and pin both wings level with it before sewing.
Our pick for crisp eyes
Notions
10mm Black Safety Eyes, Set of 20 Pairs
A mid-size 10mm eye suits most standard-gauge amigurumi owls and gives the wide, alert look owls are known for without overwhelming a smaller face.
What size safety eyes look right on this size owl?
9-12mm safety eyes suit an owl worked in worsted-weight yarn at standard amigurumi gauge, roughly 5-6in tall finished. Larger eyes exaggerate the round, wide-eyed owl look; smaller eyes read as a more realistic, subdued expression.
How do I avoid the visible jog at a color change?
Use a standing or jogless color-change join rather than simply switching yarn mid-round: work the last stitch of the old color to its final yarn-over using the new color, then continue the next round shifted one stitch to hide the transition line.
How do I scale the pattern up or down in size?
Add or remove 1-2 even rounds in the main body section before the color-change round to adjust overall height, and scale the wing panels proportionally. The ear tufts and taper rounds don't need to change since they're a fixed shaping sequence regardless of body size.
How much stuffing should I use so the owl can sit upright on its own?
Stuff firmly, especially through the lower body and base, so the owl has enough weight and rigidity at the bottom to balance without leaning. A lightly-stuffed owl will tip over since amigurumi shapes rely on firm stuffing for structural support, not just softness.
What color combinations look good together?
Brown body with a cream or tan belly patch is the most realistic combination. Muted teal or mustard with a cream belly gives a more decorative, nursery-friendly look while keeping the same recognizable owl silhouette.
Is embroidered eyes a safe substitute for very young children?
Yes, embroidered eyes worked with embroidery floss and a sharp needle avoid the small hard safety-eye pieces entirely, making them the safer choice for a toy intended for infants or very young toddlers who put things in their mouths.
Nora has been teaching crochet for 12 years, from absolute beginners to people coming back to the craft after decades away. She started CrochetGuides to write the clear, honest instructions she wishes she'd had when she was learning — the ones that actually work the first time.
CrochetGuides is a participant in the Amazon Services LLC Associates Program. As an Amazon Associate we earn from qualifying purchases, at no extra cost to you.