Free Amigurumi Bunny Pattern
Long floppy ears, a soft cream body, and a tiny embroidered pink nose — a classic amigurumi bunny that works equally well as a nursery gift or a shelf-sitter.
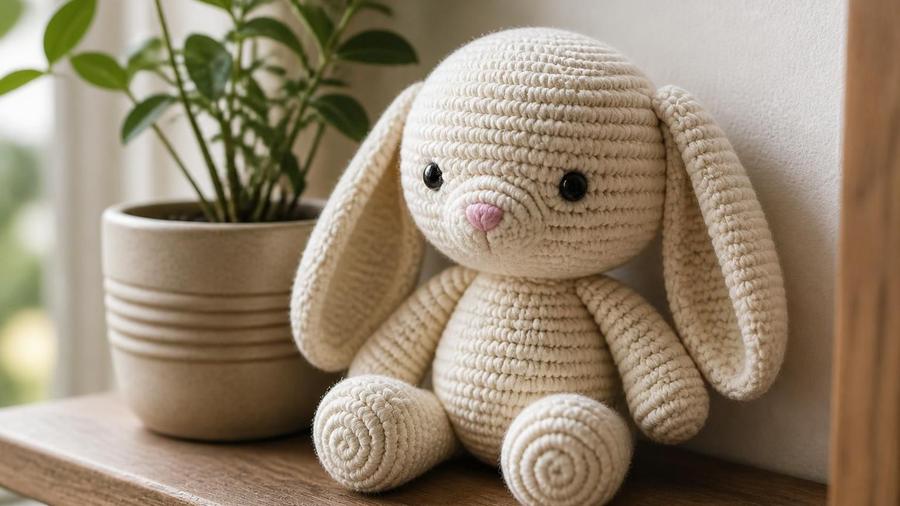
I made my first floppy-eared bunny for a friend's baby shower, and I remember genuinely underestimating how much the ear length would matter. My first attempt used short, stiff ears cut to what I thought looked proportional, and the bunny came out looking more like a bear with a strange head shape than a rabbit. It wasn't until I doubled the ear length and left them completely unstuffed that the whole thing suddenly read as unmistakably a bunny.
That's really the whole trick to this pattern: the head and body use the same simple amigurumi shaping as almost any stuffed animal, but the ears are worked long, flat, and totally unstuffed, so they drape down naturally under their own weight rather than sticking straight up. A tiny embroidered pink nose finishes the face without needing any extra crocheted pieces.
Below is the full pattern in US terms, along with notes on getting the ears to drape correctly, embroidering a clean nose, and the small mistakes that make a bunny look off rather than adorable. If you're new to amigurumi shaping, our amigurumi for beginners guide is a good place to start first.
Materials
- 1–2 skeins worsted-weight yarn in cream, about 90–110 yards
- Small amount of pink embroidery thread or yarn for the nose
- 3.5mm hook (smaller than standard, for tight amigurumi stitches)
- Polyester fiberfill stuffing
- Safety eyes, or embroidery thread for a child-safe embroidered face
- Stitch marker, to track the start of each round
- Scissors and a yarn needle
Abbreviations (US terms)
| Abbr. | Means |
|---|---|
| ch | Chain |
| sc | Single crochet |
| st(s) | Stitch(es) |
| inc | 2 sc in same stitch (increase) |
| dec | Sc 2 sts together (decrease) |
| rnd(s) | Round(s) |
See our abbreviations glossary for the full list including UK terms.
Gauge
Gauge isn't critical here — the goal is tight, even stitches that keep the stuffing from showing through. If you can see stuffing between your stitches, size down your hook.
Notes
- The head and body are worked in US terms, in a continuous spiral without joining, the same basic technique as our mini amigurumi ball pattern.
- The ears are worked flat, back and forth in rows, rather than in the round, and are left unstuffed on purpose.
- Made from six separate pieces (head, body, 2 ears, 2 arms, 2 legs) sewn together at the end.
Pattern
Magic ring, 6 sc. (6) → Inc around. (12) → [sc 1, inc] around. (18) → [sc 2, inc] around. (24)
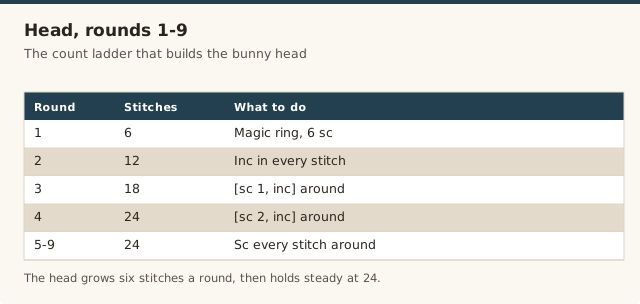
Sc every st around for 5 rounds, no shaping. (24 sts each round)
[sc 2, dec] around. (18) → [sc 1, dec] around. (12) → Dec around, stuffing firmly as you close. (6)
Fasten off, leaving a long tail for sewing to the body.
Magic ring, 6 sc. (6) → Inc around. (12) → [sc 1, inc] around. (18)
Sc every st around for 3 rounds. (18 sts each round)
[sc 1, dec] around. (12) → Dec around, stuffing as you close. (6)
Fasten off, leaving a long tail for sewing to the head.
Chain 7. Row 1: sc in the 2nd ch from the hook and in each ch across, turn. (6 sts)
Rows 2–10: ch 1, turn, sc in each st across. (6 sts each row)
Fasten off, leaving a long tail. Do not stuff; the ear stays as a flat strip.
Magic ring, 5 sc. (5). Sc every st around for 5 rounds, no shaping, stuffing lightly. Fasten off, leaving a tail for sewing.
Magic ring, 6 sc. (6). Sc every st around for 4 rounds, stuffing lightly. Fasten off, leaving a tail for sewing.
Sew the body to the bottom of the head using the tails from each. Sew the two ears to the top of the head, angled slightly outward, folding the bottom inch of each ear under slightly before stitching so they drape downward rather than standing straight up. Sew the two arms and two legs to the body. Attach safety eyes before stuffing the head if using them, or embroider the eyes with yarn once assembly is complete for a child-safe alternative, then embroider a small pink triangle nose just below and between the eyes.
Getting the ears to drape
Length and construction do all the work here. Working the ear flat, back and forth in rows rather than in the round, keeps it thin and pliable instead of round and rigid, and leaving it completely unstuffed means it has nothing holding it upright. When you sew each ear on, don't attach it perfectly flat along its full bottom edge; fold the bottom inch or so slightly under itself before your first stitch, angling the ear a little outward from the center of the head. That small fold, combined with the ear's own weight once it's finished, is what creates the soft downward drape you can see in the photo rather than a stiff, straight-up rabbit-ear silhouette.
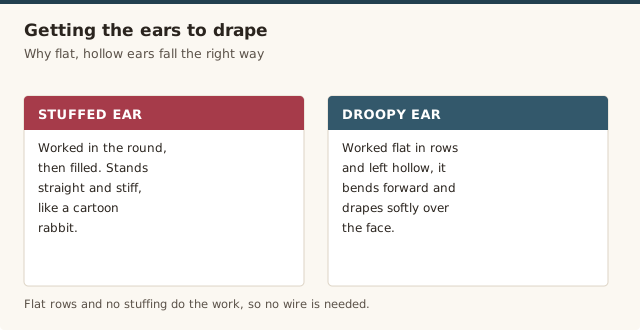
If your finished ears feel too limp and flop over completely flat against the head, try a slightly firmer yarn or add one extra row before fastening off; a touch more length and body in the fabric usually finds the right balance between floppy and collapsed.
Embroidering the face
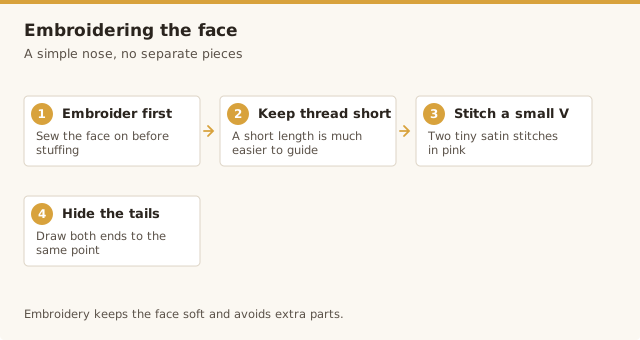
The pink nose is simple embroidery, not a separate crocheted piece, which keeps the face soft and avoids adding another small attached part. Thread a yarn needle with a short length of pink yarn or embroidery thread, and work a small solid triangle of satin stitches (straight stitches worked closely side by side) just below and between where the eyes sit. From the bottom point of that triangle, work two or three short straight stitches meeting at a point below it for the mouth, in the same neutral thread you used for any other embroidered details. Keep the whole shape small relative to the head; an oversized nose reads as cartoonish rather than delicate.
Color variations
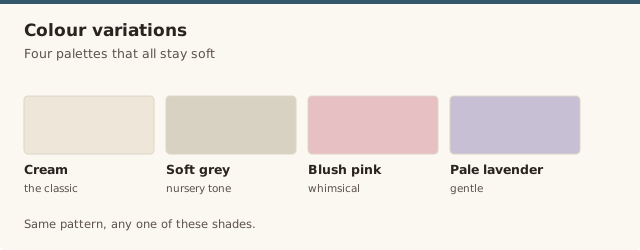
Cream is the classic bunny color and pairs well with almost any nursery palette, but this pattern works just as nicely in soft grey, blush pink, or pale lavender for a more whimsical look. If you'd like two-tone ears, work the inside third of each ear strip in a contrasting pale pink before switching back to your main color; since the ear is worked flat in rows, this is a simple color change partway through rather than any special technique. Our guide to the best yarn for amigurumi covers which fibers hold their shape best for a project like this one, and is worth reading before you buy yarn if this is your first amigurumi project.
Common mistakes & fixes
Fix: make sure the ears are left unstuffed, and fold the bottom edge slightly before sewing them on rather than attaching them completely flat.
Fix: mark the intended center point with a pin or scrap of yarn before you start stitching, and work slowly, checking the shape from a distance every few stitches rather than only at the end.
Fix: count your rows carefully on both ears before fastening off either one, and lay them flat side by side to compare before sewing either one to the head.
Fix: mark the intended attachment points with a scrap of contrasting yarn before sewing anything, checking placement from directly above and from the front before committing to stitches.
Fix: insert the eye posts but don't lock the backings on yet — hold the head up and check the spacing looks right from a normal viewing distance before securing them permanently.
Our pick
Fairfield Poly-Fil Premium Fiber Fill, 32oz
Enough for this bunny and future amigurumi projects, staying fluffy without clumping over time.
View on Amazon →Frequently asked questions
Is this amigurumi bunny pattern safe for young children?
For children under 3, or any child who still mouths toys, embroider the eyes with yarn instead of using plastic safety eyes, and securely fasten and reinforce the ears, arms, and legs, since these are all small attached parts that carry a choking risk if they come loose. Adult supervision is recommended for young children with any small-parts toy. See our guide to attaching safety eyes for more detail.
How long does this amigurumi bunny take to make?
Between the head, body, two ears, two arms, and two legs, most confident beginners finish this bunny over two to three sessions, roughly 3 to 4 hours of crochet time plus assembly.
How do I make the bunny's ears floppy instead of standing straight up?
Work the ears as flat strips rather than closed, stuffed tubes, and leave them completely unstuffed. When sewing each ear to the head, fold the bottom inch under slightly before your first stitch; that fold, combined with the ear's own weight, is what makes it drape downward rather than stand up.
How do I embroider the bunny's nose?
Thread a yarn needle with a short length of pink yarn or embroidery thread, and work a small solid triangle of satin stitches (straight stitches worked side by side) just below and between the eyes. Two or three short straight stitches below the triangle, meeting at a point, complete the classic bunny nose-and-mouth shape.
What's the best stuffing for an amigurumi bunny?
Polyester fiberfill is the standard choice for amigurumi because it stays soft, keeps its shape, and is washable and hypoallergenic, unlike natural fiber stuffing that can clump or felt with handling over time.
Can I make the bunny bigger or smaller?
Yes. To scale it up, add one more increase round to the head and body before the straight rounds and one more decrease round at the end, and add a few extra rows to the ears so they stay in proportion. For a smaller bunny, do the reverse.
Why does my bunny's head look bigger on one side?
This is almost always uneven stuffing or off-center ear placement. Stuff the head in small, even pieces as you go rather than all at once at the end, and before sewing the ears on, lay the head flat and check placement from directly above so both sides match.
CrochetGuides is a participant in the Amazon Services LLC Associates Program. As an Amazon Associate we earn from qualifying purchases, at no extra cost to you.