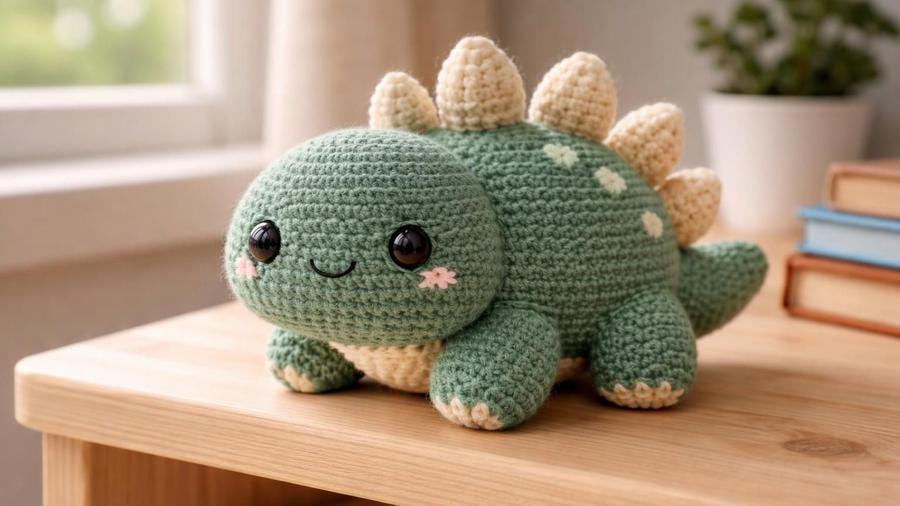
A friendly green stegosaurus-style dinosaur with a row of soft cream spikes down the back and a cream belly — sturdy enough for real play, cute enough to display.
Updated 2026 · US terms · About 5in / 12.5cm tall, 9in / 23cm nose to tail
Every dinosaur pattern I've made has come down to one design question: how do you make something with actual spikes down its back that a toddler can still safely cuddle? My first attempt used a stiffer yarn for the spikes to help them stand up, and the result looked more like a hedgehog someone had accidentally dyed green. The fix turned out to be almost embarrassingly simple: keep the spikes in the same soft yarn as everything else, leave them completely unstuffed, and only sew down the very base of each one.
That single decision is what makes this dinosaur work. The head, body, and legs are all standard amigurumi shaping, and the spikes are just small flat triangles that stay soft and floppy on their own but stand upright once they're anchored along the spine, because only their base is fixed in place. The rest of the piece — the elongated body, the tapered tail, the cream belly patch — is there to give it that recognizable, slightly rounded stegosaurus silhouette without any complicated shaping.
Below is the full pattern in US terms, along with notes on getting the spikes to stand and evenly spaced, sizing the body for a proper stegosaurus shape, and the mistakes that make a dinosaur look lopsided rather than charming. If amigurumi shaping is new to you, our amigurumi for beginners guide covers the basics first.
Toy safety note: for children under 3, or any child who still mouths toys, embroider the eyes with yarn instead of using plastic safety eyes. Securely fasten and reinforce the spikes, tail, and legs, since these are all small attached parts. Adult supervision is recommended for young children with any small-parts toy. See our guide to attaching safety eyes for more detail.
Materials
1–2 skeins worsted-weight yarn in green
Small amount of cream yarn for the spikes and belly patch
3.5mm hook (smaller than standard, for tight amigurumi stitches)
Polyester fiberfill stuffing
Safety eyes, or embroidery thread for a child-safe embroidered face
Gauge isn't critical here — the goal is tight, even stitches that keep the stuffing from showing through. If you can see stuffing between your stitches, size down your hook.
Notes
Written in US terms, worked in a continuous spiral without joining, the same basic technique as our mini amigurumi ball pattern.
The body is worked longer than a typical amigurumi body to create the elongated stegosaurus silhouette.
The spikes and belly patch are separate cream pieces sewn onto the finished green body.
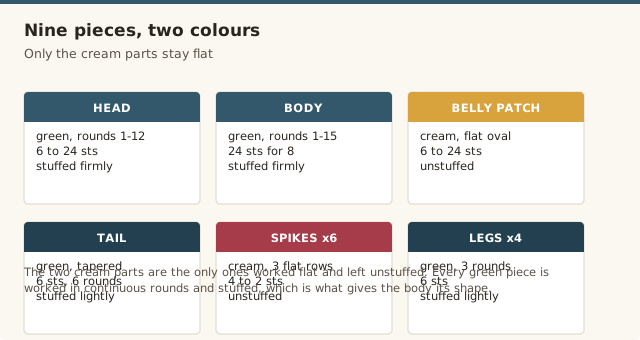
Fasten off, leaving a tail. Do not stuff; the belly patch stays a flat oval.
Tail (green)
Magic ring, 6 sc. (6). Sc even 1 round. Dec 1 st. (5) Sc even 1 round. Repeat this taper for 6 rounds total, stuffing lightly as you go. Fasten off, leaving a tail for sewing.
Spikes (make 6, cream)
Row 1: ch 2, 4 sc in the 2nd ch from the hook. (4)
Row 2: ch 1, turn, [sc 1, dec] twice. (3)
Row 3: ch 1, turn, dec, sc 1. (2) Fasten off, leaving a tail. Do not stuff.
Legs (make 4)
In green, magic ring, 6 sc. (6). Sc even for 2 rounds. Stuff lightly. Fasten off, leaving a tail for sewing.
Assembly
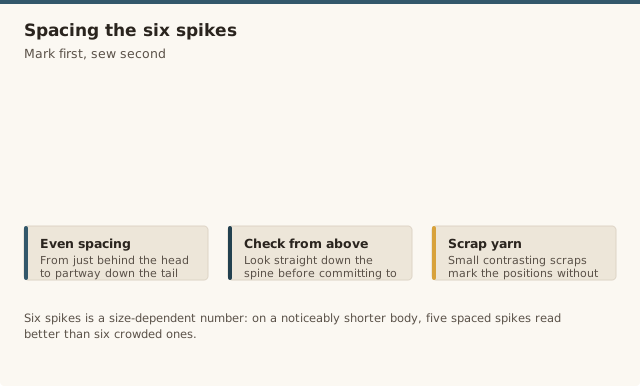
Sew the body to the head. Sew the belly patch to the front of the body, and the tail to the back, tapering end out. Sew the six spikes evenly spaced along the spine, starting just behind the head and continuing partway down the tail, anchoring only the base of each spike so the rest stands upright. Sew all four legs to the bottom of the body. Attach safety eyes before stuffing the head if using them, or embroider a simple face with yarn once assembly is complete for a child-safe alternative.
Getting the spikes to stand
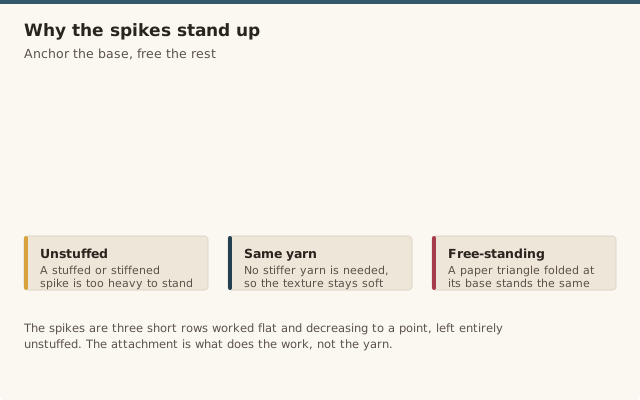
The spikes are the detail that makes this pattern read as a dinosaur rather than a generic green creature, and their construction is deliberately simple: three short rows worked flat, decreasing down to a point, and left completely unstuffed. That's on purpose. A stuffed or stiffened spike would either be too heavy to stand upright on its own or, if you used a stiffer yarn to compensate, would create a scratchier texture than you want on a toy meant for cuddling.
The trick to getting them to stand is entirely in how you attach them. Sew each spike to the spine using only the straight bottom edge, working small, tight stitches across just that base line, and leave the rest of the triangle completely free. Anchored only at the base like this, the spike's own light structure is enough to hold it upright, the same way a paper triangle folded at its base will stand on its own even though the rest of the paper is unsupported.
Color variations
A grassy green with cream spikes is the classic friendly-dinosaur look, but this pattern works just as well in teal, dusty blue, or even a soft purple if you'd rather make a more whimsical, less true-to-life creature. If you'd like the spikes to stand out even more, work them in a bright contrasting color like mustard or coral rather than a soft neutral; because they're separate pieces, the color choice doesn't affect the construction at all. Our guide to the best yarn for amigurumi covers which fibers hold their shape best if this is your first project using more than one color.
Sizing up or down
To make a larger dinosaur, add one more increase round to both the head and body before their straight rounds, add a couple of extra straight rounds to the body to keep the elongated proportions, and lengthen the tail and legs by a round or two. Scale the spikes up by adding one extra row before the decrease rows begin. For a smaller dinosaur, do the reverse throughout, and consider dropping to five spikes instead of six if the body ends up noticeably shorter.
Common mistakes & fixes
Mistake: the spikes flop over sideways instead of standing upright.
Fix: make sure only the straight bottom edge of each spike is sewn down, not the sides or the point; sewing too much of the spike flattens it against the body instead of letting it stand.
Mistake: the six spikes end up unevenly spaced along the back.
Fix: mark all six positions with small scraps of contrasting yarn before sewing any of them on, spacing them evenly from just behind the head to partway down the tail.
Mistake: the belly patch looks lumpy or puckered once sewn on.
Fix: use small, even stitches spaced closely around the entire edge of the patch, and avoid pulling the sewing yarn too tight, which can cup the patch instead of laying it flat against the body.
Mistake: the dinosaur doesn't stand up on its own.
Fix: lay all four legs flat side by side before sewing any of them on, and add or remove a small amount of stuffing so they match in length before attaching them at the same height on the body.
Mistake: the body looks too short and round instead of the elongated stegosaurus shape shown in the photo.
Fix: double-check you've worked all 8 straight rounds on the body before beginning the decrease rounds; skipping rounds here is the most common reason the body ends up looking too compact.
Our pick
Stuffing
Fairfield Poly-Fil Premium Fiber Fill, 32oz
Enough for this dinosaur and future amigurumi projects, staying fluffy without clumping over time.
Is this amigurumi dinosaur pattern safe for young children?
For children under 3, or any child who still mouths toys, embroider the eyes with yarn instead of using plastic safety eyes, and securely fasten and reinforce the spikes, tail, and legs, since these are all small attached parts that carry a choking risk if they come loose. Adult supervision is recommended for young children with any small-parts toy. See our guide to attaching safety eyes for more detail.
How long does this amigurumi dinosaur take to make?
Between the head, elongated body, tail, six spikes, and four legs, plus the sewn-on belly patch, most confident beginners finish this dinosaur over three to four sessions, roughly 4 to 5 hours of crochet time plus assembly.
How do I make the spikes stand up along the back instead of lying flat?
Leave the spikes unstuffed so they stay flexible and light, and sew each one to the spine with only its bottom edge attached, leaving the rest free-standing. A spike sewn down along its whole length will lie flat; one anchored only at the base will stand upright the way it does in the photo.
How do I keep the six spikes evenly spaced down the back?
Mark all six positions with small scraps of contrasting yarn along the spine before sewing any of them on, spacing them evenly from just behind the head to partway down the tail, then check the spacing from directly above before committing to any stitches.
What's the best stuffing for an amigurumi dinosaur?
Polyester fiberfill is the standard choice for amigurumi because it stays soft, keeps its shape, and is washable and hypoallergenic, unlike natural fiber stuffing that can clump or felt with handling over time.
Can I make the dinosaur bigger or smaller?
Yes. To scale it up, add one more increase round to the head and body before the straight rounds and one more decrease round at the end, and lengthen the tail, legs, and spikes proportionally. For a smaller dinosaur, do the reverse.
Why doesn't my dinosaur stand up on its own?
This is almost always uneven leg length or uneven stuffing between the four legs. Lay all four legs flat side by side before sewing any of them on, and add or remove a small amount of stuffing so they all match before attaching them at the same height on the body.
Nora has been teaching crochet for 12 years, from absolute beginners to people coming back to the craft after decades away. She started CrochetGuides to write the clear, honest instructions she wishes she'd had when she was learning — the ones that actually work the first time.
CrochetGuides is a participant in the Amazon Services LLC Associates Program. As an Amazon Associate we earn from qualifying purchases, at no extra cost to you.