Free Crochet Cat Toy Pattern for Beginners
A tiny stuffed mouse using the same amigurumi shaping as our mini ball pattern, with an optional catnip fill.
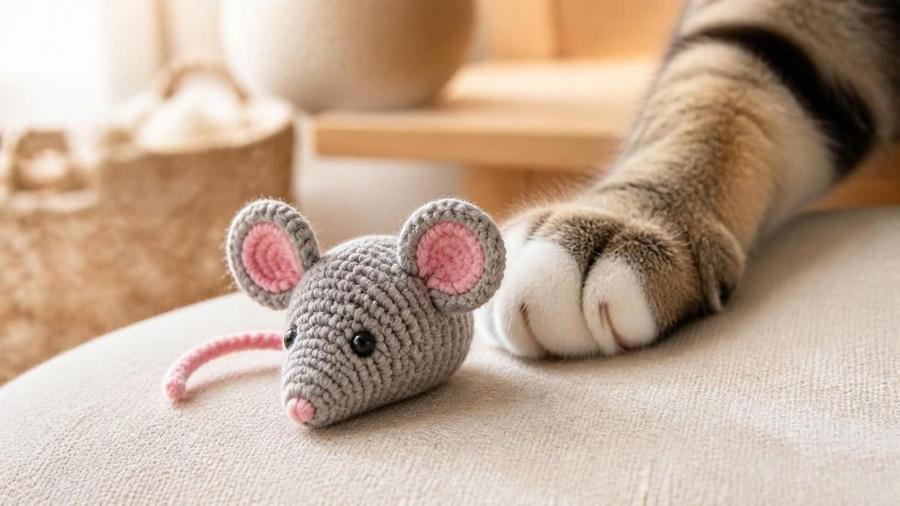
I made my first crochet cat toy not for a student but for my own cat, a demanding tabby who ignored every expensive toy I'd bought her and instead chased a balled-up scrap of yarn under the sofa for hours. It seemed only fair to crochet her something proper. The result was this little mouse — the same increase-and-decrease shaping I already used for amigurumi balls, just stretched into a body with a chain tail and two small ears. She's on her third one now, and in my classes I've learned this crochet cat toy pattern doubles as a wonderful gift for the cat people in a beginner's life. It's a quick evening project that uses almost no yarn, and watching a cat tear around after something you made is its own reward.
The trick to a cat toy is thinking like the cat, not the crafter. Cats bat, bunny-kick, and chew, so the toy has to survive all three. That means tight stitches, a securely sewn tail and ears, and nothing a cat can pull loose and swallow. Get those details right and you've made something a cat will genuinely prefer to the expensive shop toys it ignores.
Materials
- Small amount of worsted-weight yarn (under 20 yards)
- 3.5mm hook (smaller than standard, for tight amigurumi stitches)
- A pinch of polyester fiberfill stuffing, optionally mixed with a small amount of catnip
- Stitch marker, to track the start of each round
- Scissors
- Yarn needle, for closing and weaving in ends
Abbreviations (US terms)
| Abbr. | Means |
|---|---|
| ch | Chain |
| sc | Single crochet |
| st(s) | Stitch(es) |
| inc | 2 sc in same stitch (increase) |
| dec | Sc 2 sts together (decrease) |
| rnd(s) | Round(s) |
See our abbreviations glossary for the full list including UK terms.
Gauge
Gauge isn't critical for this small project — the goal is tight, even stitches that hide the stuffing rather than an exact measurement. If you can see stuffing through your stitches, try a smaller hook.
Notes
- Written in US terms and worked in a continuous spiral, same technique as our mini amigurumi ball pattern. If you're new to starting in a ring, see our magic ring tutorial first.
- Use a smaller hook than you'd normally pair with this yarn weight to keep stuffing (and catnip) from showing through.
- Mix a pinch of catnip into the stuffing if desired, rather than leaving it loose, and stitch the closing seam securely.
Pattern
Make a magic ring, 6 sc into ring, place marker. (6 sts)
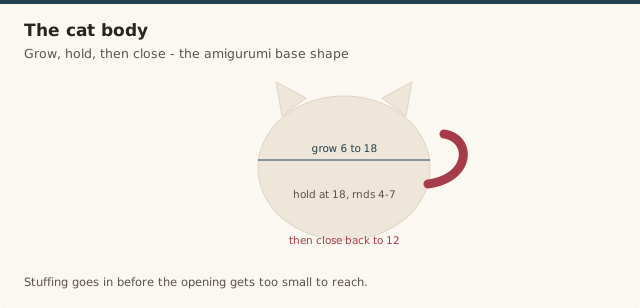
Inc in every st around. (12 sts)
[sc 1, inc] around. (18 sts)
Sc in every st around, no increases or decreases. (18 sts each round)
[sc 1, dec] around. (12 sts)
Begin adding stuffing now, mixed with catnip if using, before the opening gets too small.
Dec in every st around. (6 sts)
Add a bit more stuffing to fill evenly.
Make a magic ring, 5 sc into ring. Fasten off, leaving a short tail for sewing on.
Chain 12. Fasten off, leaving both ends free for sewing.
Close the body opening by threading the tail through the front loops of the last round and pulling tight. Sew the two ears onto the top of the body, and sew one end of the chain tail onto the back. Weave in all ends securely, going through several stitches rather than just a knot before trimming.
A fast beginner walkthrough of crocheting a small cat toy, useful for seeing the quick shaping and closing technique.
Choosing safe yarn & fill
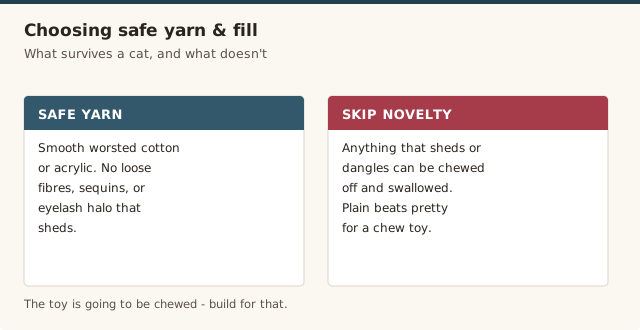
For a toy that's going to be chewed, plain is better than pretty. A smooth worsted-weight cotton or acrylic with no loose fibres, sequins, or eyelash halo is the safe choice, because anything that sheds or dangles can be chewed off and swallowed. I skip novelty yarns here entirely, even though they're tempting. For the fill, polyester fiberfill is fine on its own, and a pinch of dried catnip mixed into the stuffing is the classic upgrade — just make sure it's thoroughly blended in so it can't shift into one pocket. If you want more detail on why fibre choice matters for toys, our best yarn for amigurumi guide covers the ground.
Catnip, crinkle & other fillings
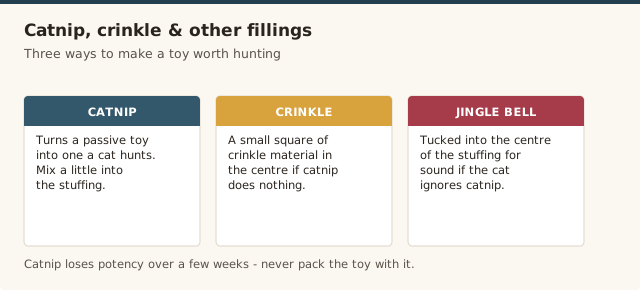
Catnip turns a passive toy into one a cat actively hunts, but it loses potency over a few weeks, so I mix a small amount into the stuffing rather than packing the toy with it. If your cat doesn't react to catnip, try a small square of crinkle material or a jingle bell tucked into the centre of the stuffing — the rustle or ring is what gets some cats going. Whatever you add, it has to be fully enclosed so it can't work loose, and nothing hard should sit right at the surface where a determined chewer could worry at it. This is the same keep-it-simple principle as our amigurumi ball pattern, just tuned for a cat's teeth.
Making it last through rough play
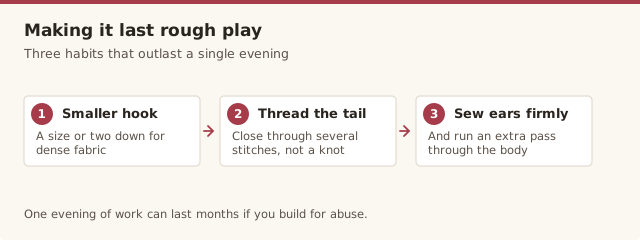
A cat toy made in one evening can still last months if you build for abuse. Use a hook a size or two smaller than the yarn label suggests so the fabric is dense and hard to snag, and close the body by threading the tail through several stitches rather than relying on a single knot. Sew the ears and tail on through their bases multiple times, because those are the first things a cat's back claws find. Then make two or three at once — the best way to make a toy last is to rotate it, and spares mean you're never caught without one when a seam finally gives.
Fairfield Poly-Fil Premium Fiber Fill, 32oz
Plenty for this small toy and every future amigurumi project, staying fluffy without clumping over time.
View on Amazon →Common mistakes & fixes
Frequently asked questions
Is it safe to put catnip inside a handmade crochet toy?
Yes, as long as the toy is stitched tightly and securely closed. Mix a small amount of loose or crushed catnip in with the stuffing rather than leaving it loose, and check the seams periodically for wear.
What yarn is safest for a cat toy?
A plain worsted-weight cotton or acrylic yarn without loose fibres, sequins, or novelty textures is safest, since pets can chew and potentially swallow loose bits.
How do I make sure the toy stays closed if my cat plays rough?
Use a smaller hook than the yarn label suggests for tighter stitches, and weave the closing tail through several stitches before trimming rather than a simple knot, which can work loose over time.
Can I make a crochet cat toy without catnip?
Yes — leave the catnip out entirely or replace it with a small crinkle material or bell tucked inside the stuffing. Just make sure anything added is securely enclosed so it can't work loose.
How do I know if a crochet cat toy is too worn to keep using?
Check the seams and surface before each play session, and retire the toy if any yarn has frayed, the stuffing is poking through, or the closing seam has started to loosen. For a toy that gets batted daily, it's worth making a few spares so you can swap them out before they wear down.
Can I put a bell inside the toy?
Yes — a small jingle bell tucked into the centre of the stuffing gives cats that don't react to catnip something to chase. Make sure it's fully enclosed and can't work its way to the surface where a determined chewer could worry at it.
How long does a crochet cat toy last?
With tight stitches and reinforced seams, one toy can last weeks or months of regular play. Rotating a few spares and retiring any toy once a seam loosens is the best way to keep play safe and fun.
CrochetGuides is a participant in the Amazon Services LLC Associates Program. As an Amazon Associate we earn from qualifying purchases, at no extra cost to you.