Free Crochet Basket Pattern for Beginners
A flat single-crochet circle that turns a corner and climbs into a sturdy basket — one hook, no seaming.
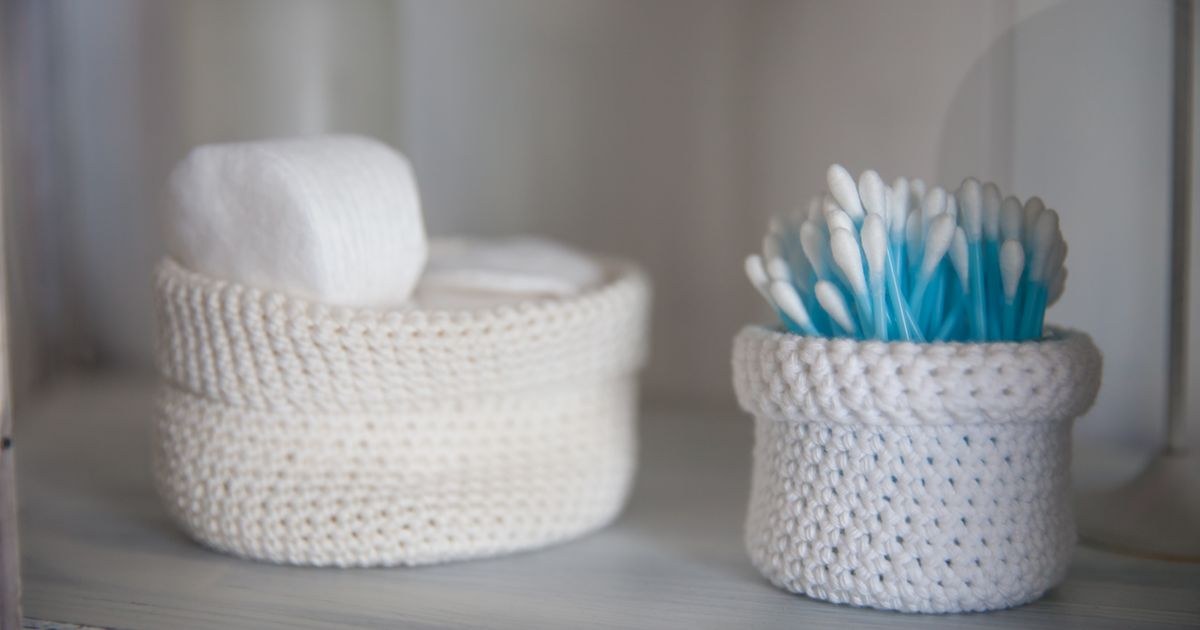
My first basket was a disaster, and it is still the project I hand new students when I want to prove a point about yarn choice. I crocheted the whole thing in a soft, squishy acrylic because it felt lovely in the skein, then set it on the shelf and watched it slump into a sad, flopping bowl within a week. Nothing about my stitching was wrong — the yarn was simply too soft to hold a wall. The moment I remade it in a stiff cotton, the exact same stitches stood up on their own. A crochet basket is really just a flat circle that learns to climb, and once you understand that, you can shape one in any size you like, from a two-inch ring dish to a laundry basket you can stand in.
What you need
- Bulky/#5 cotton yarn (or two strands of worsted cotton held together), around 150–200g for a small basket
- 6mm hook (drop to 5.5mm if your tension runs loose)
- Stitch marker
- Yarn needle
You do not need any fancy stitches for this pattern. If you can make a chain and a single crochet, you can make this basket. The only slightly clever bit is working in the round, and there is a whole guide to that if you want a refresher before you start.
Choosing yarn for structure
The single biggest decision in this project is the yarn, because the yarn is what holds the basket upright. A basket has no frame, no stuffing, and no wire — it is only fabric, so that fabric has to be stiff enough to support its own weight. I learned this the expensive way with the acrylic bowl I mentioned earlier, and I have watched dozens of students make the same choice because soft yarn is simply nicer to hold in the shop.
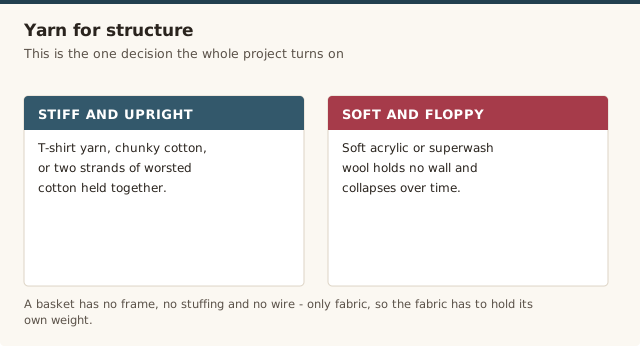
What you want is something with no drape. T-shirt yarn is my favourite for baskets because it is thick, dense, and holds a crisp edge almost like rope. Chunky cotton is a close second and comes in far more colours. If you only have worsted cotton to hand, hold two strands together and treat them as one — that doubles the weight and stiffness without buying anything new. Our yarn weight guide covers how doubling strands changes your hook size. What you should avoid for a self-standing basket is soft acrylic, alpaca, or superwash wool: they are wonderful for scarves, but they are the reason a basket flops.
Hook size matters too. Go a size or two smaller than the yarn label suggests so your stitches come out dense rather than open. A tightly crocheted wall is a stiff wall; a loose, gappy one will lean. If in doubt, crochet a small swatch and stand it on its edge. If it folds over on itself, tighten up before you start the real thing.
Crocheting the base
The base is a flat circle, and every flat single-crochet circle grows by six stitches per round. Those six increases are spaced further and further apart as the circle gets wider, which is what keeps it lying perfectly flat instead of cupping or ruffling. You will work in a continuous spiral, so put your stitch marker in the first stitch of each round and move it up as you go.
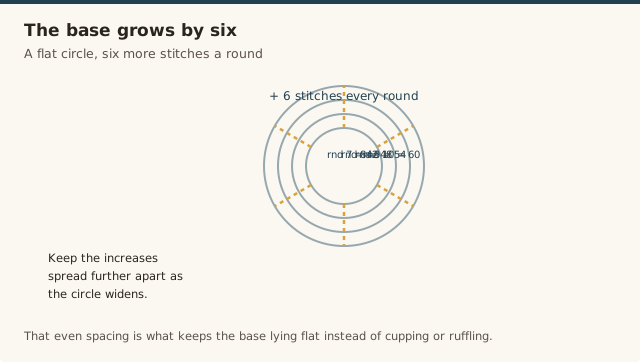
Start with a magic ring — it gives you a tightly closed centre with no little hole. Work six single crochet into the ring, then pull the tail to close it.
Base increases
- Round 1: 6 sc in magic ring (6)
- Round 2: 2 sc in each st around (12)
- Round 3: *sc in next st, 2 sc in next st* around (18)
- Round 4: *sc in next 2 st, 2 sc in next st* around (24)
- Round 5: *sc in next 3 st, 2 sc in next st* around (30)
- Round 6: *sc in next 4 st, 2 sc in next st* around (36)
- Round 7: *sc in next 5 st, 2 sc in next st* around (42)
- Round 8: *sc in next 6 st, 2 sc in next st* around (48)
Check your counts as you finish each round: 6, 12, 18, 24, 30, 36, 42, 48. If a round comes out one stitch off, find the mistake now rather than three rounds later. This is where most beginners trip up, and the fix is always to frog back to the round that was correct and work it again — there is a full walkthrough of how to crochet in the round if your circle starts to wobble.
Your base should now be a flat disc around 14–15cm across. If it cups, your increases are too far apart; if it ruffles, they are too close. A flat base is worth the effort, because the walls will only ever be as tidy as the circle they grow out of.
Working up the sides
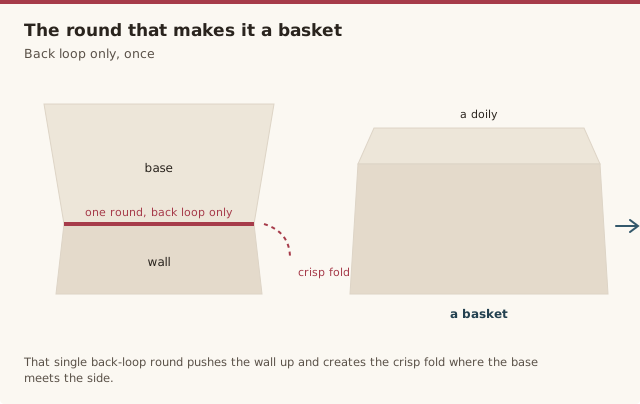
Now comes the trick that turns a doily into a basket. Instead of increasing, you will work one round through the back loop only, which pushes that round up and creates a crisp fold where the base meets the wall.
Turning the corner
- Round 9: sc in the back loop only of each st around (48)
- Rounds 10 onward: sc in both loops of each st around, with no increases (48 per round)
Work the back-loop round tightly — it is the hinge of your whole basket, and a loose hinge lets the walls flop outward. From round 10 on, it is just single crochet, around and around, keeping the count at 48 every single round. No increases, no decreases, no cleverness. The sides will start to climb on their own within two or three rounds.
Keep going until the basket is as tall as you like. A short one that holds a cotton-wool ball makes a lovely bathroom tidy; a tall one takes longer but holds rolling pins and wooden spoons. When you reach the height you want, slip stitch to the next stitch to even out the little step at the end of the spiral, fasten off, and weave in the tail.
Making it stand up straight
If your basket wobbles or the rim sags, the problem is almost never the pattern — it is one of three things, and all three are easy to fix. First, tension: single crochet worked with a relaxed hand produces soft, stretchy fabric, and soft fabric leans. Crochet deliberately tight, or drop down half a hook size until the fabric feels firm to the pinch.
Second, yarn: as I have said, a stiff cotton or t-shirt yarn will do more for your basket than any amount of careful stitching. Third, weight: if you are making a large basket, consider holding two strands together even when the yarn is already chunky. The extra density is what lets a big basket keep its mouth open when it is empty.
There is one more trick I keep up my sleeve for baskets that are finished but still a little soft: sew a length of cotton cord or twine around the inside of the top edge, tacking it down every few centimetres. It acts like an invisible drawstring that keeps the rim round, and it can rescue a basket that has been used and stretched for years.
Sizing your basket
Because the pattern is just a formula, resizing it is simple once you see how it works. The base keeps growing by six stitches per round for as long as you want it to, and the walls then keep that final count the whole way up. So if you want a wider basket, keep increasing for another round or two before you work the back-loop round — round 9 would take you to 54 stitches, round 10 to 60. For a smaller basket, stop at round 6 or 7 instead of round 8.
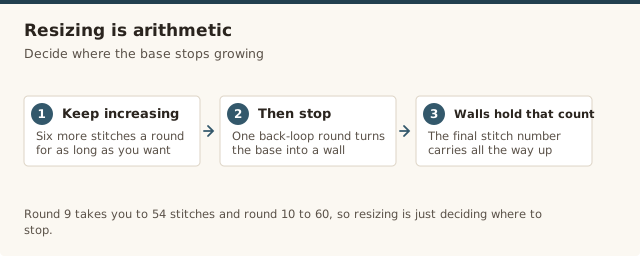
The same logic works for height. A two-inch-tall basket is just the same base with a couple of side rounds; a blanket basket is the same base with forty side rounds. The stitch count never changes once you start the sides, which is what makes this such a forgiving first project — you can put it down mid-wall and pick it up a week later without losing your place, as long as the stitch marker is still in.
Care & uses
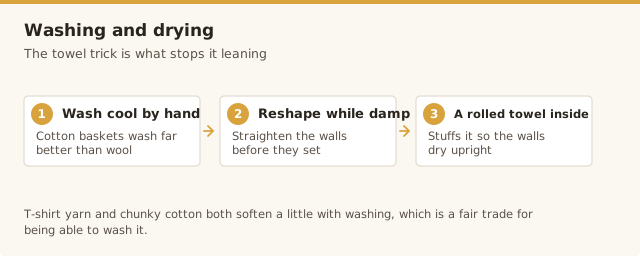
Cotton baskets wash far better than wool or acrylic ones. Spot clean small marks with a damp cloth, and for a proper wash, hand wash in cool water with a gentle soap and lay the basket flat to dry. Reshape it while it is still damp, and stuff it with a rolled towel while it dries so the walls set upright instead of leaning sideways. T-shirt yarn and chunky cotton will both soften a little with washing, so expect to reshape each time.
As for what to do with them, the list is endless. I keep a shallow one on the bathroom shelf for cotton pads and hair ties, a taller one by the front door for keys and post, and a big floppy one in the living room for the half-finished projects I refuse to put away. They also make the most practical handmade gift going — line one with a tea towel and fill it with treats, and you have a present that is already wrapped. If you enjoy the satisfying round-and-round rhythm of this project, a plant hanger uses the same idea, and our granny square bag pattern is a natural next step when you want something wearable.
Common mistakes & fixes
Fix: this is yarn, not technique. Remake it in stiff cotton or t-shirt yarn, hold two strands together, or crochet with a smaller hook so the fabric is dense enough to hold its own weight.
Fix: you are gaining stitches somewhere. Count every round — the walls must stay at 48 — and watch for two single crochets squeezed into one stitch where the round joins.
Fix: your increase spacing has drifted. Rip back to the last flat round and check the counts are 6, 12, 18, 24, 30, 36, 42, 48 — an increase one stitch too early or late throws the whole circle off.
Fix: the back-loop round was worked too loosely. Unravel a round or two and rework round 9 with firm tension, or use a hook half a size smaller for that single round.
Fix: keep a stitch marker in the first stitch of every round and move it up as you complete each one. In a continuous spiral there is no obvious seam, so the marker is the only clue you have.
Fix: finish with a slip stitch into the next stitch before fastening off, which feathers the join into a smooth edge, and thread the tail through a few stitches to hide it.
A demonstration of working a flat base and turning it up into basket sides, helpful for seeing the back-loop round in action.
Frequently asked questions
What yarn works best for a crochet basket?
A stiff yarn holds a wall best. Use t-shirt yarn, chunky cotton, or two strands of worsted cotton held together. Soft acrylic or superwash wool will flop over time.
Why is my basket floppy and collapsing?
It is almost always the yarn or the tension. Soft yarn or loose stitches can't support a wall, so switch to a stiff cotton or t-shirt yarn, hold two strands together, or drop down a hook size to tighten your stitches.
Can I make the basket bigger or smaller?
Yes. For a larger basket, keep adding base rounds with six increases per round before starting the sides. For a smaller one, stop increasing sooner. The side rounds always keep the same stitch count, no matter the size.
Do I have to start with a magic ring?
No. If a magic ring feels fiddly, chain 2 and work the first 6 single crochet into the second chain from the hook, then pull the tail to close the small centre hole.
How do I wash a crochet basket?
Spot clean small marks, or hand wash in cool water and lay flat to dry. Reshape the basket while it is still damp, and stuff it with a towel while drying so the walls dry upright rather than leaning.
What can I use a crochet basket for?
Bathroom storage, desk tidies, plant pot covers, a yarn bowl, or a blanket basket. A taller version makes a tidy wastepaper or laundry basket, and a squat one holds keys and mail by the door.
How do I keep the sides from leaning outward?
Work the back-loop-only round tightly, keep your tension even all the way up, and use a stiff yarn. If a finished basket still leans, sew a length of cord inside the top edge to firm it up.
CrochetGuides is a participant in the Amazon Services LLC Associates Program. As an Amazon Associate we earn from qualifying purchases, at no extra cost to you.