Crochet Christmas Stocking Pattern
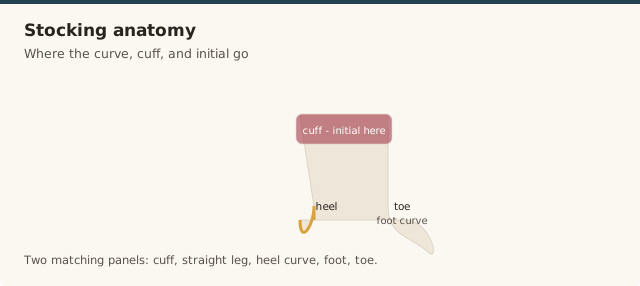
A cozy, textured stocking worked flat in two pieces, with a cable-look cuff and a sturdy hanging loop.
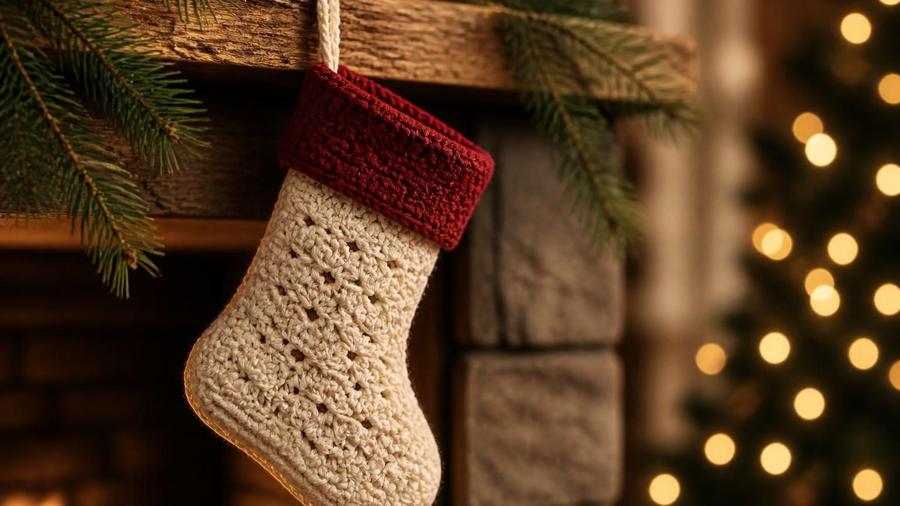
The mistake I see most often when students make a crochet Christmas stocking is a lopsided second panel. Someone will crochet the first one beautifully, then relax on the second and end up with two shapes that don't quite match when it's time to seam them together — I've watched that seam gape more times than I can count. My advice is always the same: keep the first panel beside you as a living ruler, and count every row. That's why this stocking is worked flat in two simple pieces — the shaping is gentle enough for a confident beginner to finish in an evening, and the cable-look cuff makes it look far more complicated than it is.
Over the years I've learned the two things that make a handmade stocking feel special rather than homemade are a matching pair of panels and a cuff that actually folds. I keep a printed paper template beside me when I make the second panel, because your eye alone won't catch a half-stitch drift until the seam is already fighting you. The ribbed cuff is the second secret — work it slightly loose so it folds over the top without pinching, and the whole thing suddenly looks far better than the effort it took.
What you need
- Worsted weight (#4) yarn: main color (cream/off-white) and contrast color (red or green), about 150–180 yards total
- 5.0mm (US H/8) hook
- Stitch markers
- Yarn needle
- Optional: piece of cardboard or a printed template to keep both panels the same size
Panel shaping (make 2)
Steps
- Chain 22 in main color. Work hdc in the 2nd chain from hook and each chain across (21 sts). Chain 1, turn.
- Work even in hdc (or hdc3lo for texture) for 10 rows, keeping 21 sts in every row.
- Begin the foot shaping: at the start of the next row, work 2 sc into the first stitch to start rounding the heel corner, then continue in pattern to the end. Repeat this small increase every other row for 4 rows.
- For the toe, decrease 1 stitch at the start and end of every row for 6 rows (hdc2tog at each end) until about 9 sts remain.
- Fasten off, leaving a long tail for seaming.
Assembly
Steps
- Lay the two panels together, right sides facing.
- Using the yarn tail and a whip stitch or slip stitch seam, join around the toe, foot, and heel curve, leaving the entire top (ankle) edge open.
- Turn right side out.
Cuff and hanging loop
Steps
- Join contrast color at the top edge. Work 1 round of sc evenly around the opening to even out the stitch count, join with a slip stitch.
- Work the cuff in rows of front-post/back-post double crochet (or simple hdc if you prefer a plain cuff) for 5–6 rows, to about 3 inches tall.
- Fold the cuff down over the top of the stocking.
- Chain 12–15 at the top back seam, slip stitch to the top edge to form a hanging loop, then fasten off and weave in all ends.
Sizing note
This pattern makes a stocking roughly 16 inches from cuff to toe — a classic mantel size. For a larger stocking, start with a longer foundation chain and add extra rows before shaping the foot; for a mini ornament-sized version, halve the chain and row counts. If you're adjusting the size, our fixing project size guide walks through the same numbers step by step.
Choosing yarn and colours
A worsted weight is the sweet spot here: heavy enough that the stocking holds its shape when stuffed with small gifts, light enough to work quickly. Cream and red is the classic pairing, but cream against forest green, navy, or a soft grey all read just as festive and hide little scuffs better. If you want the finished piece to feel richer, a wool-blend worsted gives the textured body more definition than a slick acrylic.
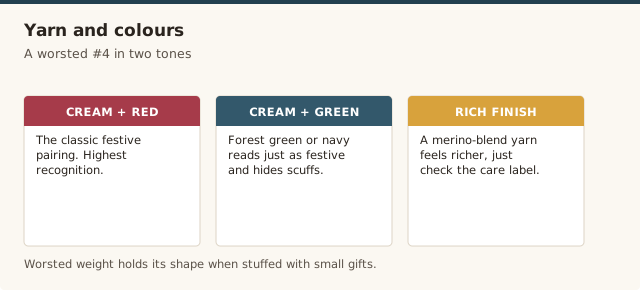
Whatever colours you pick, make sure the contrast between the body and the cuff is strong, because the folded cuff is the detail that carries the whole look. If you're new to choosing yarn, the yarn weight guide will help you swap between worsted, DK, and chunky without changing the finished size more than you intend.
Keeping the two panels identical
The single biggest cause of a disappointing stocking is a second panel that doesn't quite match the first, so I treat the first panel as a living template. Lay it flat beside you and check the second panel against it every few rows — not just the stitch count, but the overall height and the curve of the foot, which is where a subtle drift shows up fastest. A stitch marker at the start and end of each shaping row keeps the increases and decreases in the same place on both pieces.
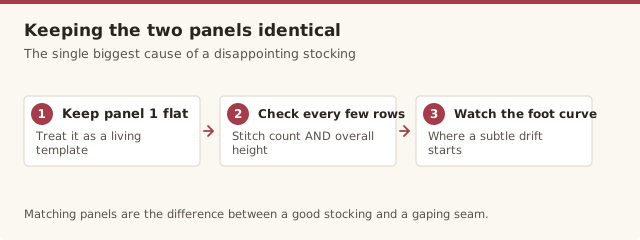
If the two panels still come out slightly off, don't force them together. Blocking the smaller one lightly — or easing the larger one with a touch more tension — brings them in line before you seam. Our guide to blocking crochet covers the gentle steam-and-pin method that works for a panel this size, and it's far kinder than wrestling two mismatched edges under a whip stitch.
Gifting and personalisation
A handmade stocking is a gift that comes out of the box every single year, so it's worth making it feel like theirs rather than anyone's. A single initial or name worked into the cuff in surface slip stitch, or a contrasting band stitched along the top edge, turns a generic stocking into a keepsake. I've also embroidered a simple snowflake or a tiny star on the body after finishing, which is faster than colourwork and just as personal.
If you're gifting to a child, keep the decoration simple and soft — no buttons or beads that could come loose, and stitch everything firmly so nothing can be pulled free. A fabric lining (covered in the FAQ below) adds a bit of extra polish and stops small presents from catching on the inside of the stitches. If you're making several in a run and want them identical, our fixing project size guide shows how to scale the panel counts without guessing.
A full stocking walkthrough, useful for seeing how the heel, foot, and cuff sections fit together.
Common mistakes & fixes
Fix: keep the first panel flat beside you as a template and check every few rows. If they're already finished and off, lightly block the smaller one or ease the larger one with slightly tighter tension before seaming.
Fix: work the seam stitch by stitch rather than skipping, and keep an even tension as you go. A slip-stitch seam from the outside hides gaps better than a whip stitch if the edges aren't perfectly even.
Fix: work the cuff rounds more loosely than the body, and add an extra stitch or two around the opening if it still pulls. The cuff needs to clear the folded edge comfortably, so err on the side of looser here.
Fix: chain a longer loop than you think you need and reinforce it by working a round of single crochet back over the chain before attaching. Anchor both ends firmly with several stitches so the weight of the filled stocking doesn't pull it loose.
Fix: take the time to lay both panels right sides together and check the orientation before you seam, then turn it right side out before adding the cuff. A quick pin at the toe and heel keeps the two pieces from shifting as you work.
Fix: use a firmer tension or a slightly smaller hook so the fabric is dense, and add a fabric lining inside for anything with pointy edges. The lining also keeps the stocking from stretching out of shape when it's filled.
Frequently asked questions
Can I make this without shaping the foot?
Yes — a simple rectangle folded in half and seamed on two sides makes an easier, boxier stocking that still hangs well.
What yarn weight works best?
Worsted (#4) gives a sturdy, huggable stocking. A chunkier yarn with a larger hook works too and finishes faster, but uses more yardage.
How do I keep both panels the same size?
Count your stitches and rows carefully, or lay the first panel flat as a guide while making the second.
How much yarn do I need for one stocking?
About 150–180 yards total — the pattern uses worsted weight in two colours, so one ball of each is usually plenty for a full-size stocking.
Can I line the stocking so small gifts don't poke through?
Yes — stitch a simple fabric lining in by hand or machine, leaving the cuff unfolded so the lining sits inside the stocking and doesn't show.
Can I add a name or initials to the cuff?
Yes — surface slip stitch or a simple embroidery stitch across the folded cuff is the easiest way to add a name or initials. Work it before folding the cuff down so you can judge the placement, and keep it simple so the stitches stay neat against the ribbing.
How do I wash a crochet stocking?
Hand-wash it in cool water and lay it flat to dry, especially if it has a fabric lining or wool-blend yarn. Avoid wringing, which can pull the seams out of shape, and reshape the foot and cuff gently while it's still damp.
CrochetGuides is a participant in the Amazon Services LLC Associates Program. As an Amazon Associate we earn from qualifying purchases, at no extra cost to you.