How to Change Colors in Crochet: The Clean Way
The last yarn over method and invisible joins for crisp, tidy stripes, colourwork, and amigurumi colour changes.
I've taught hundreds of people to change colours over the years, and the mistake that shows up in almost every single class is the same one: the student changes colour one stitch too late, on the first stitch of the new row instead of the last stitch of the old one. That single misplaced yarn over is the whole difference between a crisp, invisible join and a little jagged step of the old colour poking into the new stripe. A few years back a woman brought in a striped blanket she'd abandoned halfway through because, as she put it, every stripe "started with a hiccup." We unpicked two stitches, moved the colour change back one yarn over, and the hiccup was gone for good. That is what I want to teach you here: how to change colors in crochet the clean way, whether you're working flat, in the round, or on a tiny amigurumi head.
Choosing colours that work together
Before you touch a hook, it helps to know that the colour change itself is rarely the hard part — the hard part is usually picking colours that look good sitting next to each other. I've watched beginners agonise over a join that was perfectly clean, only to realise the real problem was that a pale pastel stripe was swimming against a muddy mid-tone and looked "dirty" at the boundary. The yarn wasn't dirty; the colours just had no clear relationship to one another.
The simplest way to keep things harmonious is to choose colours that share a similar value, meaning a similar lightness or darkness. If you squint at a palette until it almost goes blurry, colours with the same value will read as a similar shade of grey. Stripes made of colours with close values almost always sit together calmly, even when the hues are different. For stronger contrast, pair a light, a medium, and a dark of the same family — a cream, a dusty rose, and a deep maroon will always behave, where three random brights can fight.
Also match your fibres and weights. A colour change between a fluffy wool and a slippery bamboo of a different thickness will leave an uneven, lumpy join no matter how cleanly you work it. If you're making your first striped project, use the same yarn in two or three colours so every stitch behaves the same way. If you're still getting comfortable reading what a label is telling you, our guide to reading a crochet pattern walks through the basics of yarn weights and ball bands.
Changing colour at the end of a row or round: the last yarn over method
This is the method I teach first, because it fixes ninety percent of colour-change problems on its own. The principle is simple: a stitch isn't finished until you've pulled the last loop through the loops on your hook, and that final pull-through decides which colour the top of the stitch will be. If you complete that final pull-through with the new colour, the top of the last stitch in the old colour becomes the new colour — and the next row starts clean, with no stray strand of the old shade hanging at the edge.
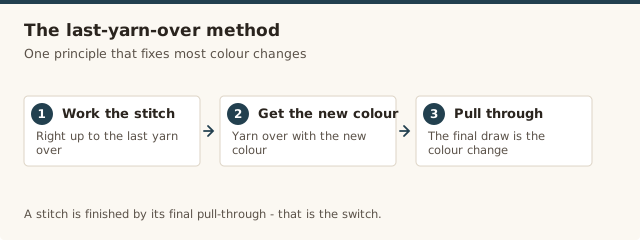
The mistake most people make is finishing the entire last stitch in the old colour, chaining, and then trying to introduce the new colour on the first stitch of the next row. That leaves the old colour as the top of the final stitch, which pokes into the new row and creates the "step" or "jog" everyone hates. Changing one yarn over earlier is the whole fix.
Steps
- Work to the final stitch of the row or round and stop before the last yarn over of that stitch. With US single crochet you'll have two loops on your hook; with double crochet, two loops as well.
- Drop the old colour, leaving a tail of about 6 inches (15 cm), and lay the new colour across your hook.
- Yarn over with the new colour and pull it through the remaining loops on the hook. The stitch is now complete, and the top of it is the new colour.
- Work your turning chain in the new colour, then turn your work if you're working in rows.
- Continue the next row or round in the new colour, leaving the old yarn tail hanging to be woven in later.
- Give both the old and new tails a gentle tug to even the tension before you keep going.
If you're working in joined rounds rather than rows, the same rule applies: change on the final yarn over of the last stitch of the round, then work your joining slip stitch and the turning chain of the new round in the new colour. The result is a round that begins in the new colour with no old-colour speck at the join.
Changing colours mid-row
Sometimes you need to change colour in the middle of a row or round — for a motif, a block of colourwork, or a decorative stripe that doesn't run the full width. The technique is identical to the end-of-row change; you just do it wherever the new colour needs to begin.
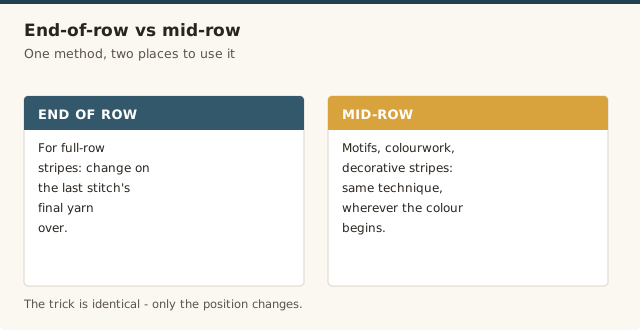
Work to the point where the new colour should start, then complete the final yarn over of that stitch with the new colour. That positions the boundary exactly where you want it, with the top of the change-over stitch already in the new shade. If the new colour only runs for a few stitches and the old colour needs to resume afterward, drop the old colour and pick up the new one for those stitches, then change back the same way — always on the last yarn over of the stitch before the colour you're switching to.
For colourwork where you're carrying an unused colour behind the work — like a striped pattern or a simple geometric chart — the unused yarn travels along the back of the row as a "float." Keep those floats relaxed, not pulled tight, or your fabric will pucker and the carried yarn will show through the front. A float should lie flat against the back of the work, and you should be able to fit a finger under it without stretching it.
The invisible colour change for amigurumi and in-the-round work
Amigurumi is where colour changes get the most scrutiny, because the join sits on a small, round surface and every tiny imperfection is easy to spot. The trick here is the same last-yarn-over principle, applied to continuous (spiral) rounds. Done well, the change is genuinely hard to find.
Steps
- Work to the last single crochet of the round in the old colour. Insert your hook and pull up a loop, leaving two loops on the hook.
- Yarn over with the new colour and pull through both loops. The top of this final stitch is now the new colour, so there's no old-colour "step" at the start of the next round.
- Don't chain or slip stitch — simply work the first stitch of the new round directly into the next stitch, exactly as you would in a continuous round.
- Place your stitch marker in the first stitch of the new round as usual, and continue in the new colour.
The reason this looks invisible is that the top of the last stitch is now the new colour, so the round appears to begin seamlessly rather than with a visible colour jog. If you're working in the round and still see a slight diagonal "seam" wandering around your piece, that's normal for continuous rounds — it's the nature of a spiral, not a mistake in your colour change.
Carrying yarn up the side vs cutting it
When you're working stripes that repeat the same two or three colours every couple of rows, cutting the yarn at every change leaves you with a forest of ends to weave in. Carrying the unused colour up the side of the work lets you skip most of that. The carried yarn simply rides up the edge and waits until its colour comes around again.
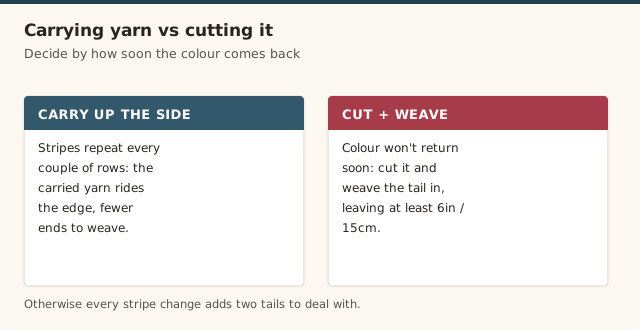
To carry yarn up the side neatly, work your turning chain, then lay the carried yarn along the edge and work your first stitch over it so it's trapped inside the fabric. Alternatively, give the carried yarn a single twist around the working yarn at the start of each row before you work the first stitch, which anchors it and keeps it from leaving a long, loose loop. When you come back to that colour a few rows later, the strand is already waiting at the edge — pick it up and change colours on the last yarn over as usual.
There are limits to carrying. If the gap between uses is long — say ten or twelve rows — the carried strand becomes a visible sag at the side, and it's cleaner to cut and weave in a new tail. A good rule of thumb I share with students: carry yarn for short, frequent repeats, and cut for long gaps. Carrying across the middle of the work (as floats) is only worth it when the distance is short, because long floats catch on fingers and pull the fabric tight.
Weaving in ends so they stay put
A colour change isn't finished until the tails are dealt with, and nothing spoils tidy work faster than a little tail poking out of the front a month later. Weaving in ends properly is mostly a matter of leaving enough tail to work with and changing direction as you go.
Leave at least 6 inches (15 cm) on each colour change. Thread the tail onto a yarn needle and weave it back and forth through the backs of the stitches, going in one direction for an inch or so, then doubling back the other way. Weaving in a zigzag — rather than a single straight line — locks the tail in place, because the changes in direction create friction that stops the yarn sliding free when the fabric is washed or stretched. If your yarn will allow it, split the plies with your needle as you pass through a few stitches for extra grip.
And no, don't knot. I know the urge — a knot feels permanent — but knots are exactly what fails first. A hard knot can work its way to the front of the fabric and pop loose, and it leaves a lump you'll always be able to feel. A well-woven tail is more secure and completely invisible. When you're joining separate pieces, weave ends along the seam between them, which is already a natural place for yarn to hide — the same principle we use when we join granny squares.
Avoiding visible seams and colour jogs
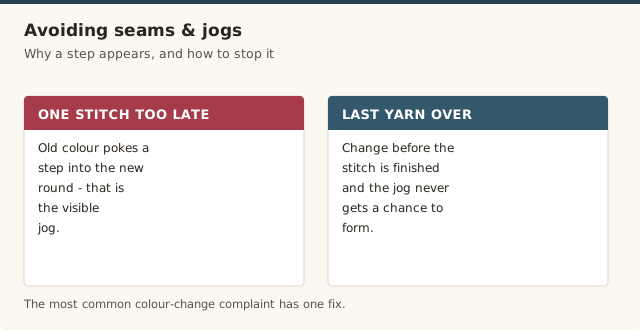
The little "step" you see at the start of a new round or stripe is called a colour jog, and it's the single most common complaint about colour changes. The root cause is almost always the same: the new colour was introduced one stitch too late. Change on the last yarn over of the previous stitch, and the jog disappears before it can form.
Beyond that, a few habits keep seams from showing. Keep your tension even through the change — that final pull-through should be snug, but not so tight that it cinches the stitch closed. When a pattern uses a turning chain that counts as a stitch, the chain itself can look like a gap or a hole at the start of the row; working a chainless "standing" stitch in the new colour in its place will close that gap and read as a much cleaner edge. And in continuous rounds, remember that a slight diagonal seam is normal and will always be there — the goal is a tidy, even one, not a perfectly straight line.
If something still looks off after a colour change, stop before you've worked a whole row on top of it. It is far easier to unpick two stitches than a full round. My guide to fixing common crochet mistakes covers how to back up a few stitches without losing your place.
Common mistakes & fixes
Frequently asked questions
What does "change colour on the last yarn over" mean?
It means you finish the final stitch of the old colour by pulling the new colour through the last loops on your hook, so the top of that stitch becomes the new colour. This places the change exactly at the boundary between rows or rounds instead of one stitch into the new colour.
How do I change colours in amigurumi without a visible line?
Use the invisible change: on the last single crochet of the round, complete the final pull-through with the new colour, then continue the next round in the new colour. Because the top loop of the last stitch is the new colour, there is no old-colour step at the start of the round.
Can I carry yarn up the side instead of cutting it?
Yes, for stripes worked flat you can carry the unused colour up the side, twisting it or working it into the first stitch of each row so it lies flat along the edge. For colourwork across the middle of a row, carry the yarn behind the stitches instead and keep the floats loose.
Why does my colour change leave a gap or a jagged step?
Usually because the change was made on the first stitch of the new row rather than the last stitch of the old one, or because the new loop was not pulled snug. Move the change back one yarn over and give the new yarn a gentle tug before continuing.
Do I tie a knot when changing colours?
No. Knots leave hard bumps that can work their way to the front of your work and come undone. Leave a 6-inch tail and weave it in securely in at least two directions instead.
How long should my yarn tails be when I change colours?
About 6 inches (15 cm) is a comfortable length to thread onto a yarn needle and weave in without slipping. Shorter tails are fiddly and can come loose; much longer ones simply mean more weaving at the end.
How do I weave in ends so they do not come undone?
Thread the tail onto a yarn needle and weave it back and forth through the backs of the stitches in two directions, splitting the plies if you can, then trim it close. Weaving in a zigzag rather than a straight line locks the tail in place.
CrochetGuides is a participant in the Amazon Services LLC Associates Program. As an Amazon Associate we earn from qualifying purchases, at no extra cost to you.