How to Count Crochet Stitches and Rows
Count by the base of the stitch and the number stops being a guess. Includes what counts, how to track rounds, and how to fix a miscount.
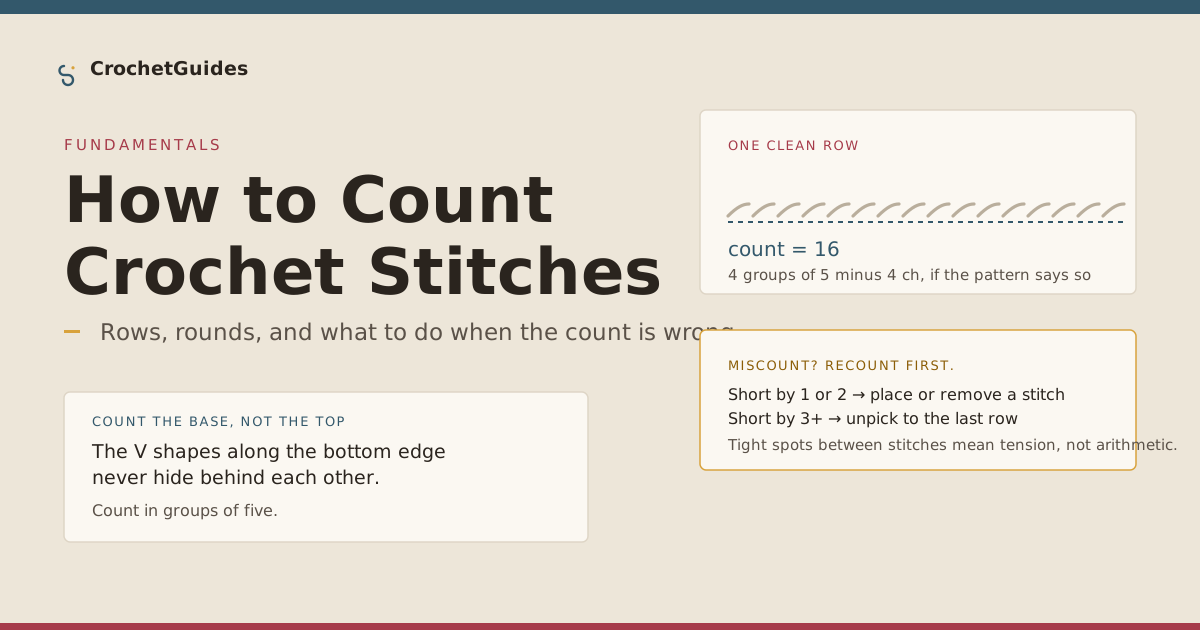
Nearly every crochet pattern starts with an instruction like "sc 30 around, joining with ss to the first sc". Until you can count reliably, that line is just a wall. This guide is about making that number dependable — counting the right part of the stitch, knowing what to include in the total, and fixing a count that turns out wrong.
Count by the base, not the top
Most people count by looking at the tops of the stitches, because the tops are what they can see from the front. That is exactly where counting goes wrong. In a soft, slightly fuzzy yarn, or in any stitch taller than a double crochet, the top loops lean into each other and merge visually. Two stitches can look like one, and a slip stitch sitting beside a taller stitch can hide a whole stitch behind it.
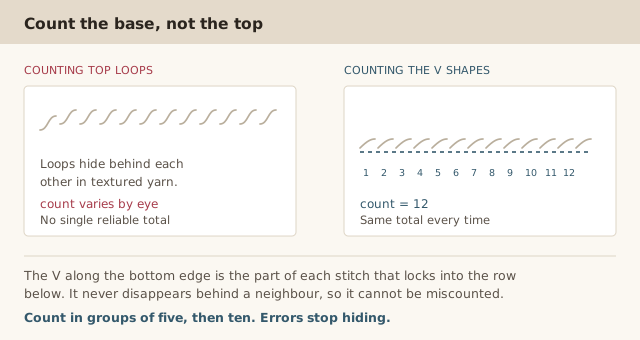
Turn the work so the row you have just finished is at the bottom. Along that bottom edge, each stitch shows a distinct V shape. Those V shapes sit flush against the row below and cannot overlap. Count those instead, and your count stops depending on how the yarn happens to catch the light.
What actually counts as a stitch
This is the part that catches out beginners, and it is worth getting straight before anything else. Some parts of a stitch are included in the count and some are not.
| Element | In the count? | Why |
|---|---|---|
| The chain turning chain | Yes | Your pattern's stitch total includes it as the first stitch of the new row. |
| A single chain in a chain space | Yes | A chain space counts as one stitch. That is why ch-1 often sits directly over it. |
| A slip stitch join | Yes | It is a stitch, and it replaces the first stitch of the round. This is where many off-by-one errors come from. |
| An increase | Yes, twice | An increase is two stitches in the space where you made it. Missed here, your count drifts by one each time. |
| A decrease | No | A decrease turns two stitches into one, so your total goes down by one. |
| A stitch marker | No, it is a tool | The marker is not yarn. Do not count it, but never work over it either. |
dc), the turning chain is ch-1 and it counts as the first stitch. Half treble (htr) turns with ch-2, and that also counts as the first stitch. If your pattern says "dc 20", you count all twenty including the turning chain. This is the single most common reason a row ends up one stitch short.
US readers: sc is ch-1 turning chain, hdc is ch-2, dc is ch-3. The same rule applies in both systems — the turning chain counts as a stitch.
A method that survives fuzzy yarn
Counting twenty stitches one at a time in soft mohair is genuinely hard, however good your eyesight. Counting in groups changes the problem, because you are comparing small equal chunks instead of tracking a running total in your head.
- Place a marker in the first stitch of the row or round. This is your zero point and your way back if you lose your place.
- Count by the bases, in a steady left-to-right or right-to-left direction. Always the same direction, or you will confuse yourself.
- Group in fives. Press your thumb down at each fifth stitch. Now you have four or five groups instead of twenty individual things to hold in your head.
- Count the groups out loud in tens. "Two groups of five, ten, three more, fifteen" is far more reliable than silent counting past twenty.
- Name the last stitch. Say "the last stitch is the one before the marker". Having it named makes a recount fast.
- Count backwards once to confirm. If you get the same number going the other way, you can trust it.
Two independent counts in opposite directions catch nearly every error. It feels slower than guessing, but it is much faster than unpicking four rows because you were one stitch short.
For long rows, a row counter app with a tap or a voice command works well. The important part is not the app — it is that you still count by the bases. A counter only records what you tell it, so it faithfully records a wrong count too.
Counting rows and rounds
Stitches and rows are counted differently because flat rows stack in a straight line while rounds spiral with no visible edge. Once you know the difference, both become easy to track.
Flat rows
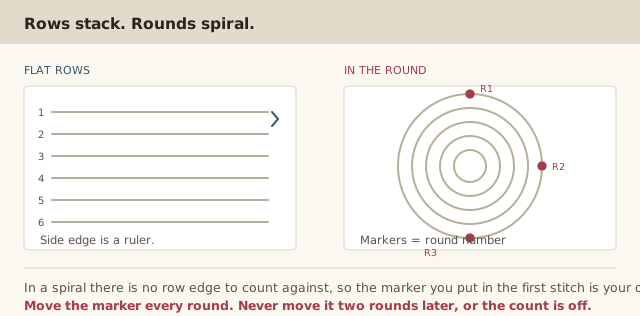
Flat rows are the easy case. Count from the foundation chain upward and keep the side edge as your reference line, so "row 12" always means the same thing. Write the number down at the end of each row if you are losing track, because a pen is faster and more reliable than memory halfway through a garment.
Rounds in the round
In a spiral there is no side edge, so the marker is your record of where a round begins. Put a marker in the first stitch of every round and move it forward one round as you go.
If your pattern was worked in joined rounds rather than a spiral, the join gives you a natural round boundary each time, so the marker matters less. Spiral is the default for amigurumi for a reason: the stitch count only needs checking when something changes it.
Starting a circle
Circles start with a chain ring or a magic ring, and the first round is where off-by-one errors begin. Two rules prevent most of them:
- When a pattern says "ch 3, then sc 2 in the same space", those 2 scs count as 2. When it says "sc 2 around", count 2.
- In a magic ring, work your increases into the ring in the round after, not into the starting chain. Working into the chain as well adds a stitch you did not count.
Our magic ring tutorial walks through the join-up step, which is where most first-round counts go astray.
Checking your count against the pattern
Counting tells you what you have. Checking tells you what you should have. Patterns usually state a target count, and comparing the two is what catches a silent error before it becomes nine rows of wrong.
| You counted | Pattern says | Most likely cause |
|---|---|---|
| Target − 1, once | One round | A missed increase, or a turning chain not counted |
| Target − 2, once | One round | One missed increase, or a slip stitch join counted twice |
| Target − 1, every round | Several rounds | An increase you stopped making, or a stitch you are skipping each round |
| Target + 1, every round | Several rounds | An extra stitch worked into the join, or two stitches in one space |
| Target correct, edge curling | Target correct | Not a count problem. It is tension or a different stitch in play. |
The pattern of the error is the diagnosis. A constant drift means a consistent mistake in one spot. A one-off means a single slip. And a correct count with a wonky edge tells you to stop counting and look at something else — our guide to fixing curling edges covers that, and fixing crochet mistakes covers the general triage.
When the count is wrong
First, do not immediately start unpicking. Most miscounts are either a miscount or a single skipped stitch, and both are quick to deal with once you know which.
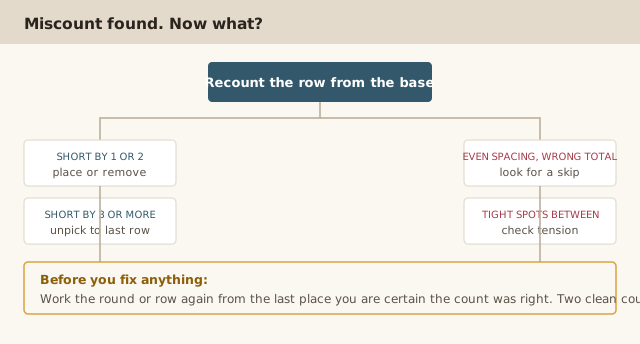
- Count again by the bases, in the opposite direction to your first count.
- Count again a second time if the two disagree. Two independent counts that agree are worth trusting.
- Walk the row looking for gaps. A skipped stitch shows up as a wider space or a stitch that sits at a slightly different angle.
- Compare to the pattern's target and work out the difference, then use the table above to identify the cause.
- Fix the smallest possible thing. Placing or removing one stitch is fast; unpicking four rows is not.
If you do need to unpick, working back along the row is usually faster than pulling the hook stitch by stitch. Our guide to unravelling a row covers the two methods, including the one that keeps the yarn from fraying.
Frequently asked questions
How do I count crochet stitches accurately?
Count the V shapes along the base of the row, the part that sits against the row below, rather than the loops on top. The bases cannot hide behind each other, so the total is consistent. Count in groups of five, work in the same direction every time, then count once backwards to confirm. Two independent counts that agree are far more reliable than one careful count.
Does the turning chain count as a stitch?
Yes. The turning chain is included in the row's stitch total, and it is treated as the first stitch of the new row. In UK terms, dc rows turn with ch-1 and htr rows with ch-2, both of which count. In US terms, sc turns with ch-1 and hdc with ch-2. If you are consistently one stitch short at the end of a row, forgetting this is the first thing to check.
Does a slip stitch join count as a stitch?
Yes. The slip stitch join is a stitch and it takes the place of the first stitch of the round, so your total still equals the round's target count. It does not add an extra stitch on top. This is a common source of confusion, because the join stitch sits right where the first stitch is, and people worry they have double-counted.
How do I keep track of rounds?
Put a stitch marker in the first stitch of each round and move it forward one round as you work. In a spiral there is no edge to count against, so the marker is the only reliable record of where a round began. Move it every round rather than leaving it and trying to remember, because that is precisely when the count goes wrong.
What if I keep losing count?
Count in smaller chunks instead of trying to hold a large number in your head. Groups of five marked with your thumb, then counted out loud in tens, removes the mental arithmetic. Write the number down at the end of each row. Working flat with a clear side edge as a reference also helps a great deal, and it makes the difference between a row you can find again and one you cannot.
My stitch count is correct but the piece looks wrong. What now?
A correct count with a wonky edge is a tension problem, not an arithmetic one. Tight stitches pull in and reduce your visible count, and a stiff stitch worked with loose tension changes the fabric without changing the number. Stretch the piece gently and look at it flat. Our curling edges guide and guide to gauge cover the causes, since consistent tension is what makes counting reliable in the first place.
CrochetGuides is a participant in the Amazon Services LLC Associates Program. As an Amazon Associate we earn from qualifying purchases, at no extra cost to you.