How to Increase and Decrease in Crochet
Every curved, tapered, or fitted crochet shape comes down to two simple moves: adding a stitch, or joining two into one.
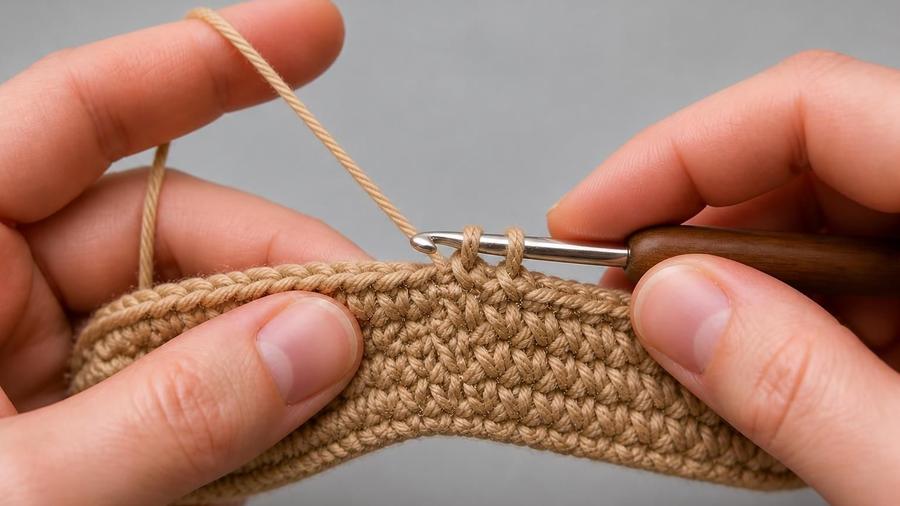
Somewhere in my first few months of crocheting, I made a flat circle that turned out shaped more like a taco shell than a circle, curling stubbornly upward no matter how hard I tried to press it flat. I hadn't miscounted my stitches exactly, I just hadn't understood that a flat circle needs a very specific number of new stitches added every single round to keep pace with its own growing circumference, and I'd been guessing at how many to add rather than following an actual increase count.
That taco-shaped circle was my introduction to what I now think of as crochet's two load-bearing techniques: increasing and decreasing. Almost nothing you'll ever make is a perfectly straight rectangle. Hats round off at the crown, sleeves taper toward the wrist, amigurumi curves in and out to make a head or a paw, and every one of those shapes is built from careful, deliberate increases and decreases, not from anything more exotic. Once you understand what each one actually does mechanically, and why a pattern asks for a specific number at a specific point, shaping stops feeling mysterious and starts feeling like simple arithmetic.
This guide covers both techniques in single crochet, since that's where they're used most often and most simply, along with how to read a pattern's shaping instructions, common places you'll use each one, and the troubleshooting that saves a lopsided project.
It's worth saying up front that neither technique is difficult on its own. An increase is one extra stitch worked into a spot that would otherwise get one; a decrease is two stitches folded into one. What actually takes practice is applying them at the right place, at the right count, consistently enough that the resulting shape comes out even rather than lumpy. That's a counting and pattern-reading skill more than a stitch-mechanics one, and it's the part this guide spends the most time on.
Working an increase
Steps
- Work a single crochet stitch into the next stitch as normal, completing it fully.
- Without moving to a new stitch, work a second single crochet into that exact same stitch.
- Continue to the next stitch and repeat as your pattern specifies.
That's the entire technique: two stitches where there would normally be one. Each increase you work adds exactly one stitch to your row or round's total count. A pattern might ask for a single increase somewhere in a row, or for increases spaced evenly around an entire round, depending on how much the piece needs to widen at that point.
Working a decrease
Steps
- Insert your hook into the next stitch and pull up a loop, but don't finish the single crochet yet. You should have two loops on your hook: your working loop plus the one you just pulled up.
- Insert your hook into the following stitch and pull up a second loop, without finishing that stitch either. You now have three loops on your hook.
- Yarn over once and pull through all three loops on the hook at the same time, completing both stitches as one.
This is often written as "sc2tog" (single crochet two together) in patterns. The mechanical result is that two separate stitches from the previous row become a single stitch in the current row, which reduces your total count by one for each decrease worked.
A note on invisible decrease
The decrease above works fine everywhere, but on a stuffed, smooth-surfaced project like amigurumi, the standard decrease leaves a small visible bump where the two stitches join, since both loops of each stitch get pulled together. A variation called invisible decrease avoids this by catching only the front loop of each of the two stitches instead of both loops, which removes most of the bump. It's worth learning as a separate skill once the basic decrease above feels comfortable; our invisible decrease for amigurumi guide covers it in full detail.
Reading a pattern's shaping instructions
Patterns describe increases and decreases with their own shorthand, and getting comfortable reading it makes shaping rounds far less intimidating. "Inc" or "2 sc in same st" both mean an increase; "dec" or "sc2tog" both mean a decrease. A round written as "[sc 4, inc] around" means you repeat that four-stitch-plus-increase sequence all the way around the round, which spaces the increases evenly rather than clustering them together. Evenly spaced shaping is what keeps a circle round instead of lopsided, or a taper smooth instead of stepped, so following the exact placement a pattern gives matters just as much as getting the count right.
Where you'll use each one
Increases show up constantly in flat circles and hat crowns, where each round needs to grow outward to keep the fabric flat rather than cupping inward; in amigurumi shaping, to round out a head or belly; and in garment construction, to widen a sleeve toward the shoulder or flare a skirt hem. Decreases show up in the mirror-image situations: closing the top of an amigurumi head or the tip of a limb, tapering a hat crown inward before finishing, narrowing a sleeve toward the wrist, or shaping a raglan yoke's diagonal seam lines.
Both techniques often appear in the same project at different points, and some pieces use them in the same round, increasing in one section while decreasing in another to create an asymmetric or curved shape, like a sleeve cap or a curved ear.
It's also worth knowing that increases and decreases aren't limited to circular shapes. Flat, row-by-row pieces use them constantly too: a triangular shawl grows with an increase at the start or end of every row, a fitted garment panel might decrease steadily up toward the armhole, and a mitten's thumb gusset increases outward before splitting off from the main hand. The mechanics are identical whether you're working in rounds or rows; only the placement and the shape you're aiming for changes.
Why spacing matters as much as the count
It's tempting to think that hitting the right final stitch count is all that matters, but where you place your increases or decreases within a round changes the shape you get even at an identical total count, which is a distinction that trips up a lot of otherwise careful crocheters. Increases clustered together in one spot will flare that section outward, useful for a deliberate ruffle but a problem if you wanted an even circle. Spread evenly, the same number of increases produces a smooth, symmetrical round instead. The same logic applies to decreases: bunching several together pulls that one area in sharply, while spacing them evenly produces a smooth, even taper. This is why patterns are so specific about exactly where each increase or decrease falls within a round, not just how many there are in total.
Common mistakes & fixes
Fix: this means too many increases relative to the round's circumference. Recount your stitches at the end of every round against the pattern's stated total, and double-check you haven't worked an accidental extra increase anywhere in the round.
Fix: this is the opposite problem, too few increases for the round's growing size. Check you haven't skipped an increase or accidentally decreased somewhere by mistake, and compare your stitch count to the pattern's expected numbers round by round.
Fix: place a stitch marker every ten stitches or so before you start a tricky shaping round, giving yourself smaller, easier-to-count sections to check as you go rather than counting the whole round at the end.
Fix: a small bump is a normal side effect of a regular decrease and is usually only a real problem on a smooth, stuffed surface like amigurumi, where switching to invisible decrease removes it. A small hole is more often a tension issue, pull the final yarn-over of the decrease a little snugger.
Fix: re-read the pattern's exact placement instructions, like "[sc 4, inc] around," rather than just adding the total number of increases wherever is convenient. Even spacing is what produces a smooth shape at any given stitch count.
Frequently asked questions
How do I increase in single crochet?
Work two single crochet stitches into the same stitch instead of one. This adds one extra stitch to your row or round total for every increase worked.
How do I decrease in single crochet?
Insert your hook into a stitch and pull up a loop, then insert into the next stitch and pull up a second loop without finishing either one, so three loops sit on your hook. Yarn over and pull through all three loops at once. This turns two stitches into one, reducing your total by one stitch for every decrease worked.
How do I know how many increases or decreases my pattern needs?
Always follow the specific count and placement your pattern gives, since the number and spacing of increases or decreases is what actually produces the shape the designer intended, whether that's a flat circle, a curved sleeve cap, or a tapered amigurumi limb.
What's the difference between a regular decrease and an invisible decrease?
A regular decrease works through both loops of each of the two stitches being joined. An invisible decrease instead works through only the front loop of each stitch, which removes the small visible bump a regular decrease leaves, and is especially popular for amigurumi shaping.
Can I increase or decrease in stitches other than single crochet?
Yes, the same basic principle, working two stitches into one spot for an increase or joining two stitches into one for a decrease, applies to half double, double, and taller stitches too, though the exact method of joining two stitches into a decrease varies slightly by stitch height.
Why does my flat circle ruffle instead of lying flat?
This almost always means too many increases relative to the round's circumference, often from working an increase where the pattern didn't call for one, or losing count partway through a round. Recount your stitches at the end of every round against the pattern's expected total.
Why does my project curl or cup instead of lying flat?
This is usually the opposite problem: too few increases for the round's growing circumference. Compare your stitch count at the end of each round to the pattern's numbers, and check you haven't skipped an increase or accidentally worked a decrease by mistake.
CrochetGuides is a participant in the Amazon Services LLC Associates Program. As an Amazon Associate we earn from qualifying purchases, at no extra cost to you.