Front Loop vs. Back Loop Crochet: How & When to Use Each
Two tiny loops sit on top of every stitch you make. Which one you catch changes the whole texture of the fabric.
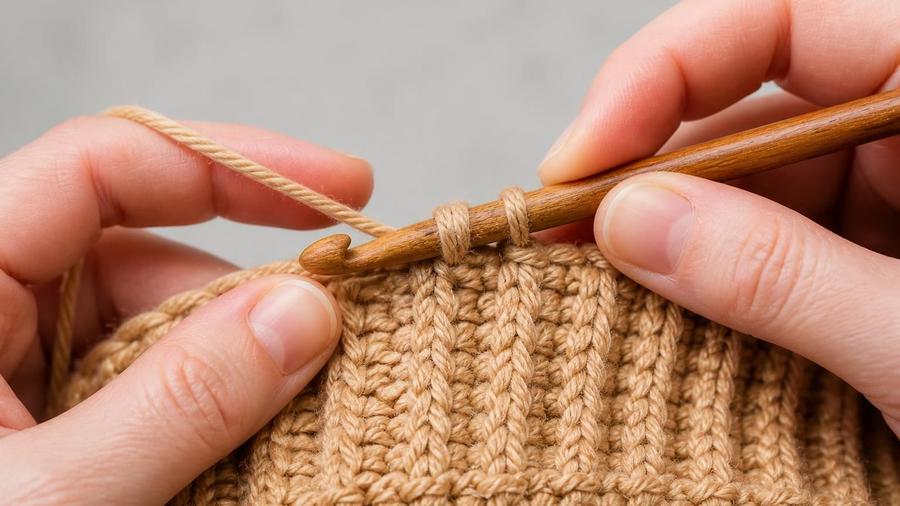
I remember the exact swatch that made this click for me. I was maybe two years into crocheting, working my way through a hat pattern that kept saying "sc BLO" for the brim, and I genuinely thought it was a typo for a few rows. I worked through both loops like I always did, and the brim came out looking exactly like the body of the hat: fine, but not the snug ribbed band the pattern's photo clearly showed. It wasn't until I frogged it and actually looked, really looked, at the top of my stitches that I noticed there were two loops there, not one, and that "through both loops" had been my unconscious default the entire time.
Once you see it, you can't unsee it. Every single stitch you've ever made has a front loop and a back loop sitting side by side at its top, and normal crochet just happens to use both of them without ever mentioning it, because that's the default. The moment a pattern asks you to use only one, it's making a deliberate choice about texture, and that choice is worth understanding rather than just following blindly. This guide walks through what the two loops actually are, what each one does to your fabric, and when reaching for one over the other is worth it.
Finding the two loops
Every crochet stitch, once it's made, leaves a small chain-like shape sitting along the top of the row or round, and from above that shape looks like a series of little "V"s. Each V is made of two strands, and those two strands are your front loop and back loop. The loop nearer to you as you hold the work is the front loop; the one farther away, tipped slightly back, is the back loop. This is true no matter which stitch made it, single crochet, double crochet, or anything in between, and it's true whether you're working in rows or continuous rounds.
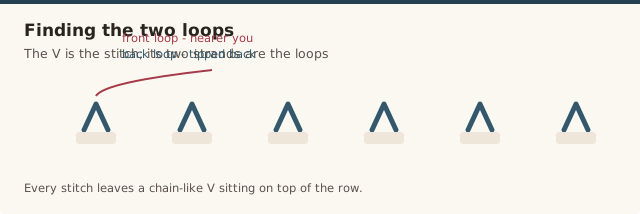
Normal crochet, the kind you do without a pattern telling you otherwise, inserts the hook under both of those strands at once. That's the "through both loops" default, and it's honestly so automatic that most crocheters never consciously register it's happening, the same way you don't think about which fingers move when you tie a shoelace. Front loop only and back loop only just mean picking one of those two strands on purpose and ignoring the other.
Working front loop only (FLO)
Steps
- Find the V at the top of the stitch you're about to work into.
- Insert your hook under only the strand of that V closest to you, the front loop, leaving the back loop sitting untouched behind your hook.
- Complete the stitch exactly as you normally would, whether that's a single crochet, half double, or double crochet.
- Move to the next stitch and repeat, always catching just the front loop across the row or round.
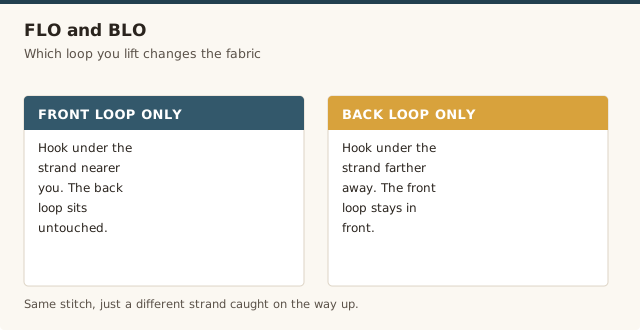
Because the back loop is left alone every time, it stays intact and visible on the surface of the fabric as a small horizontal bar. Worked over several rows, those unused back loops line up into a subtle ridge that sits slightly proud of the main fabric. FLO tends to read as a slightly softer, less pronounced ridge than BLO produces, which is one reason patterns sometimes specify one over the other for a particular visual effect.
Working back loop only (BLO)
Steps
- Find the V at the top of the stitch you're about to work into.
- Insert your hook under only the strand of that V farthest from you, the back loop, leaving the front loop sitting untouched in front of your hook.
- Complete the stitch exactly as you normally would.
- Move to the next stitch and repeat, always catching just the back loop across the row or round.
This time it's the front loop that's left unworked, and because the front loop sits closer to the viewer, the ridge it creates tends to read as slightly more prominent and defined than an FLO ridge does. BLO is the technique behind most ribbed crochet cuffs, hat bands, and mitten wrists you'll see in patterns, including our own baby mittens pattern, which uses a BLO ribbed cuff specifically for the stretch and definition it gives a small wrist opening.
How the texture actually changes
The core thing to understand is that FLO and BLO don't create a new stitch, they change which part of an existing stitch gets locked down. Working through both loops anchors the stitch fully into the row below, which is what gives standard crochet fabric its dense, sturdy, all-over texture. Leaving one loop free means that loop isn't caught by anything above it, so it stays raised and visible rather than getting buried, and a whole row of those raised loops reads visually as a single horizontal line running across the fabric.
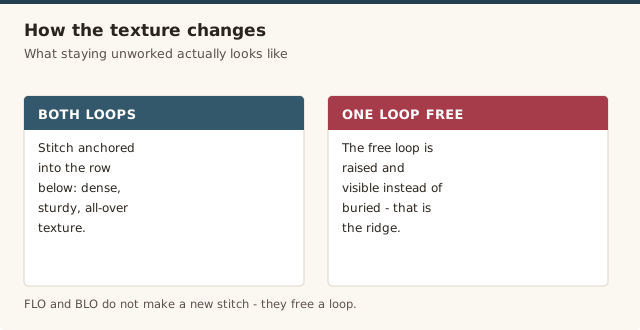
Stack several rows of FLO or BLO on top of each other, especially in single crochet turned back and forth, and those individual ridges line up into what looks remarkably like knit ribbing, stretchy horizontal bands that give with a slight give in both directions. That's not a coincidence or an approximation; it's a direct mechanical result of always leaving the same loop unworked, row after row, at the same position in the stitch.
The fabric itself also behaves differently. Because only one loop of each stitch is truly locked in, FLO and BLO fabric is looser and stretchier than the equivalent both-loops fabric at the same stitch and row count, and it's usually a touch thinner too, since there's less yarn structurally interlocking at each point. That stretch is exactly why BLO shows up so often on cuffs and wristbands: a hat brim or mitten opening that needs to flex around a wrist or head benefits from give that regular dense crochet fabric doesn't have.
When to reach for each one
Ribbed cuffs, bands, and brims are the single most common use, and this is almost always BLO specifically, since its slightly more prominent ridge reads as cleaner ribbing at typical yarn weights. If you've ever wondered how a crochet beanie gets that snug, stretchy knit-look band at the bottom without switching to knitting needles, BLO worked back and forth in single crochet is usually the answer.
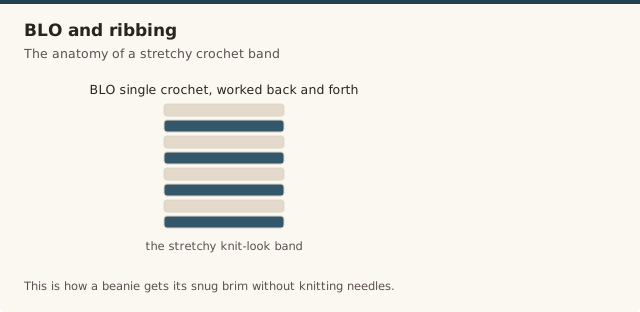
Textured stitch patterns are the other major use, particularly ones designed to mimic a specific fabric look, like a subtly ribbed dishcloth, a textured scarf with visible horizontal lines, or an amigurumi detail like a lion's mane or a sheep's fleece where the raised loops add dimension. Some designers alternate FLO and BLO rows deliberately to build a more complex ridged pattern than either one alone produces.
There's also a structural use worth knowing: because FLO and BLO fabric is looser, it can be a useful way to ease a transition between two pieces of different tightness, or to add a small amount of built-in stretch to an edge that needs to flex, like the top of a bag or the cuff of a sleeve, without switching yarn weight or hook size.
Combining loops in one project
There's nothing stopping you from mixing regular both-loop crochet with FLO or BLO sections in the same piece, and patterns do this constantly. A hat might work its band in BLO for the ribbed look and switch to both loops for the main body once the band is finished; a garment might use BLO for a cuff, waistband, or button placket while the rest is worked normally. Just follow whatever the pattern specifies row by row, since there's no rule that a whole project has to commit to one method throughout.
If you're designing your own textured swatch rather than following a pattern, a useful starting experiment is a small rectangle worked in single crochet, turning at the end of every row: try a few rows through both loops, then a few rows BLO, then a few more through both loops again, and compare how differently the middle section catches the light and stretches compared to what's above and below it. It's a fast, low-commitment way to see the effect for yourself before committing to it in a real project.
Common mistakes & fixes
Fix: this is by far the most common slip, since both-loop crochet is such an ingrained default. Read the row's instructions again right before you start it, and glance at your hook placement on the first stitch to confirm you're actually catching just one loop.
Fix: pause and identify both loops before inserting your hook rather than guessing from muscle memory. The front loop is always the one nearer your body as you hold the work; if you're ever unsure, gently tug each loop with your fingertip to confirm which one moves closer to you.
Fix: this usually comes from inconsistent tension rather than a loop-selection error. Keep your working tension even across the whole row, since a looser stitch will leave a looser, less defined ridge than a snugger one right next to it.
Fix: this often happens after a break or when you set the work down mid-row. Before resuming, look at the last one or two stitches you made and confirm which loop, if any, is sitting unworked on the surface, so you can match it going forward.
Fix: this is a normal side effect of the technique, not necessarily an error, since leaving one loop unworked always produces a looser fabric than both-loop crochet at the same gauge. If it's too loose for your project, try going down half a hook size for the FLO or BLO section specifically.
Fix: count the actual stitch bases you're working into, not the visual ridges on the surface, since those ridges are a byproduct of previous rows and don't correspond one-to-one with your current round's stitch count.
Frequently asked questions
How do I tell the front loop from the back loop?
Look down at the top of the stitch you're about to work into: it looks like a small horizontal "V" made of two loops. The loop closest to you, nearest your body, is the front loop. The loop farthest from you, closer to the back of the fabric, is the back loop. This holds true regardless of which stitch you're using or whether you're working in rows or rounds.
Does front loop only or back loop only use less yarn?
The stitch itself uses about the same amount of yarn either way, since you're still working the same stitch, just catching one loop instead of two. The fabric produced is usually a bit thinner and stretchier than working through both loops, though, since less of the previous row's stitch is caught and locked in place.
Can I switch between front loop only and back loop only within the same project?
Yes, and patterns do this intentionally to create texture, like alternating ridge rows or a ribbed cuff that transitions into a plain body. Just follow the pattern's instructions row by row; there's no technical reason you can't mix both methods with the regular both-loops method in the same piece.
Is back loop only crochet the same as ribbing?
Back loop only crochet is the technique that produces the ribbed look, when it's worked in rows of single crochet turned back and forth, which leaves the unworked front loops stacking up into visible horizontal ridges that read as ribbing. It's not a separate stitch, just the back-loop-only technique applied specifically to build that ridged texture.
Which loop should I use for amigurumi?
Standard amigurumi is worked through both loops for maximum stitch density and stuffing security. Front loop or back loop only fabric is looser and can let stuffing show through more easily, so it's not the usual choice for a toy's main body, though some designers use it deliberately for a textured detail like a mane or a row of ruffled fur.
Will front loop only or back loop only fabric curl?
It can, a bit more than regular both-loop fabric, since the looser structure has less to hold it flat. This usually settles down once the piece is finished and, if needed, lightly blocked. It isn't a sign anything went wrong.
What does "FLO" and "BLO" mean in a pattern?
FLO is shorthand for front loop only and BLO is shorthand for back loop only. When you see these abbreviations next to a stitch, like "sc BLO," it means work that single crochet into just the one loop named rather than through both loops as usual.
CrochetGuides is a participant in the Amazon Services LLC Associates Program. As an Amazon Associate we earn from qualifying purchases, at no extra cost to you.