Free Baby Romper Crochet Pattern (Button Straps)
Full-length legs, an easy two-tube join at the crotch, and button shoulder straps that make the whole thing simple to get on and off.
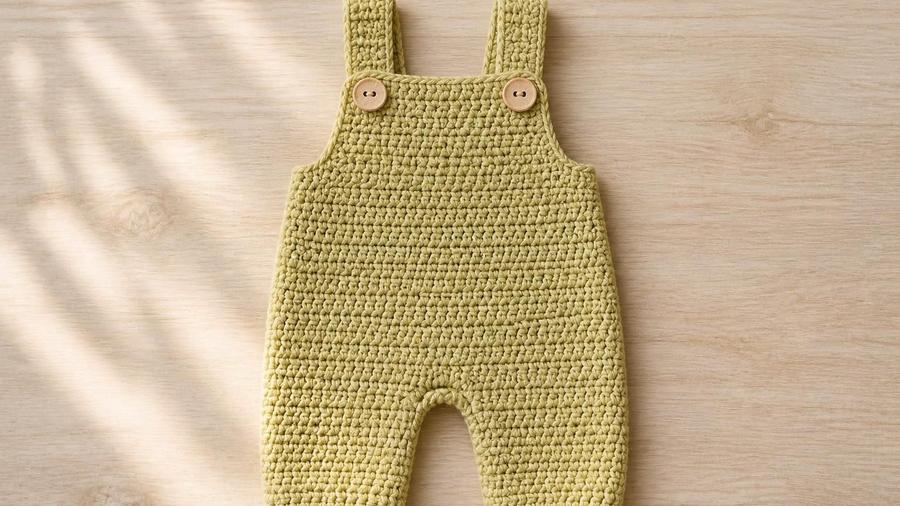
I'd been putting off designing a full romper for years, mostly because every construction I sketched out on paper looked like it would involve some fiddly seaming I didn't want to inflict on anyone. Then I actually sat down and worked through it stitch by stitch, and it turned out the trick was much simpler than I'd been assuming: build the two legs completely separately as small tubes, then just join them into one bigger tube at the crotch. No set-in seams, no complicated shaping, just two tubes becoming one.
From there, the romper is mostly straightforward rounds and rows. The joined body continues upward as one piece until you reach the underarms, at which point it splits into a flat front panel and a flat back panel, worked separately like a very simple little vest. Two short button straps connect the back panel to the front over the shoulders, and that's the whole garment. It photographs beautifully laid flat, which is part of why I designed it with legs, straps, and buttons all visible at once rather than tucked away.
Below is the full pattern in US terms, with sizing notes for newborn through 12 months, a dedicated section on attaching the straps securely, and the small technique that makes the leg-to-body join sit flat instead of bunching at the crotch. If you'd rather a shorts-length version with a ruffled leg trim, our diaper cover pattern reuses this same body-and-strap approach in a different shape.
Materials
- About 500–600 yards of worsted-weight cotton or cotton-blend yarn
- 4.5mm or 5mm crochet hook
- 2 buttons, about 3/4in / 2cm
- Yarn needle, scissors, sewing needle and thread for buttons
- Stitch marker
Abbreviations (US terms)
| Abbr. | Means |
|---|---|
| ch | Chain |
| sc | Single crochet |
| dc | Double crochet |
| st(s) | Stitch(es) |
See our abbreviations glossary for the full list including UK terms.
Gauge
13 dc and 8 rows measures about 4in / 10cm square with a 5mm hook and worsted yarn.
Notes
- Legs are worked in joined rounds, the body continues in joined rounds after the crotch join, then splits to flat rows for the front and back panels.
- Make 2 identical legs before starting the body.
- Sized for 3-6 months in the main pattern, with adjustments for 0-3, 6-9, and 9-12 months in the sizing section.
Pattern
Chain 16, join with a slip stitch to form a ring, being careful not to twist the chain. Ch 2, dc in each chain around. (16 sts) Ch 2, dc in each st around. Repeat this round 6 more times. (7 rounds total, 16 sts each) Fasten off the second leg only; leave a long working tail on the first leg to continue into the body.
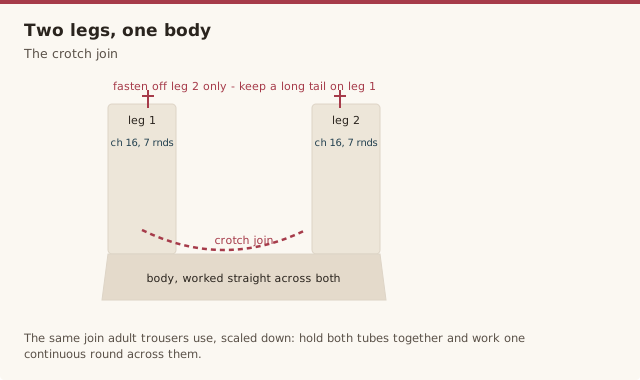
With the first leg's working yarn, ch 2, dc in each of the 16 sts of the first leg. Without cutting yarn, dc in each of the 16 sts of the second leg. Join with a slip stitch to the first stitch of the round. (32 sts) This single round is what turns the two separate leg tubes into one connected body tube.
Ch 2, dc in each st around. Repeat for 6 rounds. (32 sts each round)
Ch 2, dc in the next 16 sts, turn, leaving the remaining 16 sts unworked for now. This begins working flat rows across half the body only, forming the front panel; the other 16 stitches will become the back panel afterward.
Ch 2, dc in each st across. Turn. Repeat for 4 rows total. (16 sts each row) Fasten off.
Rejoin yarn to the first of the remaining 16 unworked sts from the splitting round. Ch 2, dc in each st across. Turn. Repeat for 4 rows total, matching the front panel exactly. Do not fasten off; continue directly into the straps.
At the back panel's last row, place a stitch marker 3 sts in from each side, marking where each strap will start. Join yarn at one marked point, ch 2, dc across 4 sts. Turn. Ch 2, dc across 4 sts. Repeat for 7 rows total, or until the strap reaches over the shoulder to the front panel with a small overlap. Fasten off, leaving a tail for sewing. Repeat for the second strap at the other marked point.
Work 1 round of sc around each leg opening and around the neck and arm openings for a clean, defined edge. Sew a button to the front panel under each strap's end point, positioned so the strap lies flat when buttoned. Weave in all ends.
Attaching the straps securely
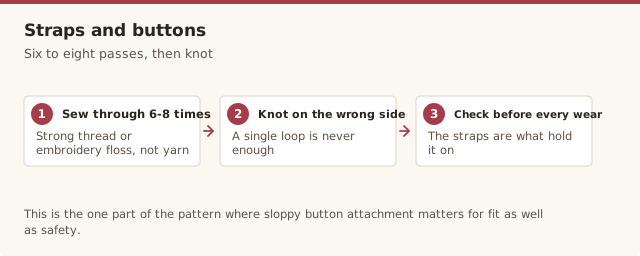
Because the straps are the only thing holding the romper on the shoulders, this is the one part of the pattern where sloppy button attachment actually matters for fit as well as safety. Sew through the button's holes and the strap fabric at least 6-8 times with strong sewing thread or embroidery floss, then knot off firmly on the wrong side rather than trusting a single loop. Before the first wear and periodically after that, give each button a firm tug to check it hasn't loosened; babies pull at buttons more than you'd expect, especially once they're old enough to grab at their own clothes.
If you'd rather avoid sewn-on buttons entirely, you can substitute a simple button loop worked directly into the strap's last row instead of a separate buttonhole, closing over a button sewn to the front panel the same way. Either method works; what matters is that the attachment point is reinforced and checked regularly, not which specific closure style you pick.
Sizing for 0-12 months
The main pattern above is written for roughly 3-6 months. Baby proportions change quickly in the first year, so the adjustments below focus on leg length and body rounds rather than trying to scale every measurement at once.
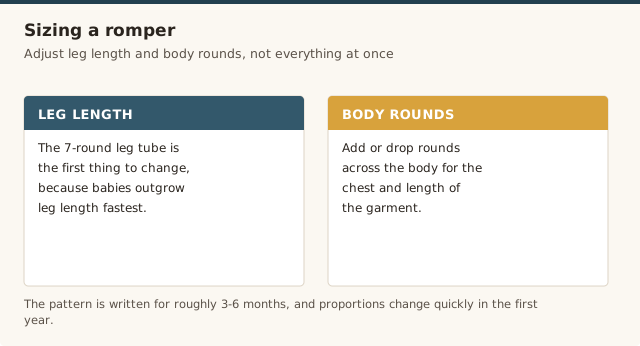
For 0-3 months, work each leg for 5 rounds instead of 7, and reduce the body to 4 rounds before splitting to the front and back panels; newborn legs are proportionally shorter relative to the torso than an older baby's.
For 6-9 months, add 2 rounds to each leg (9 rounds total) and add 1 extra body round (7 rounds) before splitting.
For 9-12 months, add 4 rounds to each leg (11 rounds total), add 2 extra body rounds (8 rounds) before splitting, and add 1 extra row to both the front and back panels for a slightly longer torso.
Choosing yarn and hook size
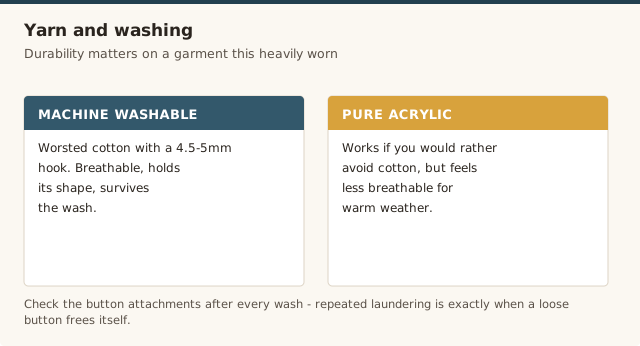
A worsted-weight cotton or cotton-blend yarn with a 4.5mm or 5mm hook gives a fabric with enough drape to feel comfortable against skin while still holding its shape well enough for the leg tubes to keep their form. A pure acrylic works too if you'd rather avoid cotton, though it will feel less breathable for warm-weather wear. Our yarn weight guide covers the tradeoffs between fiber types in more depth.
Care & washing
Machine wash on a gentle cycle and lay flat to dry, checking the button attachments after each wash since repeated laundering is exactly when a loosely sewn button tends to work itself free. A romper gets heavy wear for an actively growing baby, so a genuinely durable, machine-washable yarn is worth prioritizing over a delicate specialty fiber.
Common mistakes & fixes
Fix: make sure both legs have exactly the same stitch count before joining, and work the joining round's stitches at an even, consistent tension rather than pulling tight at the transition point between the two legs.
Fix: count rows carefully on both panels and lay them side by side to compare before moving on to the straps; it's much easier to add a row to a short panel now than to unpick a finished strap later.
Fix: check that the strap wasn't accidentally worked with a half-twist during the turning chain rows; lay the strap flat against the back panel before attaching the button to confirm it isn't twisted.
Fix: the leg round count controls length, not width; if the fit around the thigh itself is off, adjust the foundation chain (in multiples of 2) rather than the number of rounds, and re-swatch to confirm your gauge matches the pattern's.
Fix: re-sew it with fresh, strong thread rather than just tightening the existing stitches, and check all buttons on the garment at the same time since a worn thread on one is often a sign the others are due for the same attention.
Our pick
Lion Brand 24/7 Cotton Yarn
A durable, machine-washable worsted-weight cotton with good stitch definition, comfortable against skin and sturdy enough for a garment that gets this much wear.
View on Amazon →Frequently asked questions
How do the legs join into one body?
Each leg is worked separately as its own small tube from the ankle up. At the crotch, you hold both leg tubes together and work one continuous round straight across both of them, which joins them into a single larger tube for the body. This is the same basic join used for adult pants and shorts, scaled down.
How securely do the button straps need to be attached?
Very securely. Sew each strap button on with strong thread or embroidery floss, going through the button and fabric multiple times and knotting off firmly, then check the buttons regularly for looseness before every wear, the same as you would with any button-fastened baby garment.
What age range does this pattern fit?
The main pattern is written for 3-6 months. The sizing section gives adjustments for 0-3, 6-9, and 9-12 months, mainly by lengthening the leg tubes and adding body rounds before the straps.
Can I make the legs shorter, like shorts?
Yes, though at that point you may prefer our diaper cover pattern instead, which is built specifically as a shorts-length piece with a ruffled leg trim rather than full legs. This romper pattern is designed around full-length legs; shortening them is possible but changes the proportions the pattern was written for.
What yarn and hook size should I use?
A worsted-weight cotton or cotton-blend yarn with a 4.5mm or 5mm hook works well, giving a fabric with enough drape to be comfortable against skin while still holding its shape.
Is there anything around the neck on this romper?
No. The romper closes at the shoulders with short button straps, not with any tie, cord, or drawstring, and nothing wraps around the neck. This is a deliberate safety choice consistent with every pattern in this baby-clothing collection.
CrochetGuides is a participant in the Amazon Services LLC Associates Program. As an Amazon Associate we earn from qualifying purchases, at no extra cost to you.