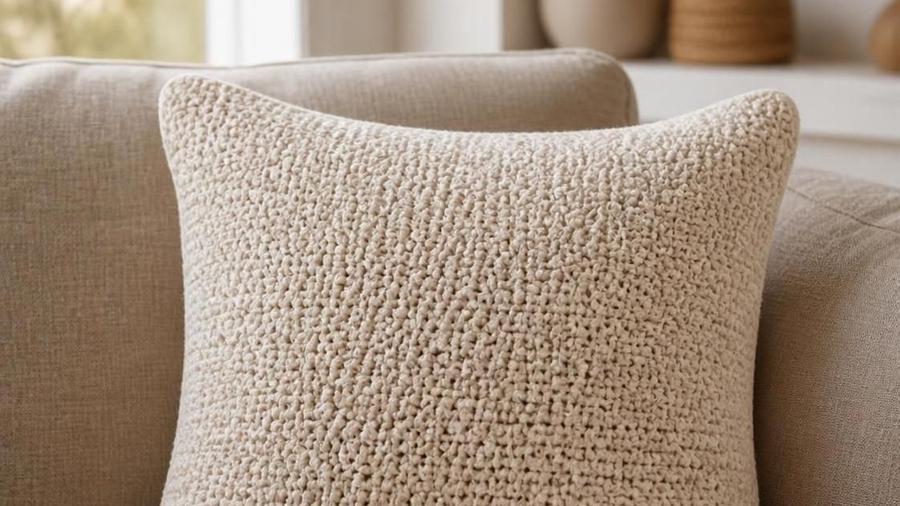
An 18in square cover with a nubby, boucle-like texture and a no-zipper envelope back, sized to fit a standard pillow insert.
Updated 2026 · US terms · Fits an 18in / 45cm pillow insert
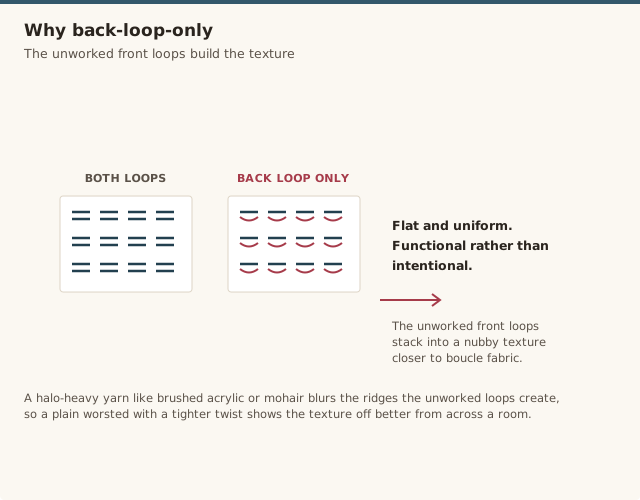
I made my first pillow cover thinking any single crochet square would do the job, and technically it did, it covered the pillow. What it didn't do was look like something you'd actually want on a sofa. Plain single crochet through both loops has a flat, uniform surface that reads as functional rather than intentional. Working the same stitch through the back loop only instead completely changed that: the unworked front loops stack into a soft, nubby texture that looks and feels closer to boucle upholstery fabric than to a typical crochet swatch.
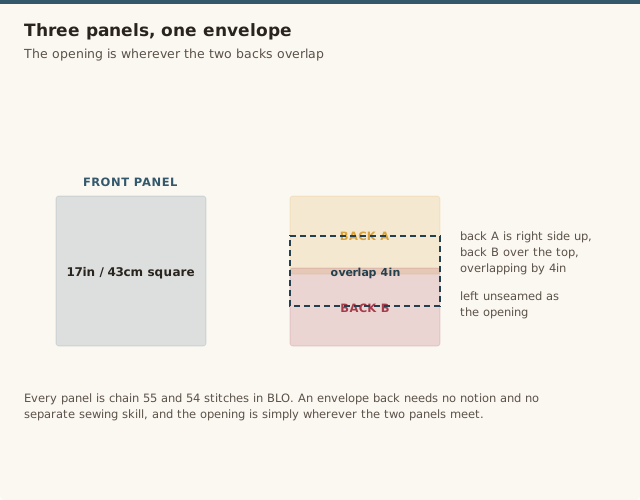
The other decision that mattered more than I expected was the closure. My first cover used a zipper, which meant buying a separate notion, sewing it in by hand, and hoping the two edges lined up. An envelope back, two overlapping panels instead of one solid piece, needs no extra materials and no separate sewing skill at all. The opening is just wherever the two panels overlap, which also happens to be the most beginner-friendly closure option going.
This pattern covers both panels, front and back, sized to fit a standard 18in pillow insert, along with the specific overlap measurement that keeps an envelope back from gaping open, and the textured back-loop-only stitch that gives this cover its distinctive surface.
12 sc and 14 rows measures about 4in / 10cm square with a 5mm hook and worsted yarn, worked in BLO. Swatch and compare against your actual pillow insert before starting, not just the pattern's stated size.
Notes
Worked flat in rows throughout, in single crochet worked through the back loop only (BLO) for texture.
The front panel is one full square; the back is two overlapping rectangles.
Sizing for other pillow forms is covered separately; see the sizing section.
Pattern
Front panel
Chain 55. Sc BLO in 2nd ch from hook and each ch across (54 sts). Ch 1, turn. Sc BLO in each st across. Repeat until the panel measures 17in / 43cm square, checked against your actual insert as you go. Fasten off.
Back panel A
Chain 55. Sc BLO in 2nd ch from hook and each ch across (54 sts). Ch 1, turn, sc BLO across. Repeat until the panel measures 11in / 28cm tall. Fasten off.
Back panel B
Repeat back panel A exactly, working a second identical panel measuring 11in / 28cm tall.
Assembling the envelope back
Lay the front panel right side down. Place back panel A on top, right side up, aligned with the top edge of the front panel. Place back panel B on top of that, right side up, aligned with the bottom edge of the front panel, overlapping back panel A by at least 4in / 10cm in the middle. Pin all layers in place around the outer edge.
Seaming
Using a mattress-stitch-style seam through matching stitches (see our seaming guide for the technique), seam through all 3 layers around the entire outer edge, keeping the overlap section unseamed so it functions as the opening. Weave in all ends. Insert the pillow form through the overlap opening.
Why back-loop-only creates the texture
Working through both loops, the default for most crochet, locks each stitch fully into the row below, producing a flat, even surface. Working through the back loop only leaves the front loop of every stitch unworked and sitting proud on the surface, and stacked row after row, those unworked loops build into a soft, bumpy texture that catches light differently than a flat fabric would. It's the same underlying technique used in ribbing and some amigurumi detailing, just applied here across an entire panel rather than a small section, which is what gives this cover's distinctive boucle-like hand-feel rather than a plain crochet look.
The effect is more noticeable with a smoother, less fuzzy yarn. A halo-heavy yarn like a brushed acrylic or mohair blend tends to soften and blur the ridges the unworked loops create, so if you want the texture to really read from across a room, a plain worsted or chunky yarn with a tighter twist shows it off better than a fuzzy one would. It's worth working a small swatch in your actual chosen yarn before committing to the full panel, since the texture can look quite different from one fiber to the next even at the same gauge.
Turning direction matters here too. Because every row is worked through the back loop only, and the orientation of "back" flips depending on whether you're looking at the right side or wrong side of the fabric, it's easy to lose track after setting the work down mid-panel. A quick way to reorient: the ridges from the unworked front loops always run horizontally along the right side of the fabric, so hold the panel up to the light and look for that ridge pattern before picking your hook back up, rather than guessing from the last row you remember working.
Sizing for other pillow forms
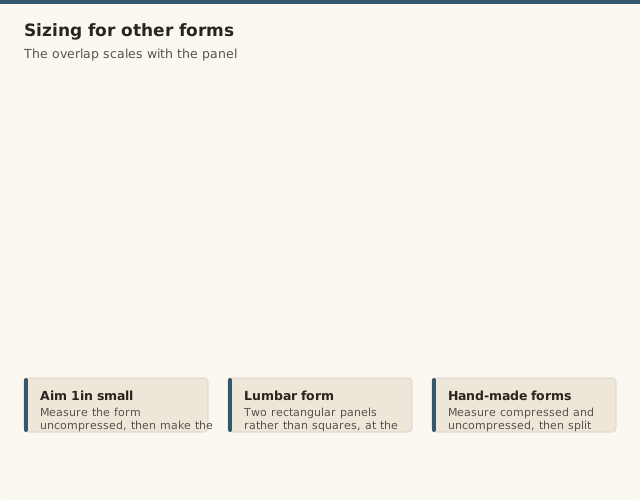
For a different size, swatch first in BLO single crochet with your chosen yarn and hook, then measure your actual pillow form (uncompressed) and calculate your target panel size at roughly 1in smaller than the form on each side, so the finished cover holds the insert snugly rather than loosely. A lumbar pillow needs two rectangular panels rather than square ones, sized to the lumbar form's actual width and height. A euro sham needs larger squares, typically 24-26in, using the same construction and overlap approach scaled up.
When you scale the panel up or down, scale the back-panel overlap along with it rather than keeping the 4in figure fixed. A small 12in accent pillow only needs about a 3in overlap to stay closed, while a 26in euro sham genuinely needs 5-6in of overlap, since a wider panel has more room to bow outward at the middle and a shallow overlap on a large cover gapes far more visibly than the same shallow overlap would on a small one. A rough rule that's worked well across the sizes I've tested: aim for the overlap to be at least a quarter of the panel's total height.
If you're working from a non-standard or handmade pillow form rather than a store-bought one, measure it compressed as well as uncompressed and split the difference, since a form stuffed unevenly by hand often reads several inches larger in one direction when you press it flat than it does once it's sitting naturally on a sofa.
Washing & care
This is where a removable envelope cover earns its keep: slide the cover off the insert entirely before washing, since machine washing an insert along with its cover means a much longer, less even drying time and risks the insert clumping unevenly inside. Wash the cover alone on a gentle cycle and lay flat to dry, reshaping it gently while still damp if the texture has flattened at all during the wash.
Fit and finish fixes
Mistake: the finished cover is too small or too tight for the pillow insert.
Fix: crochet a gauge swatch and measure your actual pillow form before starting, rather than trusting a pattern's stated size alone; insert dimensions vary more between brands than you'd expect.
Mistake: the textured stitch makes the fabric feel too dense or stiff for a soft pillow.
Fix: go up a hook size from what the yarn label suggests if the fabric feels boardy; BLO texture combined with a tight gauge can feel stiffer than intended.
Mistake: the envelope back gapes open, showing the insert underneath.
Fix: overlap the two back panels by at least 4in / 10cm in the middle, not the 2in some patterns default to; a shallow overlap is the most common cause of a gaping envelope back.
Mistake: the side seams pucker instead of lying flat.
Fix: use a mattress-stitch-style seam worked through matching stitches on each panel, rather than whip-stitching through whatever loops happen to line up.
Mistake: the finished cover looks flat and lifeless once the insert is inside.
Fix: size the cover slightly smaller than the insert, not an exact match; a cover sized exactly to the insert's dimensions tends to sit loose and deflated rather than plump.
Our pick
Yarn
Bernat Blanket Yarn
A soft, chunky-weight yarn with a slightly textured hand that pairs well with the BLO stitch here, giving extra depth to the finished cover's boucle-like surface.
Measure the pillow insert's width and height while it's uncompressed, not squashed flat, and aim for your finished cover to measure slightly smaller than that, roughly 1in less on each side, so the pillow stays plump inside rather than looking flat and loose.
What's the best yarn weight and fiber for home decor durability?
Worsted or chunky weight in a sturdy cotton, cotton-blend, or wool-blend holds up well to regular handling and sitting. Pure acrylic works too and is often more affordable, though it can pill slightly faster under heavy daily use than a natural-fiber blend.
How do I wash a crochet pillow cover?
This is the main advantage of a removable cover over a fixed one: take it off the insert and machine wash on a gentle cycle, then lay flat to dry. Washing the cover alone, without the insert inside, avoids the insert absorbing water and taking far longer to dry.
Can I adjust the size for a lumbar or euro pillow?
Yes, work each square panel to match half the target dimensions (a lumbar cover needs two rectangular panels rather than squares, a euro sham needs larger squares, roughly 24-26in), following the same gauge-based approach: swatch first, then calculate stitch and row counts to reach your target size.
Envelope closure vs. button closure vs. slip-stitch seam, which should I use?
An envelope back (two overlapping panels) is the fastest and most beginner-friendly, with no fasteners to attach. A button closure looks slightly more finished and holds more securely if the cover will be removed and replaced often. A fully seamed closure (no opening at all) is the most secure but means unpicking a seam every time you want to wash the cover, so it's best reserved for a cover you don't plan to remove often.
How much yarn do I need for one 18in cover?
About 350-450 yards of worsted-weight yarn, or slightly less in chunky weight, for both panels of an 18in cover combined.
How do I match a cover to other decor pieces on the site?
Using the same yarn colour and weight across a few pieces ties a room together without everything needing to match exactly in stitch pattern. Our chunky throw blanket pattern and market bag pattern both work well in a coordinating colourway alongside this pillow cover.
Nora has been teaching crochet for 12 years, from absolute beginners to people coming back to the craft after decades away. She started CrochetGuides to write the clear, honest instructions she wishes she'd had when she was learning — the ones that actually work the first time.
CrochetGuides is a participant in the Amazon Services LLC Associates Program. As an Amazon Associate we earn from qualifying purchases, at no extra cost to you.