Crochet Reindeer Amigurumi Pattern
A small stuffed reindeer with branching antlers and a bright red nose — built from simple amigurumi pieces.
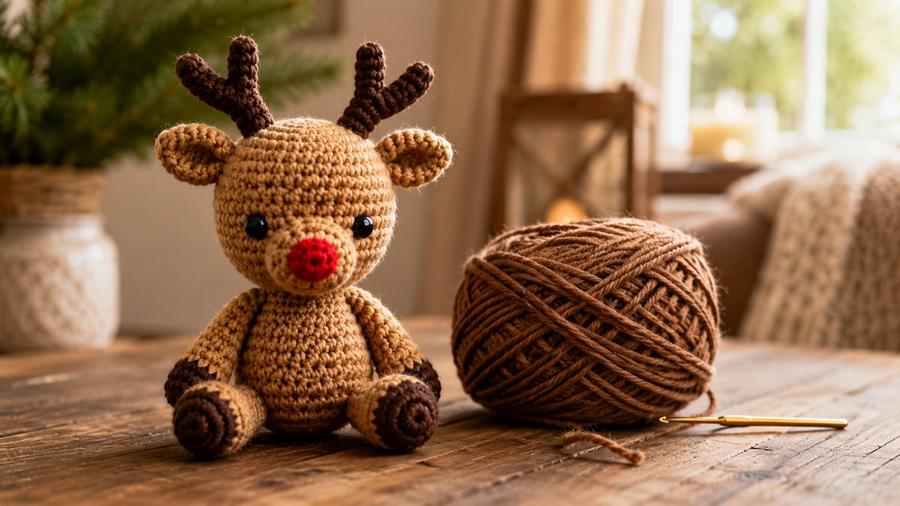
Every December, I run a small workshop where people make a crochet reindeer to hang on the tree or stand beside the fire, and the part that always trips up beginners isn't the body — it's the antlers. A student once brought hers back with both antlers sewn on backwards, and to be honest, it still looked sweet. The real trick I've learned to teach is to count the little branches as you go, so each side matches. Once the head, body, and four simple limbs are done, the antlers and a bright red pom-pom nose are what make it read as a reindeer rather than a generic bear. If you've never made amigurumi before, our amigurumi for beginners guide walks through the same round-shaping basics this pattern relies on.
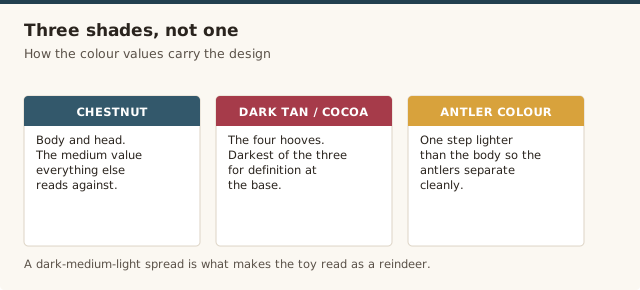
Brown is the colour I fuss over most, because it's far too easy to end up with a reindeer that reads as a single mud-coloured lump. I've settled on a warm chestnut body, a darker tan or cocoa for the four hooves, and antlers one shade lighter than the body, so the three parts separate cleanly at a glance. I also stuff these firmly rather than gently — a reindeer that's packed tightly sits and stands properly, where one that's softly stuffed slumps sideways on the mantel before Boxing Day.
What you need
- Worsted weight (#4) yarn: brown (main), a touch of darker brown or tan (antlers, hooves), and red (nose)
- 4.0mm (US G/6) hook
- Polyester fiberfill stuffing
- Black safety eyes or embroidery thread
- Yarn needle
Body
Steps
- Magic ring, 6 sc. (6 sts)
- Increase every round by 6 sts for 3 rounds. (24 sts)
- Work even for 6 rounds.
- Decrease by 6 sts per round for 3 rounds, stuffing as you go, then close and leave a small opening or a tail for attaching the head.
Head
Steps
- Magic ring, 6 sc. (6 sts)
- Increase every round by 6 sts for 3 rounds. (18 sts)
- Work even for 4 rounds, attaching safety eyes partway through.
- Decrease by 6 sts per round for 2–3 rounds, stuffing firmly, then close.
Ears, legs, and antlers
Steps
- Ears (make 2): magic ring, 5 sc, increase 1 round to 10 sts, work 1 round even, fasten off and flatten slightly before attaching.
- Legs (make 4): magic ring, 6 sc, work even for 5–6 rounds without stuffing heavily (a light stuff is enough for small limbs), fasten off leaving a tail for attaching.
- Antlers (make 2): chain 10, then from the 4th chain from hook, work a short branch: chain 4 more, slip stitch back down that branch, then continue back down the main chain with sc, adding one more short branch partway down the same way. Fasten off leaving a tail.
Assembly
Steps
- Attach the head to the top of the body, and the four legs evenly around the base.
- Attach the ears to the top of the head, and the antlers just behind the ears.
- Attach a small red pom-pom, or a tightly wrapped ball of red yarn, as the nose.
Choosing yarn and colours
For a reindeer that reads clearly as a reindeer, the browns matter more than the shaping does. I teach three separate shades: a warm chestnut for the body and head, a darker tan or cocoa for the four hooves, and antlers one step lighter than the body. That three-value spread — dark, medium, light — is what keeps the toy from turning into a single brown shape from across the room. If you only have two browns, make the antlers the same as the body and darken the hooves instead; the hooves and the red nose do most of the heavy lifting.
For the yarn itself, a smooth worsted acrylic or cotton is the easiest to work with, and it holds a firm stitch that hides the stuffing. Fluffy or bouclé yarns make lovely soft toys but will swallow the antler branches and make the face details hard to place, so if you want to use one, save it for a little scarf around the neck rather than the whole reindeer. If you're weighing cotton against acrylic, our best yarn for amigurumi guide lays out the trade-off between firmness, softness, and how easy each is to sew through.
Sizing up or down
This pattern scales easily, because every piece is a sphere or a tube that simply grows when you reach for a bigger hook and yarn. To make a large floor-sitting reindeer, swap the worsted for bulky or super-bulky yarn with a 5.5–6.0mm hook and keep the same increase pattern — you'll get a toy roughly twice the size without changing a single stitch count. The catch is that bigger toys need far more stuffing, and the antlers will flop faster, so plan to slip a chenille stem inside each one before sewing it on.
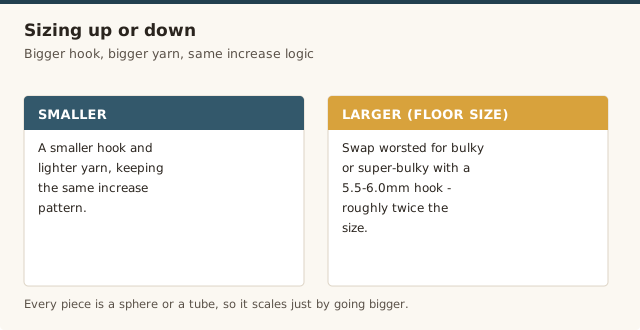
To go smaller, for an ornament-sized reindeer to hang on the tree, use DK or sport yarn with a 2.5–3.0mm hook and consider a two-branch antler instead of three so the detail doesn't blur into a knot. I've made a whole family this way in a single weekend, and the small ones finish in one sitting, which is exactly why they suit the easiest first projects I hand to nervous beginners.
A demonstration of shaping the head and antlers, useful for seeing how the small details are attached.
Common mistakes & fixes
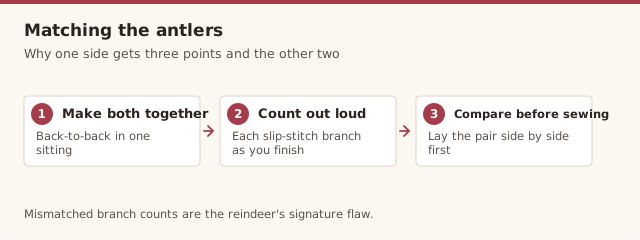
Fix: make both antlers back-to-back in one sitting while the branch count is still fresh in your head, and count each little slip-stitch branch out loud as you finish it. Lay the finished pair side by side before sewing so any mismatch shows up early.
Fix: your tension is too loose for this yarn. Drop down a hook size, or switch to a firmer cotton, and pull the magic ring tight at the start. Our amigurumi starter kit guide covers the right hook range for a stuffing-proof fabric.
Fix: stuff the neck end of both pieces firmly, then take three or four extra stitches through the join so the head is anchored rather than just resting on top. Sitting the head very slightly back on the body helps it stay upright.
Fix: place the red nose on the lower half of the head, just below the eye line, and pin it with a single stitch first so you can judge the face before committing. Step back and look at it from across the room — that's where the proportions really show.
Fix: make all four legs in a single sitting and count the rows as you go, since five rounds and six rounds look nearly identical on a short limb. Lay all four side by side before attaching and trim the difference with one extra round on the short ones.
Fix: the closing tail wasn't threaded through every remaining stitch's front loop. Go back over the closure once, run the tail through any loose loops, and pull tight again before weaving the end away. The magic ring tutorial shows the same pull-closed principle in slow motion.
Frequently asked questions
Can I skip the antler branching and just use a plain chain?
Yes — two short plain chains sewn into a V-shape still read clearly as antlers if you want a faster version.
What size hook and yarn give the best result?
Worsted weight with a 4.0mm hook gives a firm, well-defined amigurumi fabric that holds its shape without stuffing showing through.
How do I make the nose extra bright?
A small store-bought red pom-pom (about 1 inch) sewn on gives a neater, fuller look than a crocheted circle.
Can I use a different yarn weight for my crochet reindeer?
Yes, DK or bulky yarn both work if you match the hook to the yarn and adjust the round counts. A heavier yarn makes a larger reindeer and uses more stuffing, while a finer yarn makes a smaller, softer toy.
How do I keep the antlers from flopping over?
Use firmer stuffing or a short length of chenille stem inside each antler before sewing it on, and anchor the base with several stitches through the head. Working the antlers in a stiffer cotton yarn also helps them stand.
How long does a crochet reindeer take to finish?
A confident beginner can finish the whole reindeer in about two to three hours once the pieces are crocheted, with the antlers and face taking the longest. First-timers often need a full afternoon, because the assembly — not the crocheting — is what eats the time.
Can I make the nose a light-up Rudolph nose?
Yes — a small battery-powered LED pom-pom or a sew-on light unit turns it into a proper Rudolph. Tuck the battery pack inside the head before you close it, and leave a small hidden opening so you can reach the switch.
CrochetGuides is a participant in the Amazon Services LLC Associates Program. As an Amazon Associate we earn from qualifying purchases, at no extra cost to you.