Free Crochet Crossbody Bag Pattern for Beginners
Two simple single-crochet panels, a long adjustable strap and an optional flap — a hands-free everyday bag you can finish in a weekend.
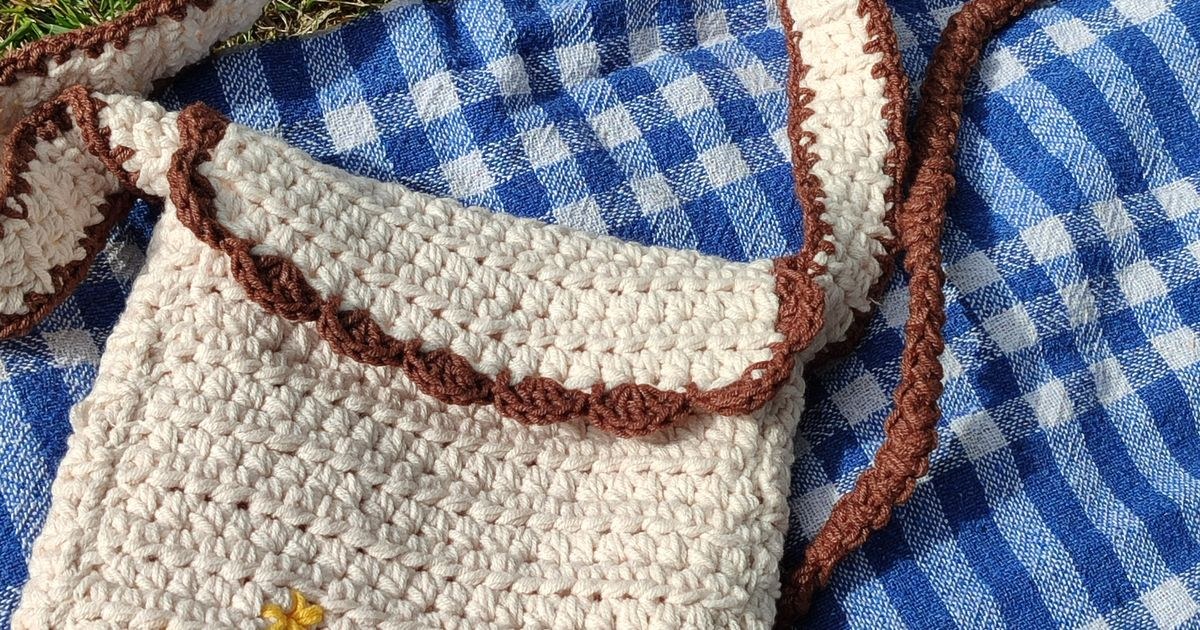
My first crossbody bag was a disaster, and I still have it hanging on the back of my studio door to remind me why I teach the way I do. I had spent an entire Saturday evening working beautiful, even panels, only to sew on a strap that hung somewhere around my knees because I never measured myself before chaining. The second mistake was worse — I made it in a soft merino because it felt lovely in the skein, and within a month the whole thing had stretched into a shapeless sling. A crossbody bag lives against your hip and rubs against your coat and gets set down on cafe tables, so it needs yarn that can take a beating and a strap that stays the length you intended. Sort those two things first, and everything else about this project is genuinely relaxing.
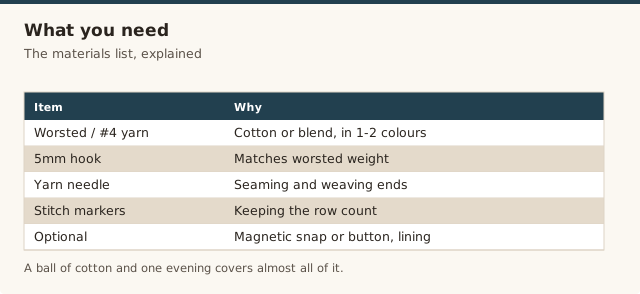
What you need
- Worsted/#4 weight yarn, ideally cotton or a cotton blend for structure, in 1–2 colors
- 5mm hook
- Yarn needle
- Stitch markers
- Optional: magnetic snap or a 2.5cm button, fabric for lining, and a strap slider for adjustability
Yarn choice for durability
I make my crossbody bags in cotton or a cotton blend every single time, and I've never regretted it. Cotton doesn't have much memory, which is exactly what you want here — a bag that holds its rectangle rather than slowly morphing into a puddle. It also stands up to friction, so the spot where the strap rubs against your shoulder stays smooth instead of pilling the way a soft animal fiber does. If you want a touch of sheen or a bit more drape, a cotton-acrylic or cotton-bamboo blend works beautifully and is usually a little cheaper than a pure cotton.
Whatever you choose, stay at worsted/#4 weight or heavier. A DK or lighter yarn will make the panels floppy unless you line and interline them, and a beginner shouldn't have to fight the fabric to get a tidy result. For a full rundown of how weight changes drape and firmness, see our yarn weight guide before you buy.
Step 1: front panel
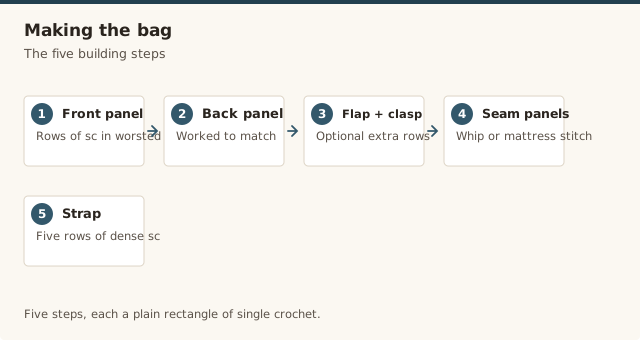
Both panels are worked flat in rows of single crochet, which keeps the fabric dense enough that nothing pokes through. If single crochet is still new to you, refresh the motion in our basic stitches guide before you start so your rows stay even from the very first one.
Steps
- Chain 41.
- Row 1: single crochet in the second chain from the hook and in each chain across — 40 sc. Turn.
- Rows 2–56: chain 1 (this does not count as a stitch), then single crochet in each stitch across — 40 sc every row. Turn at the end of each row.
- Fasten off after row 56 and weave in the end.
Place a stitch marker in the first and last stitch of every tenth row so you can count quickly, and count at the end of each row anyway. The panel should come out to roughly 25cm wide by 30cm tall, but the stitch count matters more than the exact measurements — if you add or remove stitches partway through, the two panels won't line up at the seam.
Step 2: back panel
Steps
- Work exactly as the front panel: chain 41, then 56 rows of 40 single crochet.
- If you want a flap, do not fasten off — continue straight into the flap rows below. If you're skipping the flap, fasten off and treat the back as identical to the front.
Make the back panel right away while your tension is fresh, rather than coming back to it the next day. I've had students who made one panel on a relaxed evening and the second on a hurried lunch break, and the second panel always came out a shade tighter, leaving one edge puckered at the seam. If you do need to split them across sessions, block both to the same size before seaming (see our blocking guide).
Step 3: flap & clasp (optional)
The flap is just extra rows on the back panel, folded over the opening toward the front. It gives the bag a more finished look and a bit of security, but the bag works perfectly without one — plenty of my students leave it off and simply keep the top open.
Steps
- Continuing from the back panel, work rows 57–76 in single crochet, still 40 sc per row — that's 20 rows for the flap. Turn at the end of each row.
- To make a buttonhole in the final row: chain 1, single crochet in the first 17 stitches, chain 4, skip 4 stitches, then single crochet in the remaining 19 stitches. The 4 skipped stitches sit in the centre of the flap — 17 + 4 + 19 adds back up to 40.
- Fasten off and weave in the end.
- Sew a 2.5cm button onto the front panel where the buttonhole lands, or sew a magnetic snap onto the underside of the flap and the front of the bag instead.
Step 4: seam the panels
Steps
- Hold the front and back panels together with right sides touching, stitch edges aligned. If you made a flap, keep the flap on the outside so it can fold over later.
- With the yarn needle and a length of matching yarn, whip-stitch through both loops of each stitch along the bottom edge and up both side edges.
- Leave the top open. Turn the bag right side out.
Take an extra stitch or two at each bottom corner, because that's where the seam gets the most pull and where I most often see a small gap form after a few weeks of use.
Step 5: making the strap
A crossbody strap is worth making properly, because it carries all the weight. Worked in five rows of plain single crochet, it's dense enough not to sag, yet soft enough not to dig into your shoulder.
Steps
- Chain 241.
- Row 1: single crochet in the second chain from the hook and in each chain across — 240 sc. Turn.
- Rows 2–5: chain 1 (does not count), then single crochet in each stitch across — 240 sc per row. Turn at the end of each row.
- Fasten off, leaving a long tail for sewing.
- Sew one end of the strap to each side seam, just inside the top edge, checking the strap isn't twisted before you secure the second end.
If you want the strap to be truly adjustable, thread a strap slider or a set of two D-rings onto one end before sewing, then loop the free end back through so you can pull it shorter or longer. If you prefer fixed, just sew both ends flat.
Sizing the strap
The single biggest fix I make in class is a strap that was chained to a guess rather than a body. Stand in front of a mirror with a tape measure, hold one end at the point on your shoulder where the strap will rest, and let the other end fall to the spot on your opposite hip where you want the bag to sit. Read that length, then add about 8cm. The extra covers the seam allowance at each end and the small amount the stitches relax once they've held the weight of a phone and a purse for a few days.
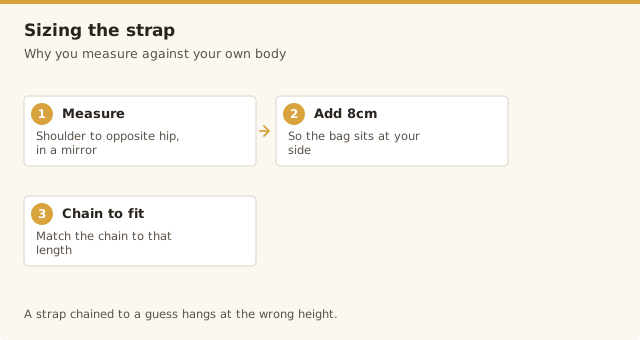
My own strap measures 118cm finished, which sits the bag right at my hip at five foot four. My taller sister uses the same 240-stitch chain and finds it lands a touch higher, which she likes for reaching into the bag without bending. If your measurement is longer or shorter than the starting chain gives you, add or remove chains in multiples of two before you begin row 1 — the single-crochet count will simply follow whatever your chain gives you.
Lining & structure
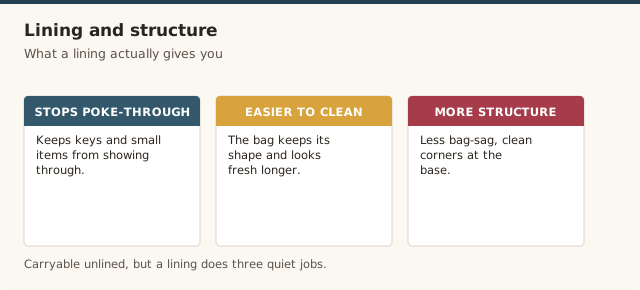
You can absolutely carry this bag unlined, and I did for my first year with one. But a lining does three quiet jobs that make a real difference on a daily bag. It stops keys and pens from poking through the single-crochet gaps, it hides the wrong side of your seaming so the inside looks tidy, and — most usefully — it gives the bag a firm floor so it keeps its shape instead of slumping when you set it down. Cut a rectangle of cotton fabric about 2cm larger than your finished bag all the way around, fold and press a hem, then slip-stitch it into the top edge by hand with matching thread. If you'd like a sturdier base, slide a rectangle of craft felt or interfacing between the lining and the crochet before you close the top.
Care
A cotton crossbody bag is forgiving to wash, but a few habits keep it looking crisp for years. Hand wash in cool water with a gentle detergent, squeeze rather than wring, and lay it flat to dry away from direct sun, which can fade bright cottons surprisingly fast. Take the lining and any metal clasp out first if you can, and fold the strap into a loose coil so it dries without kinks. I keep a small mesh bag on the shelf above my machine for the weeks I'm short on time — a gentle cold cycle works fine for pure cotton, but always check the yarn label first if there's any wool or viscose blended in.
Common mistakes & fixes
Fix: measure from shoulder to opposite hip with a tape measure and add 8cm before chaining, rather than guessing. If it's already finished, you can shorten a too-long strap by sewing a new seam partway along and trimming, or hide extra length with a slider.
Fix: count every row as you work and keep the same 40-stitch width throughout. If they still differ, block both panels to the same measurements before seaming so the seam falls cleanly.
Fix: switch to cotton or a cotton blend rather than a soft animal fiber, and consider crocheting the strap over a cord core so the yarn doesn't take all the weight.
Fix: take an extra stitch or two at each corner and work the seam through both loops of every stitch, not just the outer loop, so the join is firm from the start.
Fix: block the flap before attaching the clasp, and don't overfill the bag — a flap that has to stretch over a bulging top will fight back. Move the snap or button up or down slightly so the flap sits without pulling.
Fix: chain the foundation loosely, or size up one hook for the starting chain only, then switch back to your 5mm hook for row 1. This keeps the first row the same width as the ones above it.
Frequently asked questions
What yarn works best for a crossbody bag?
Worsted-weight cotton or a cotton blend is the most durable choice because it keeps its shape, resists pilling, and washes well after daily wear.
How long should a crossbody strap be?
Most adults find a strap of about 110 to 120 cm comfortable, but measure from your shoulder to the opposite hip where you want the bag to sit, then add about 8 cm for the seaming and for the stitches relaxing.
Do I need to line my crossbody bag?
A lining is not required, but it keeps small items from poking through the stitches, stops the bag from stretching out of shape, and hides the wrong side of your seaming, so I recommend it for everyday use.
How do I keep the strap from stretching?
Work the strap in firm single crochet and consider crocheting over a length of cotton cord or twine so the cord, not the yarn, takes the weight. A stiffer cotton for the strap rows also helps.
Can I make the bag bigger or smaller?
Yes. Add or remove chains in multiples of two from the starting chain to change the width, and add or remove rows to change the height, keeping both the front and back panels identical.
How do I wash a crochet crossbody bag?
Hand wash in cool water with a gentle detergent and lay flat to dry. Remove the lining and any metal clasp first, and check the yarn label before any machine cycle.
How do I attach a clasp or magnetic snap?
Sew a magnetic snap through the lining and flap with strong thread, or work a small buttonhole into the last flap row and sew a button onto the front panel at the matching spot.
CrochetGuides is a participant in the Amazon Services LLC Associates Program. As an Amazon Associate we earn from qualifying purchases, at no extra cost to you.