Free Crochet Tote Bag Pattern for Beginners
A sturdy market-style tote built from single crochet, with two simple chain-and-strap handles.
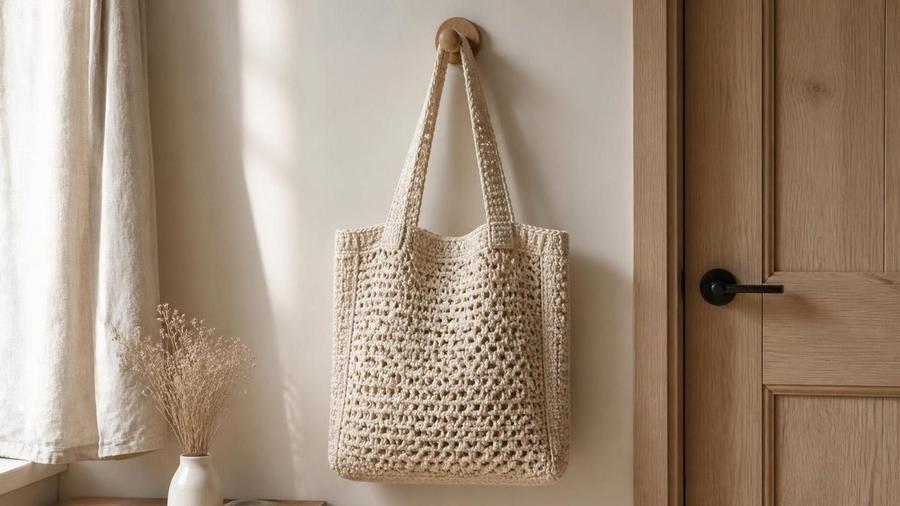
The first crochet tote bag I ever made sagged so badly under a carton of milk that the whole thing brushed my knees by the time I got home from the shop. I'd used a soft acrylic from my stash and worked it loose and airy, the way I would a scarf, and the bag stretched in every direction the moment it carried real weight. The fix wasn't a cleverer stitch — it was cotton yarn and firm tension. I've taught this pattern in my classes for years now, and it's usually the moment a beginner realises the yarn choice matters as much as the stitch, because a bag is the first project that has to work rather than just look nice.
Materials
- 3–4 skeins worsted-weight cotton yarn (about 400–500 yards total)
- 5.0mm (US size H) crochet hook
- Stitch marker, to track the start of each round
- Scissors
- Yarn needle, for weaving in ends
Abbreviations (US terms)
| Abbr. | Means |
|---|---|
| ch | Chain |
| sc | Single crochet |
| st(s) | Stitch(es) |
| inc | 2 sc in same stitch (increase) |
| rnd(s) | Round(s) |
See our abbreviations glossary for the full list including UK terms.

Gauge
14 sc and 16 rows measures about 4in / 10cm square with a 5.0mm hook and worsted cotton. Firmer tension than usual is fine here and actually helps the bag hold weight without stretching.
Notes
- Written in US terms, worked in a continuous spiral for the base and body — same technique as our beanie pattern. Use a stitch marker to track round starts.
- Cotton yarn is strongly recommended over acrylic; acrylic stretches under weight and won't hold a bag shape well.
- For a heavier-duty bag, hold two strands of yarn together throughout for extra strength.
Pattern
Make a magic ring, 6 sc into ring, place marker. (6 sts)
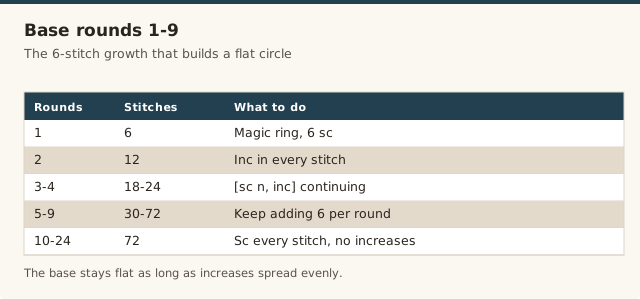
Inc in every st around. (12 sts)
Continue increasing by 6 sts each round, following the pattern [sc n, inc] where n increases by 1 each round (round 3: [sc 1, inc], round 4: [sc 2, inc], and so on) until round 9. (72 sts by round 9)
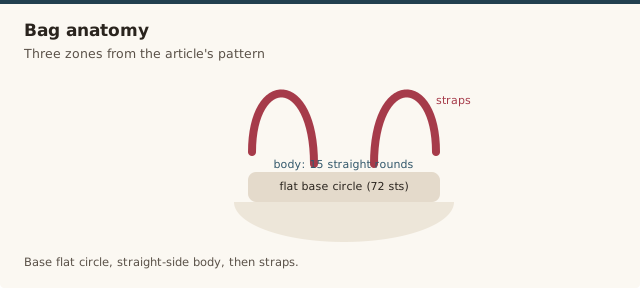
Sc in every st around, no increases, for 15 rounds. (72 sts each round)
Sc 15, ch 20 (skip next 6 sts, leaving a gap for the first handle), sc 21, ch 20 (skip next 6 sts for the second handle), sc in remaining sts to end of round. (72 sts total, including the two 20-chain gaps)
Sc in every st around, working sc into each chain from both handle gaps as if they were regular stitches. (72 sts)
Sc in every st around for 2 more rounds to reinforce the handle openings.
Fasten off and weave in all ends with a yarn needle.
Resizing & customizing
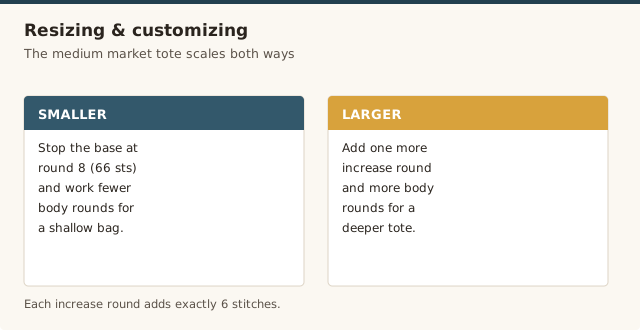
This pattern makes one medium market-tote size, but the same base logic scales easily once you see the pattern behind it: each increase round adds 6 stitches, and the base stays flat as long as increases are spread evenly around the round. For a smaller bag, stop the base increases one round early (round 8, 66 sts) and work fewer body rounds. For a larger, deeper bag, continue the base increase pattern for one extra round before switching to straight rounds, and add 4–6 extra body rounds for more depth — just remember more depth also means more yarn. If you'd rather try a granny-square construction instead, our granny square bag pattern uses a completely different, equally beginner-friendly approach.
For a stiffer, sturdier bag: switch to a hook one size smaller than recommended, or hold two strands of yarn together. Both create a denser fabric that holds shape better under weight, at the cost of using noticeably more yarn per round.
A step-by-step demonstration of crocheting a basic tote bag, useful for seeing the base, sides, and handle construction.
Common mistakes & fixes
Fix: too many increases were worked for that round. Recount your stitches against the pattern's numbers after each base round — catching an extra increase one round late is a quick fix; three rounds late means unravelling most of the base.
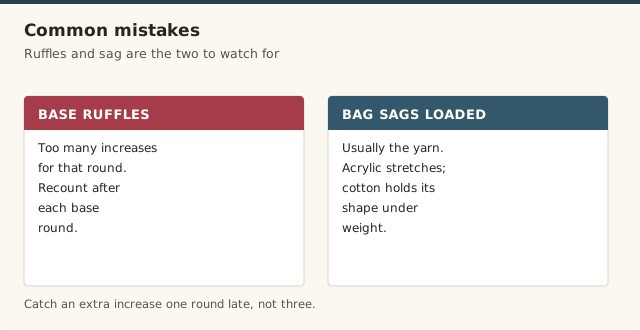
Fix: this is almost always the yarn, not the stitch pattern. Acrylic yarn stretches under weight in a way cotton doesn't; switching to cotton, or holding two strands together for extra density, fixes it without changing the pattern at all.
Fix: this usually means the skipped stitches and the chain length didn't line up exactly on Round 25. Count the skipped stitches carefully before chaining, and make sure Round 26 works one stitch into each chain along the gap — skipping a chain there is what leaves a hole.
Our pick
Cotton worsted-weight yarn, 3-pack
Sturdy cotton in an amount that gets you close to what this pattern needs, in colours that suit a market-style bag.
View on Amazon →Frequently asked questions
What yarn is best for a crochet tote bag?
Cotton yarn is the standard choice for bags, since it's sturdier and holds shape better under weight than acrylic, which can stretch and sag once loaded with items.
How much yarn do I need for a crochet tote bag?
A medium tote bag uses roughly 400 to 500 yards of worsted-weight cotton yarn, typically 3 to 4 standard skeins depending on the brand.
How do I make the straps on a crochet tote bag stronger?
Working the straps in single crochet rather than a looser stitch, and doubling the strand of yarn if the bag will carry heavy items, both add strength and reduce stretching over time.
Can I make this tote bag bigger or smaller?
Yes. Stop increasing the base a round or two earlier for a smaller bag, or continue the increase pattern for one or two extra rounds before switching to straight rounds for a larger one. Add or remove body rounds in pairs to keep the height even, and adjust yarn quantity roughly in proportion to the change in size.
How do I wash a crochet cotton tote bag?
Hand wash in cool water with a mild detergent, then lay flat to dry rather than hanging it, since a wet cotton bag can stretch out of shape under its own weight. Reshape gently while damp and let it dry fully before using it again.
Can I line a crochet tote bag with fabric?
Yes, a fabric lining stops small items poking through the stitches and adds structure. Cut a simple rectangle to fit inside, fold and stitch the seams, then hand-sew the lining to the inside of the bag just below the rim with a whipstitch.
How do I keep a crochet tote bag from stretching with heavy groceries?
Work at a firmer-than-usual gauge, choose cotton over acrylic, and reinforce the straps by holding two strands together. Storing the bag flat rather than hanging it when loaded also prevents the body from stretching out over time.
CrochetGuides is a participant in the Amazon Services LLC Associates Program. As an Amazon Associate we earn from qualifying purchases, at no extra cost to you.